Introduction & Requirements
This tutorial follows on directly from JobScheduler - Tutorial 2 - Editing a Simple Job with JOE and will show how a Run Time parameter can be configured to start the Order. This is also a first step towards learning to using the JobScheduler's Schedule function.
It is assumed that before you start to work through this tutorial you have already configured the 'Hello World' job chain with its two jobs as described in the previous tutorials.
Note that the other tutorials in this series are:
- JobScheduler - Tutorials - Introduction and Requirements
- JobScheduler - Tutorial 1 - Running a simple job using the JOC Cockpit
- JobScheduler - Tutorial 2 - Editing a Simple Job with JOE
- JobScheduler - Tutorial 3 - Running an Order Using the Run Time Parameter
- JobScheduler - Tutorial 4 - Configuring and Running a JITL Job
- JobScheduler - Tutorial 5 - The YADE JITL Job - Configuring and running file transfer jobs
- JobScheduler - Tutorial 6 - Configuring and Running Standalone Jobs
Setting the Days When the Order is to Run
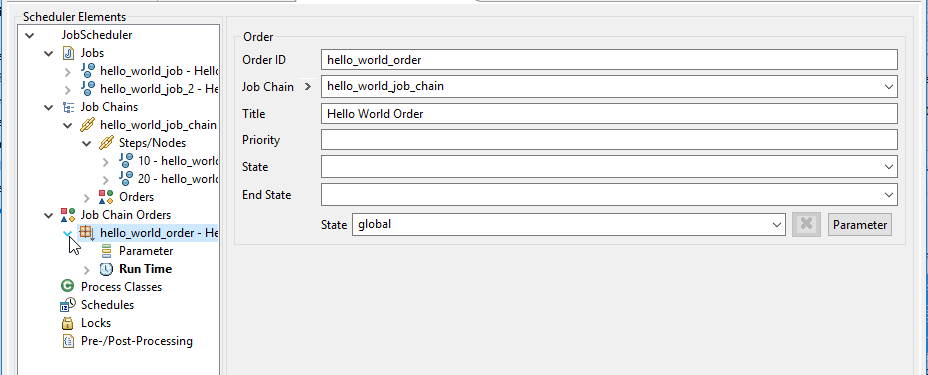
- Start by selecting the hello_world_order in JOE as shown here:

- Now click on the chevron to the left of the Order in the Scheduler Elements pane to show the Parameter and Run Time elements.
- Still in the Scheduler Elements pane, open the Run Time element by clicking on the chevron to its left and then select the Any Weekday element.
This will open a Weekday form as shown in the diagram below: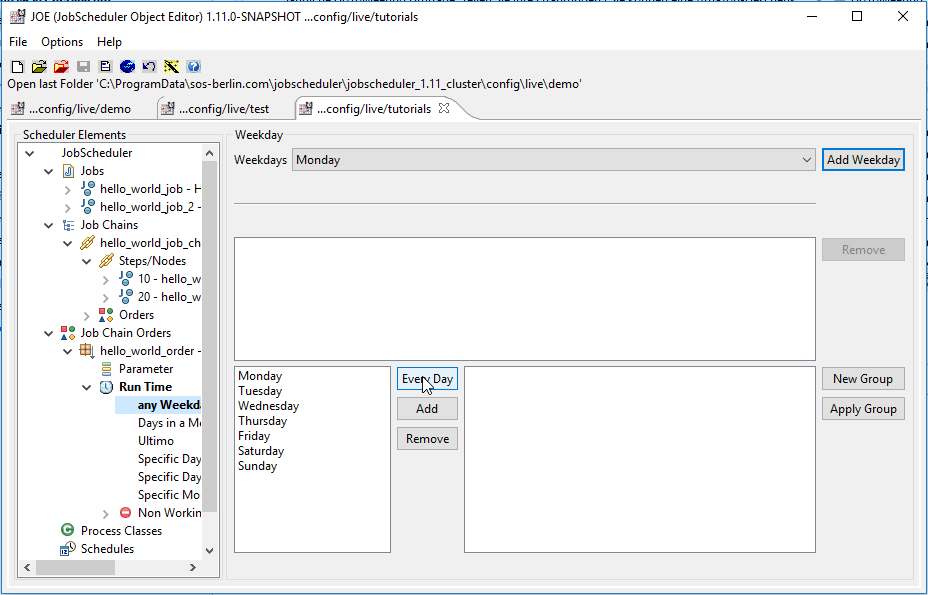
- Now click on the Every Day button as shown in the screen shot above, which will specify that the JobScheduler is to start the order every day of the week.
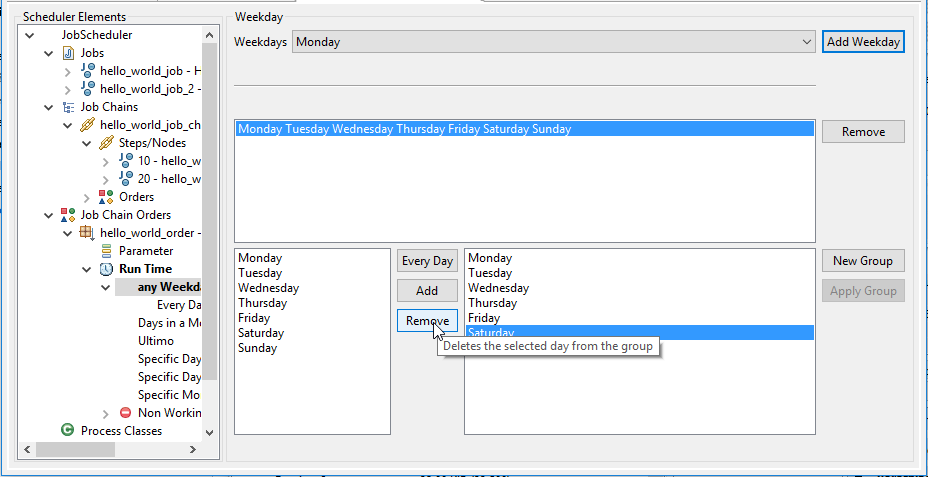
It does this by creating a new Group with all seven days of the week. This Group will then be listed in the central field of the form as shown below:
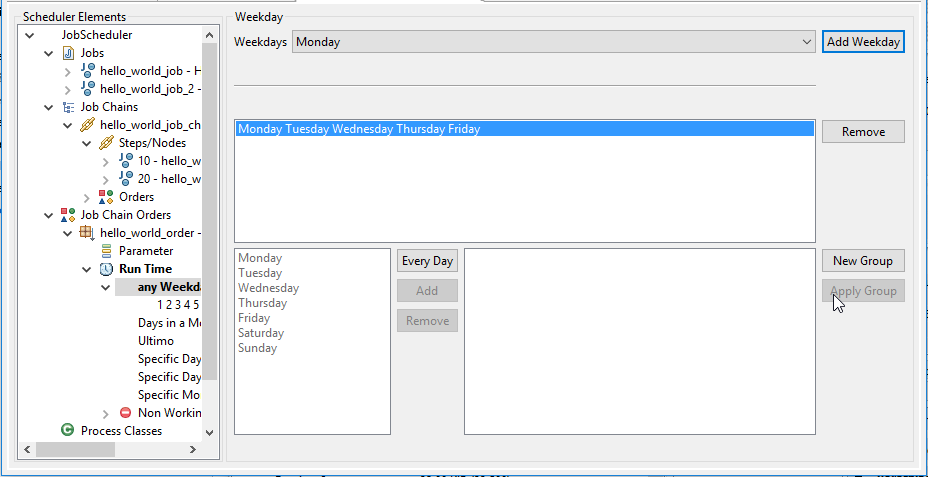
- This seven-day Group can be edited - for example, to reduce the number of days to the normal five working days - by selecting the group as shown in the next screenshot and then marking the days to be removed as shown in the next screenshot:
- The Apply Group button is then used to overwrite the original seven day group shown in the central field with the new one.
Setting the Times of Day at which the Order is to run
For the purpose of this tutorial, the Order will be configured to run at intervals of an hour, starting at 12:00 and ending at 24:00. However it is suggested that users following this tutorial select times that will allow them to see which jobs have run within a relatively short time.
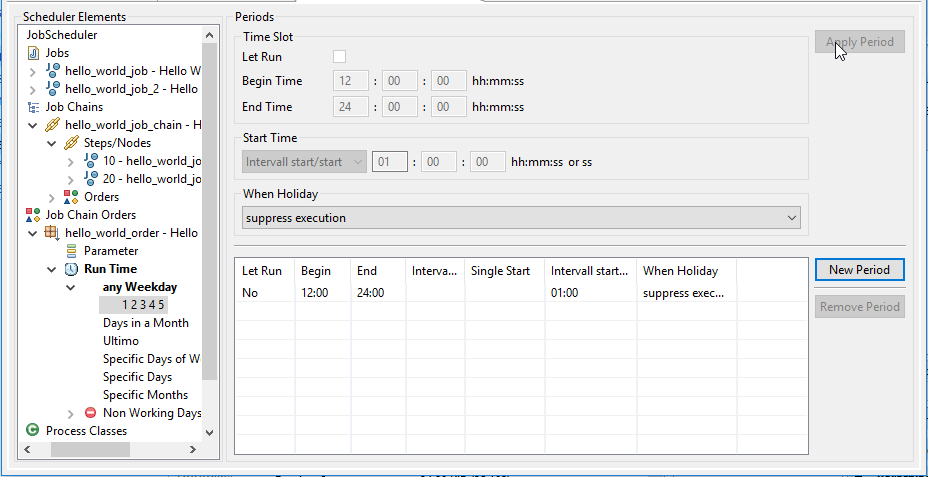
- In the Scheduler Elements pane, click on the 1 2 3 4 5 element, representing the Monday to Friday group just configured. This will open the Periods form, which is used to set the times of the day when the Order is to run.

- Click on the New Period button as shown in the screenshot above, to activate the Time Slot and Start Time fields (the field background color changes from gray to white) in the upper part of the form:
- To restrict the time during which our Order will run set the Begin Time in the Time Slot area of the form to 12:00 and the End Time to 24:00.
Next, set the type of start time in the Start Time part of the form to Interval start/start, which will be more regular than Interval end/start as shown in the next screenshot:
- Now set the interval in the Start Time part of the form to 01:00:00 and then click on the Apply Period button to note the Period, which will now be entered in the Periods list in the lower part of the form as shown below:
- As a final step in JOE, save the run time information using the Save Configuration button at the top of JOE.
Using the JOC Cockpit to Start An Order On-The-Fly and Observe Order Processing
The JOC Cockpit can be used to monitor the regular starts of the hello_world_order that were configured in the previous section and to trigger additional Order starts. Both of these operations will be described in this section.
Opening the Job Chain Flow Diagram
The Job Chain Flow Diagram presentation provides more detailed information than the Card and List presentations shown in Tutorial 1 and also offers additional functions including dynamic representation of the Order processing.
- Call up the JOC Cockpit Login page and log in with your user account as described at the start of Tutorial 1.
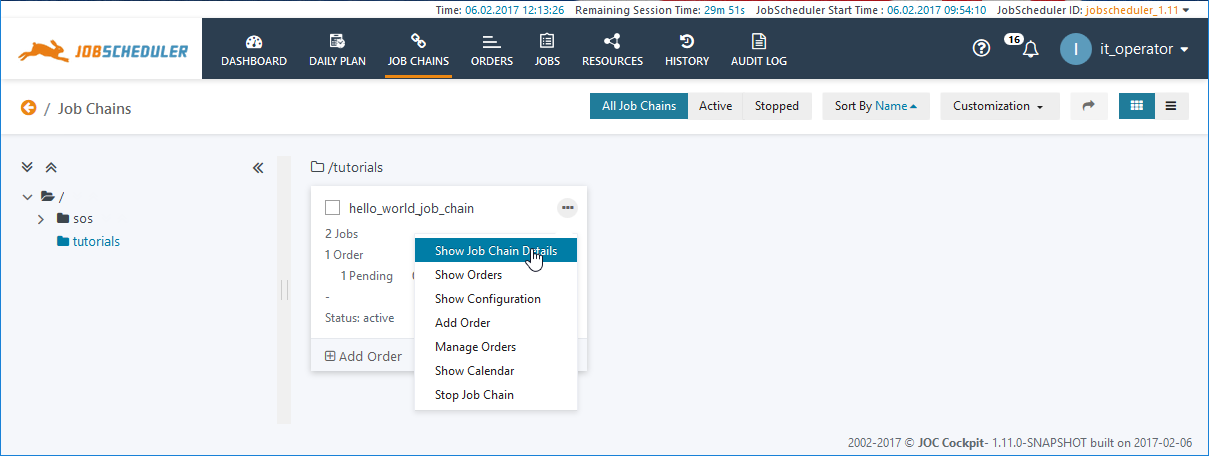
- Switch to the Job Chains view by clicking on the Job Chains icon in the main menu and then open the tutorials folder in the tree menu at the left.
This will open the card view of the hello_world_job_chain.
- Now open the Additional Options menu by clicking on the the ellipsis symbol and select the Show Job Chain Details option as shown below:
- The Job Chain Flow Diagram is shown in the next screenshot. It is dynamic and can be used to monitor the progress of the Order along the Job Chain in near real-time.
The Order is represented in the Diagram by the line of text alongside the yellow circle above the first Node in the chain and, as with almost all JobScheduler objects shown in the JOC Cockpit, has an Additional Options menu. This menu is opened using the ellipsis symbol as shown in the screenshot.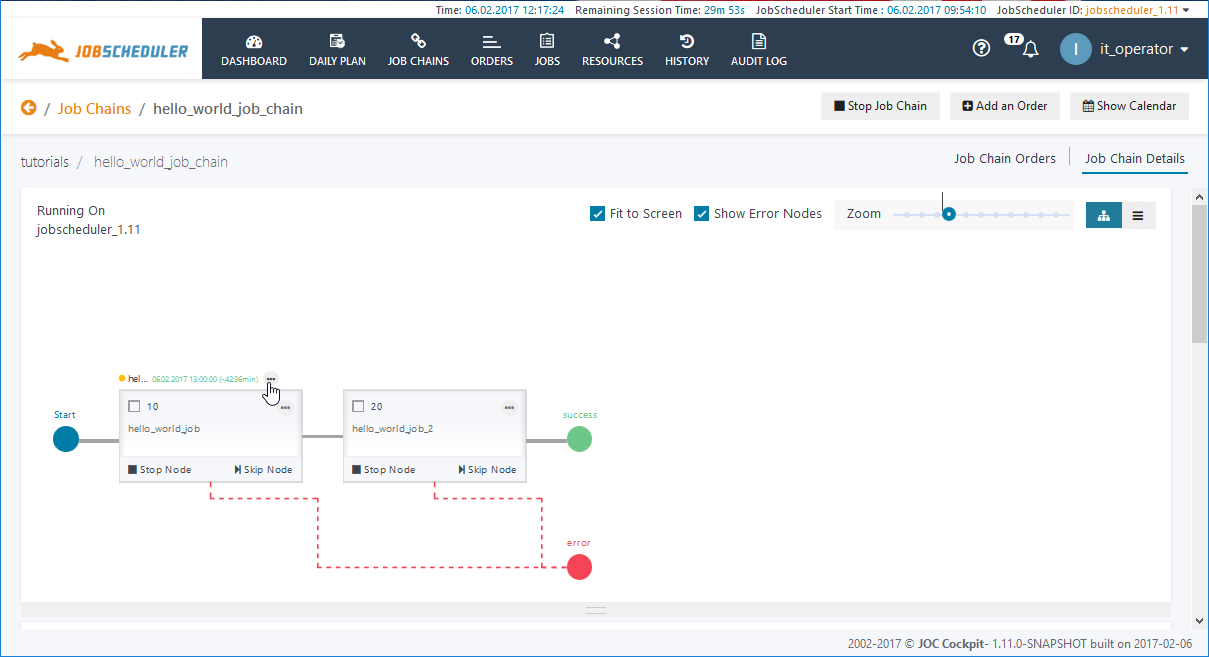
Starting the Order Now and Following the Order Progress
Persistent and On-The-Fly Settings
The Run Time configuration set for the hello_world_order in the first part of this tutorial will start the Order once every hour between 12:00 and 24:00 Mondays to Fridays. As with all configurations made using the JobScheduler Object Editor, JOE, this configuration is saved in the JobScheduler's file system and is therefore persistent. The JOC Cockpit can be used to configure on-the-fly settings for Run Times that are available in addition to the Run Times set using JOE. Such Run Times are not persistent - see the JOC Cockpit - Run-time Editor article for more information.
There are a number of ways available in the JOC Cockpit that can be used to start an Order:
- In Tutorial 1 the Order was started using the Add New Order function. This was accessed from the Order's Card view Additional Options menu and was used in the tutorial to start the Order immediately. In addition the form can be used to configure a start time and parameters for the order.
- The Flow Diagram presentation provides a Start Order Now option. In contrast with the Add New Order option described in Tutorial 1, this option does not allow a start time to be configured nor does it allow on-the-fly setting of parameters.
The Flow Diagram presentation also allows the Order processing to be followed in near real-time. (The ping commands in the Job scripts help here as they increase the processing times of the Jobs so that progress of the Order can be observed.)
Starting the Order Now
- In the Job Chain Flow Diagram presentation described in the previous section, open the Order's Additional Options menu by clicking in the ellipsis symbol above the first job in the job chain and start the hello_world_order by selecting the Start Order Now option. This will open the Write a Comment form shown in the next screenshot. Comments are included in the the JobScheduler Web Service Audit Log. See the JOC Cockpit - Audit Log article for more information.

Clicking on the Submit button as shown in the above screenshot will start the Order.
- You will now be able to follow the progress of the Order along the Job Chain in near real-time.
The screenshot below shows the order being processed at the second job.
In addition, the Order History table at the foot of the screenshot will show the current Order Status of processing, the Start Time, the processing Duration and the Node currently being processed - also in near real-time.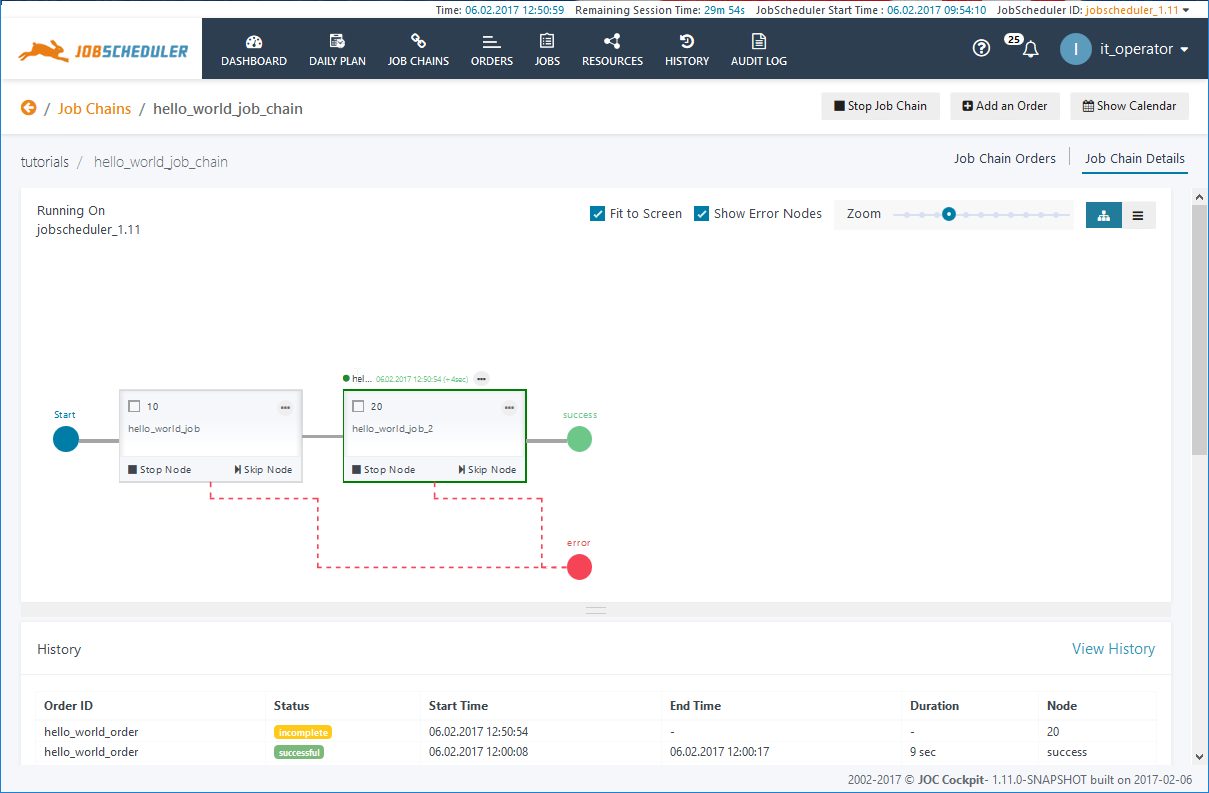
Note that the Add an Order button at the top right of the View could have been used to access the Add New Order form with the possibility of setting a Run Time and Parameters.
- As described in Tutorial 1, the links behind the entries in the History table below the flow diagram can be used to open the Order Log File.
- The Operation just carried out as part of this tutorial can now be seen in the Audit Log as shown in the next screenshot.
In addition to providing a compliance-conform record of Who-did-what this is intended to provide operators with useful information in addition to the History.