Introduction
- The Lock Instruction is used to specify one or more job nodes for mutual exclusion, to prevent jobs from being executed in parallel either in the same workflow or in different workflows.
- Mutual exclusion is based on Resource Locks, i.e. semaphores, that can be either used exclusively or can be shared within the limits of their capacity.
- Exclusive Resource Lock: only one Lock Instruction can hold the Resource Lock at any given time. Any further Lock Instructions that try to acquire the same Resource Lock have to wait.
- Shared Resource Lock: the Resource Lock is assigned a capacity that can be shared by a number of Lock Instructions. Each Lock Instruction carries a weight that counts towards the Resource Lock's capacity.
- A single Lock Instruction can hold any number of Resource Locks and can span any number of jobs and other workflow instructions.
- Jobs that are waiting to acquire a Resource Lock do not consume resources such as CPU. Orders that are waiting for a Resource Lock are in a WAITING state - see JS7 - Order State Transitions.
- If a job within a Lock Instruction fails, then the order is considered to have failed. In this situation the following applies:
- If error handling is applied inside a Lock Instruction, for example by use of a Try/Catch Instruction or Retry Instruction then a temporarily failed order can continue.
- If no error handling is applied inside a Lock Instruction then the order is moved to the begin of the outmost Lock Instruction and is put to the FAILED state to prevent the order form permanently blocking Resource Locks.
- Users who wish orders to remain with a failing job or other instruction and to continue blocking Resource Locks can apply the JS7 - Options Instruction.
- Note that Lock Instructions can be nested in a workflow that acquires a number of Resource Locks. This adds complexity to your workflows that should be managed to prevent deadlocks. It is recommended:
- to use the same nesting of Resource Locks for any occurrence in order to avoid deadlocks,
- not blocking Resource Locks for any length of time through failed orders, if the Resource Locks span across a number of jobs that allow orders to remain in a FAILED state. Using Resource Locks for single jobs only or use of the JS7 - Try-Catch Instruction will prevent Resource Locks from being blocked for a longer time.
- Changes
- JS-1952 - Getting issue details... STATUS
Feature Video
This video explains how to limit parallel execution of jobs in a workflow.
Resource Lock
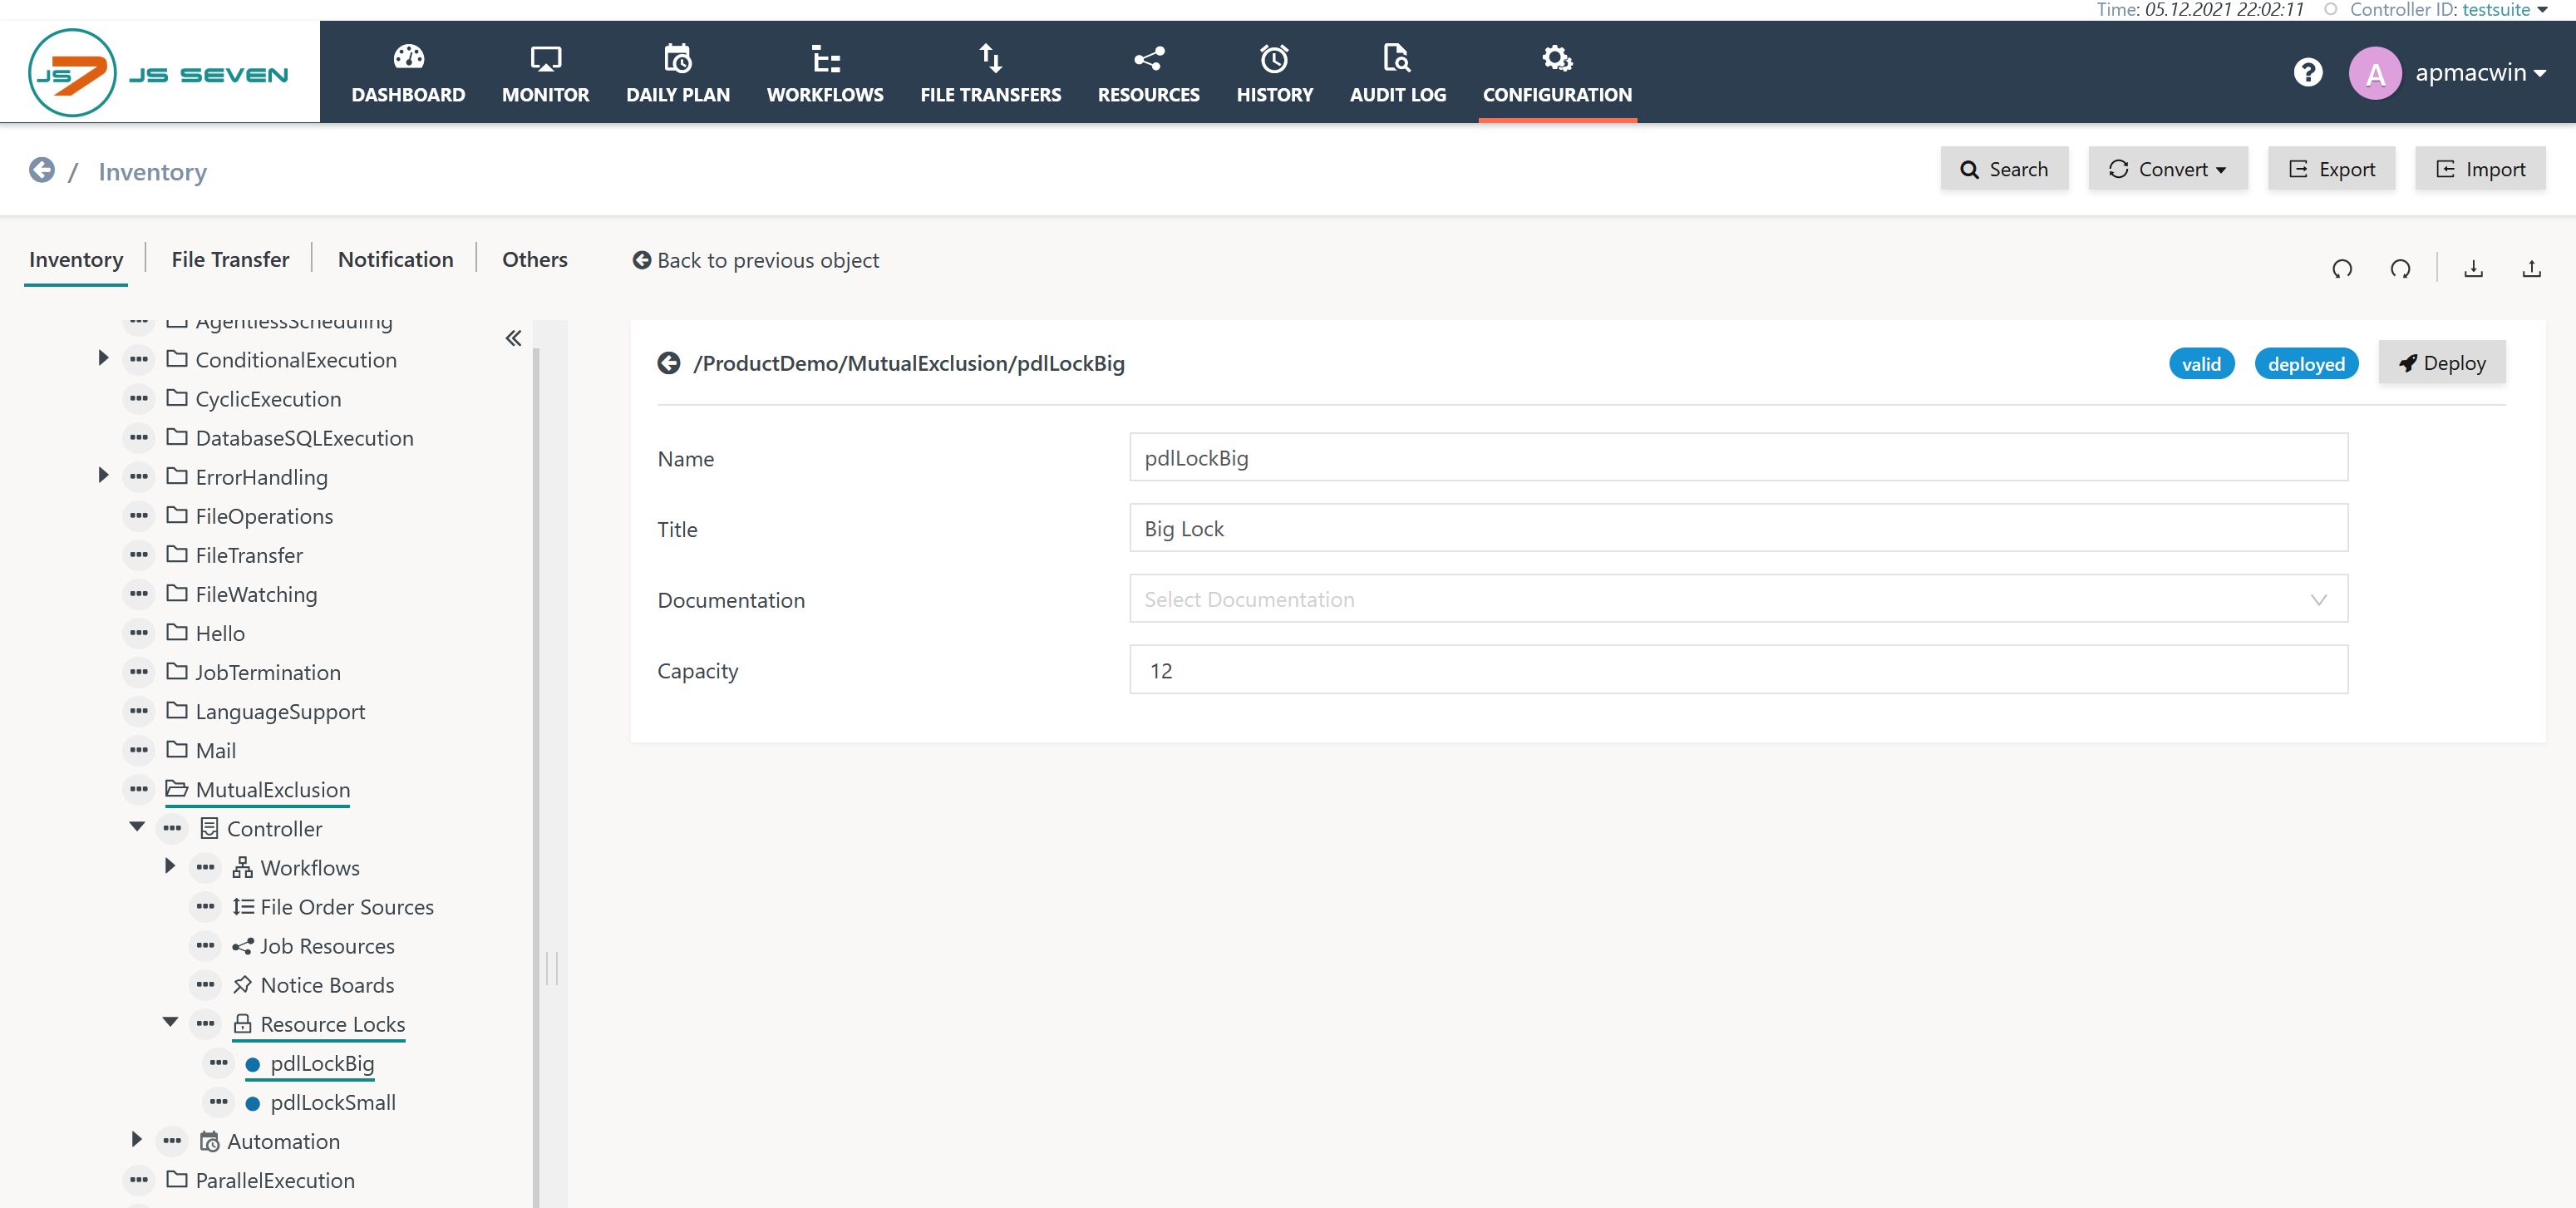
A Resource Lock is configured by assigning a name and a limit for parallel access.
You can upload the following examples in the Configuration view after creating empty Resource Lock objects by using the ![]() icon for the respective object.
icon for the respective object.
- Download Resource Lock Example (.json upload): pdlLockSmall.lock.json
- Download Resource Lock Example (.json upload): pdlLockBig.lock.json
Workflow Instruction: Lock
Exclusive Resource Locks
Download Workflow Example (.json upload): pdlExclusiveLockSerial.json
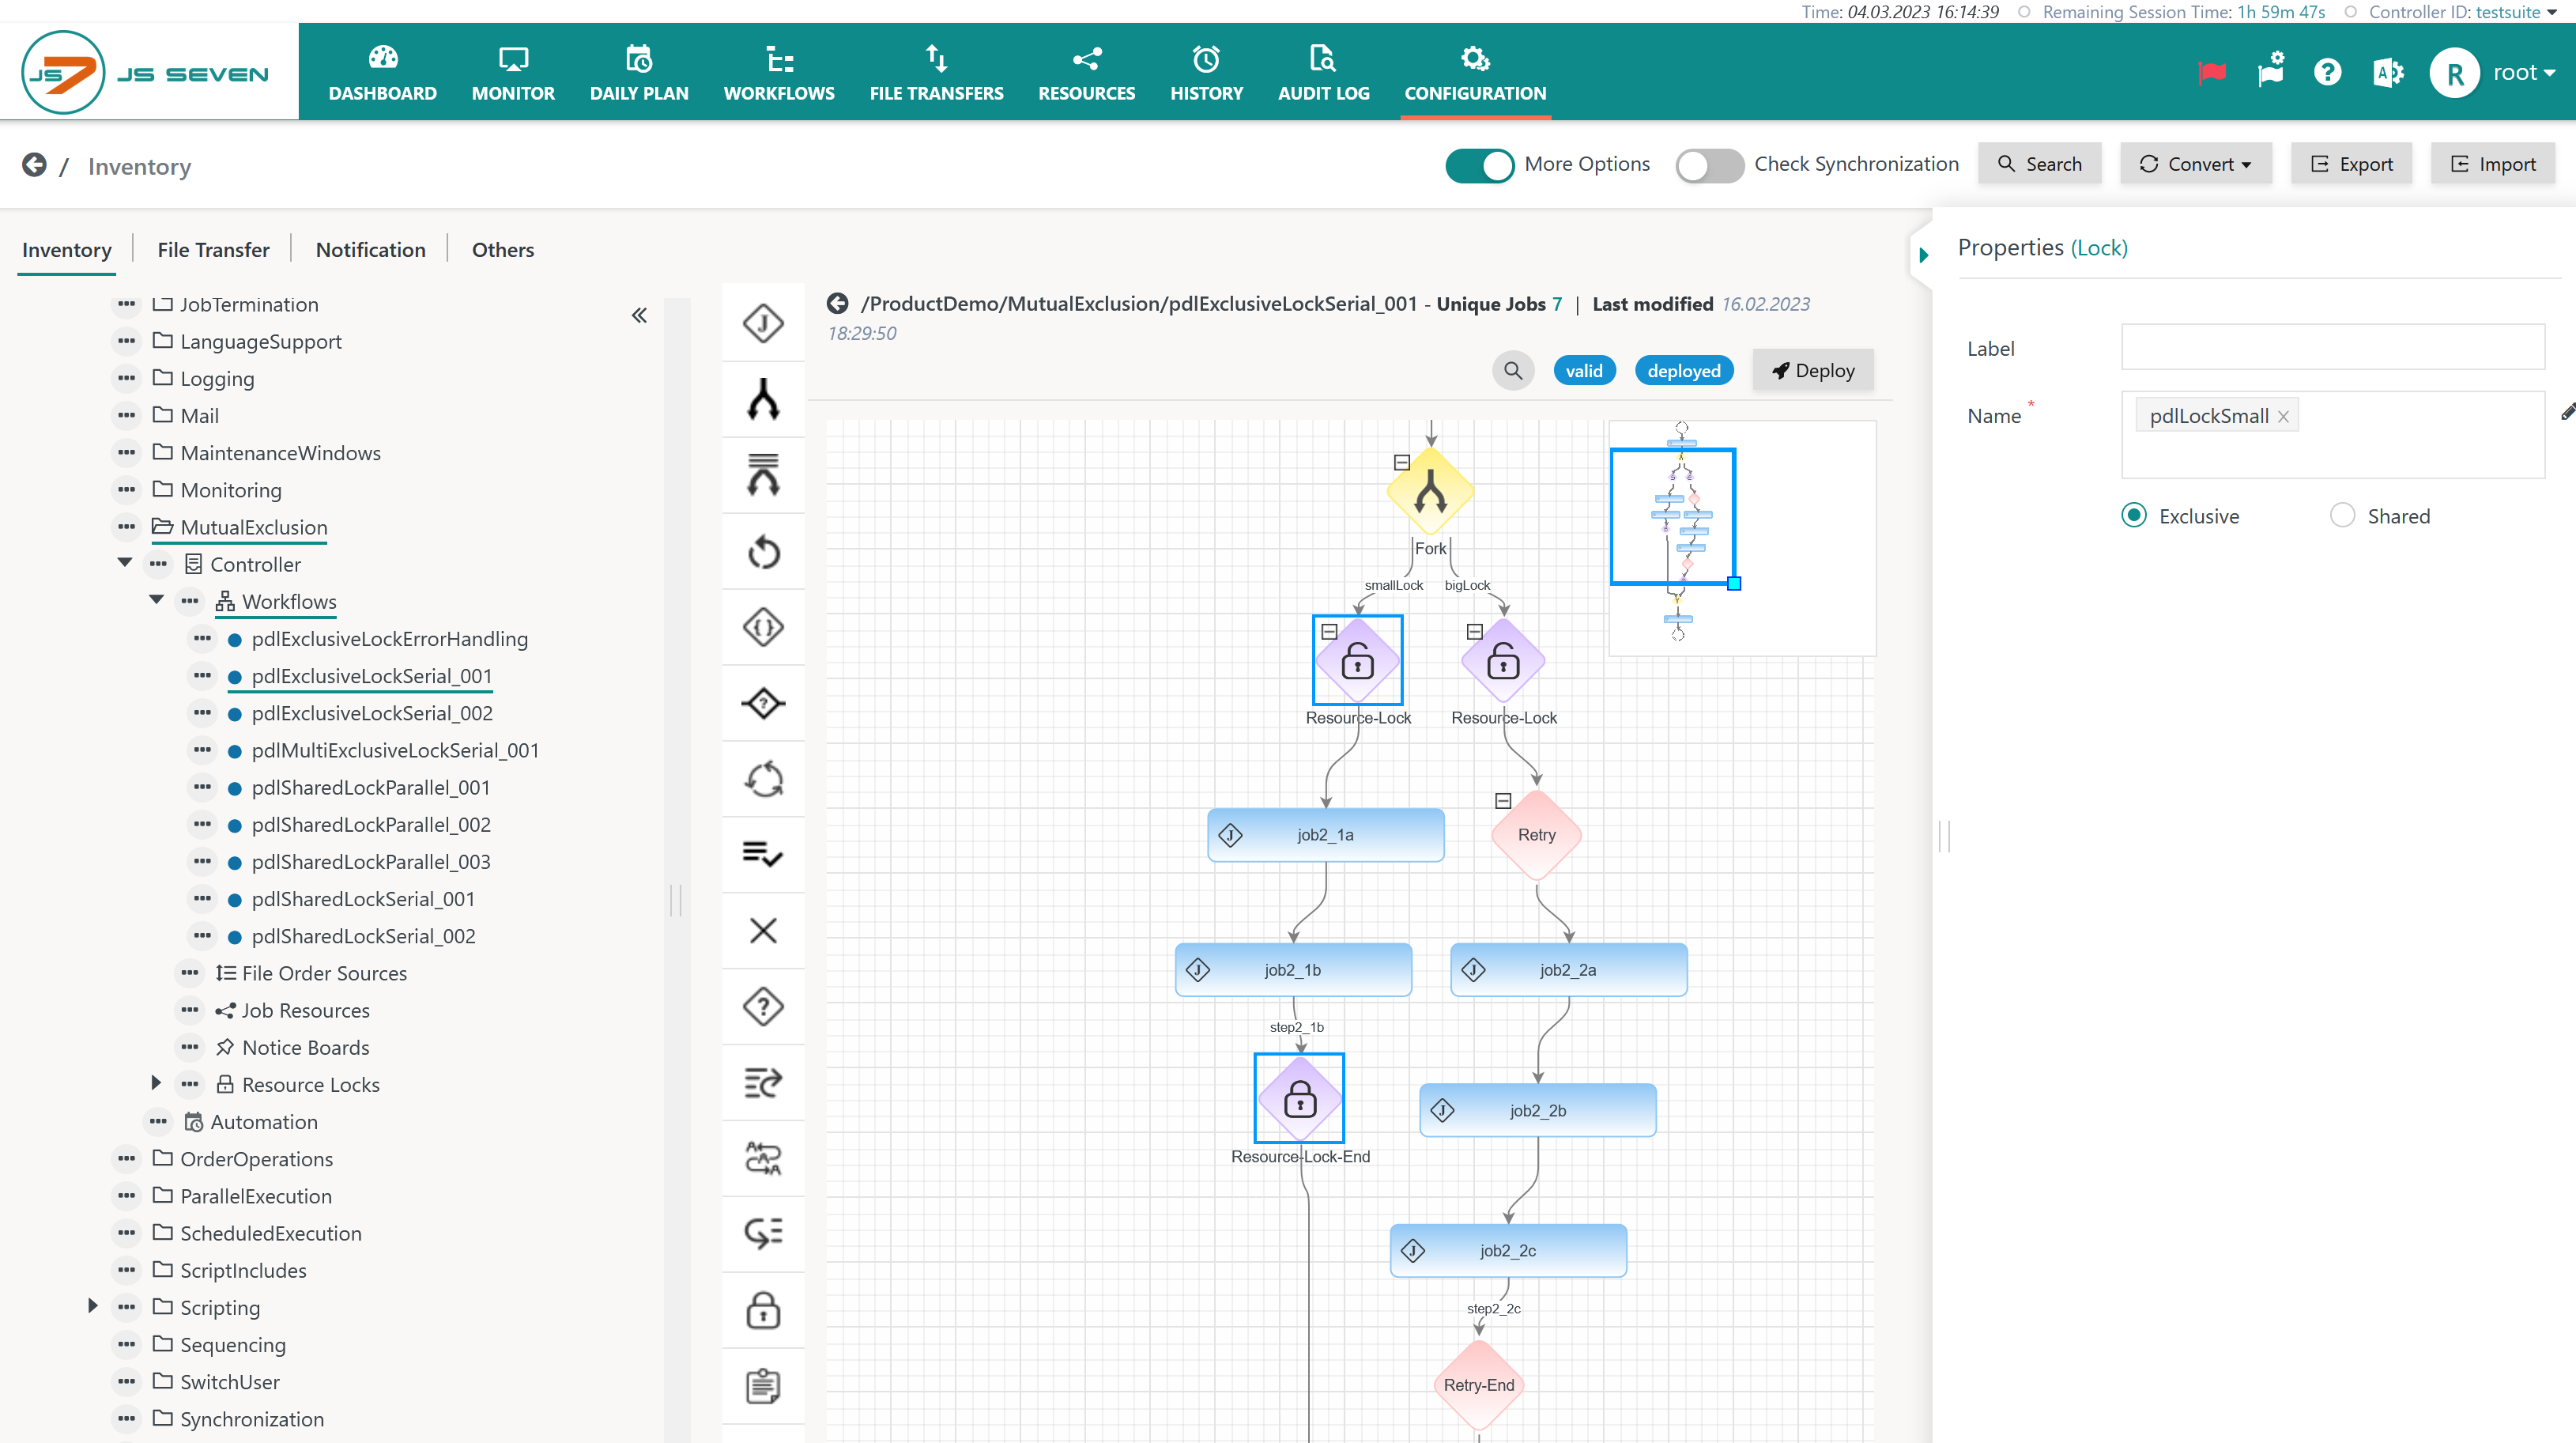
Explanation:
- The selected Lock Instruction makes use of the above Resource Lock in exclusive mode, i.e. jobs with other Lock Instructions for the same Resource Lock are prevented from starting until they can acquire the Resource Lock.
- You can copy the example workflow and add an order to each workflow. The workflow of the first order will run the respective jobs, the workflow of the second order will wait.
- You will achieve similar results by adding a number of orders to the same workflow.
Shared Resource Locks
Download Workflow Example (.json upload): pdlSharedLockParallel.json
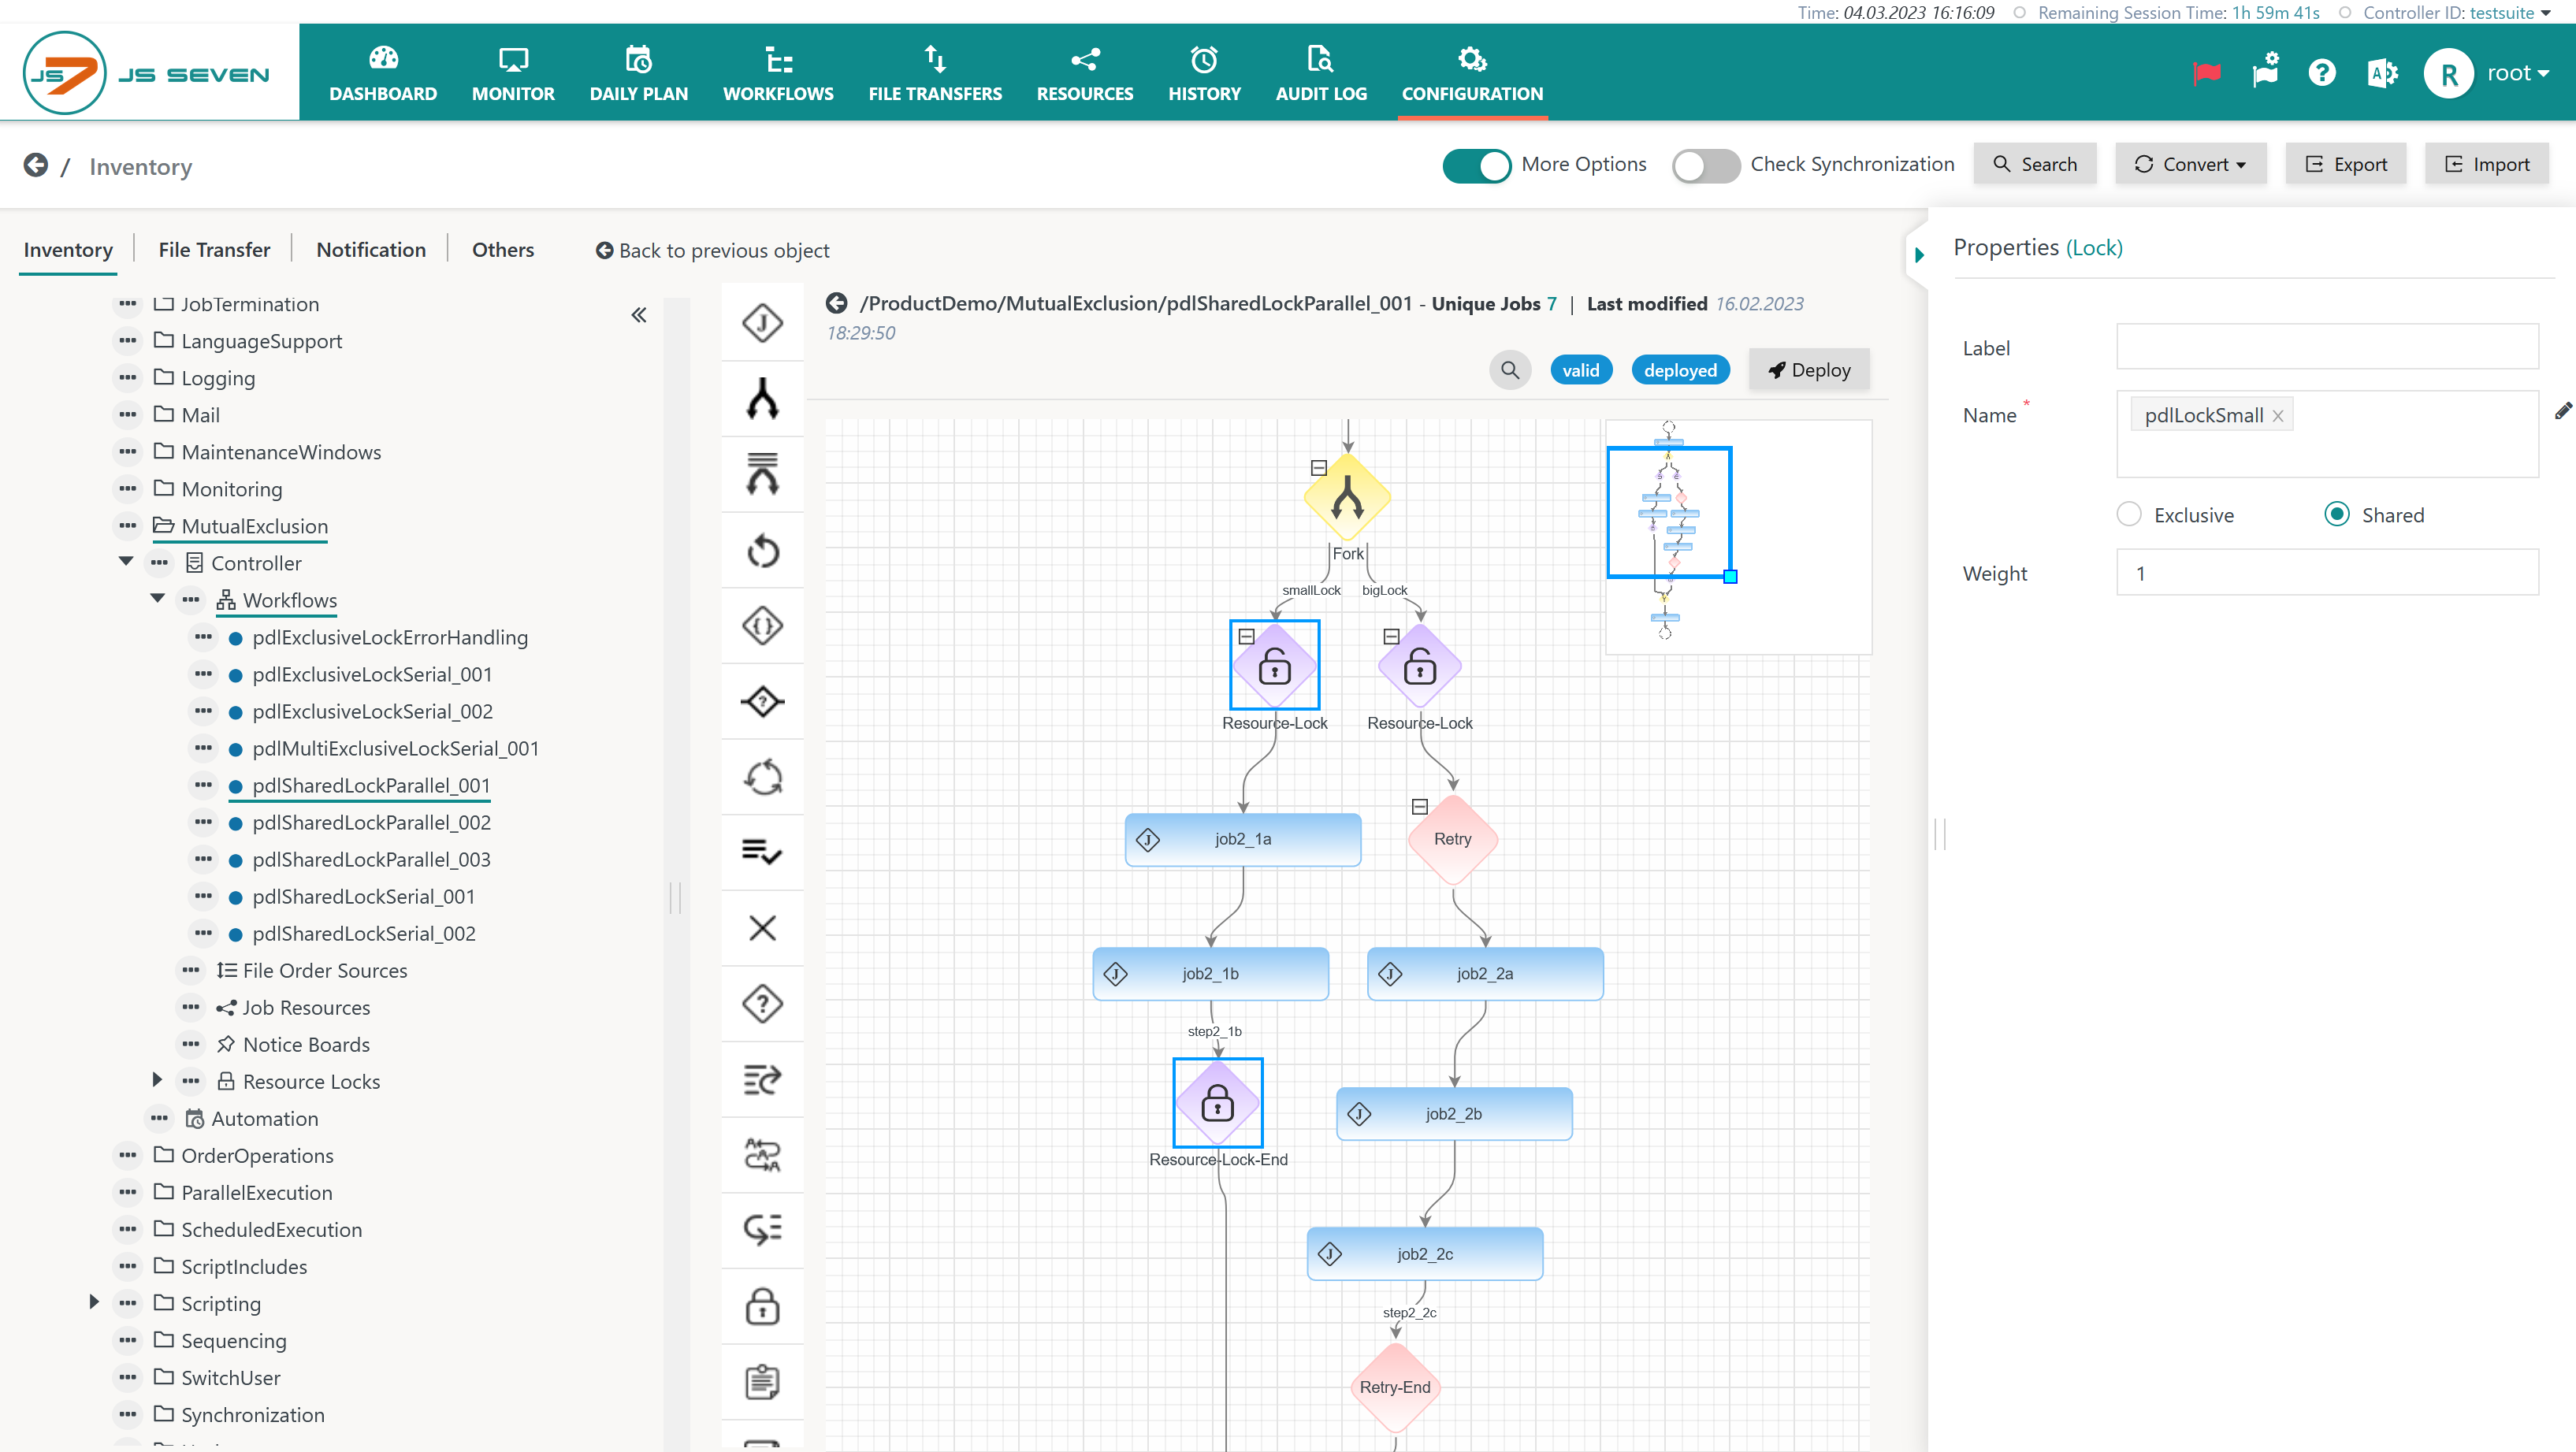
Explanation:
- The selected Lock Instruction makes use of the above Resource Lock in shared mode, i.e. other Lock Instructions can acquire the same Resource Lock if their weight (in this example: 5) fits to the Resource Locks' limit (in the above example: 12). Any further Lock Instructions that will not fit within the Resource Lock's limit are prevented from starting jobs until they can acquire the Resource Lock.
- You can copy the above example workflow or add a number of orders to the same workflow to check the behavior. As the Resource Lock's limit is 12 therefore 2 orders each using a Lock Instruction of weight 5 can execute in parallel, a third order will wait until the relevant Lock Instruction can acquire the Resource Lock.
Resource Locks View
The Resources->Resource Locks view allows the use of Resource Locks by orders and workflows to be identified:
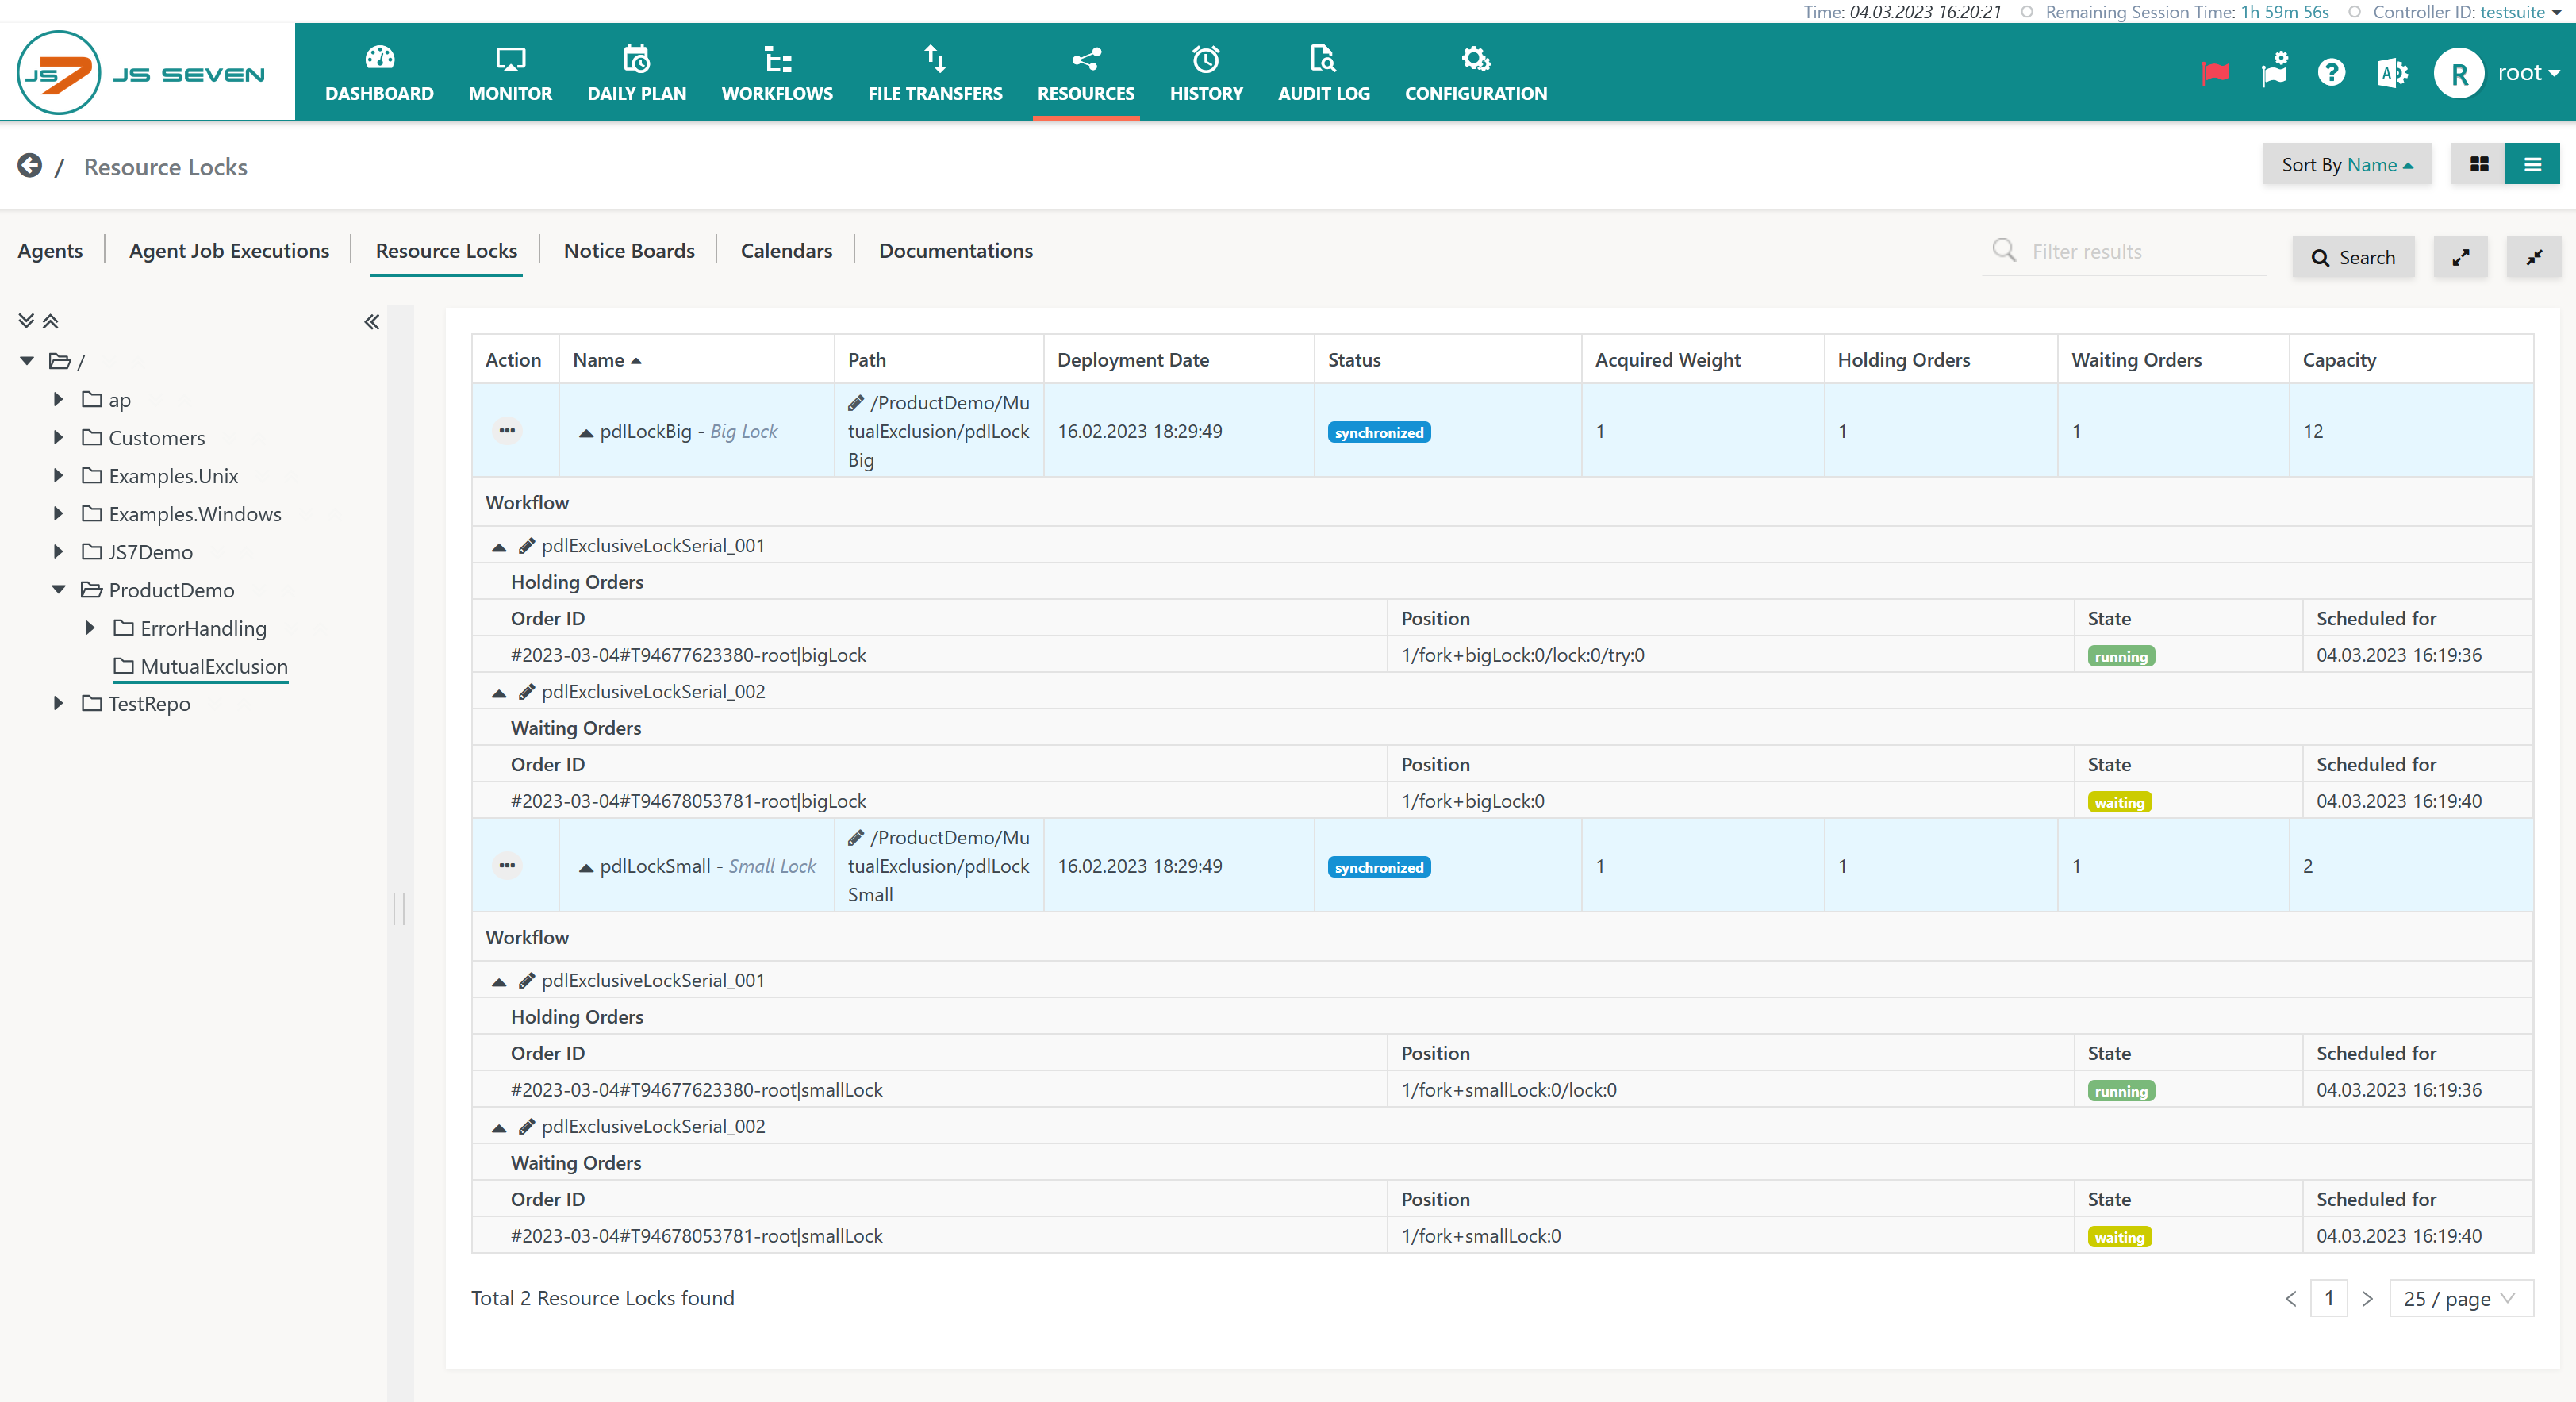
Explanation:
- The example shows two Resource Locks being used: the
pdlLockBig(limit: 12) and the pdlLockSmall (limit: 2) Resource Locks. - Each Resource Lock is acquired by an order that is in RUNNING state.
- At the same time a further two orders are trying to acquire the same Resource Locks. Both orders are in a WAITING state until they can acquire their respective Resource Lock.
Error Handling
Download Workflow Example (.json upload): pdlExclusiveLockErrorHandling.workflow.json
If a job within a Lock Instruction fails, then the order is considered to have failed. In this situation the following applies:
- If error handling is applied inside a Lock Instruction, for example by use of a Try/Catch Instruction or Retry Instruction then a temporarily failed order can continue.
- If no error handling is applied inside a Lock Instruction then the order is moved to the begin of the outmost Lock Instruction and is put to the FAILED state to prevent the order form permanently blocking Resource Locks.
- Users who wish orders to remain with a failing job or other instruction and to continue blocking Resource Locks can apply the JS7 - Options Instruction.
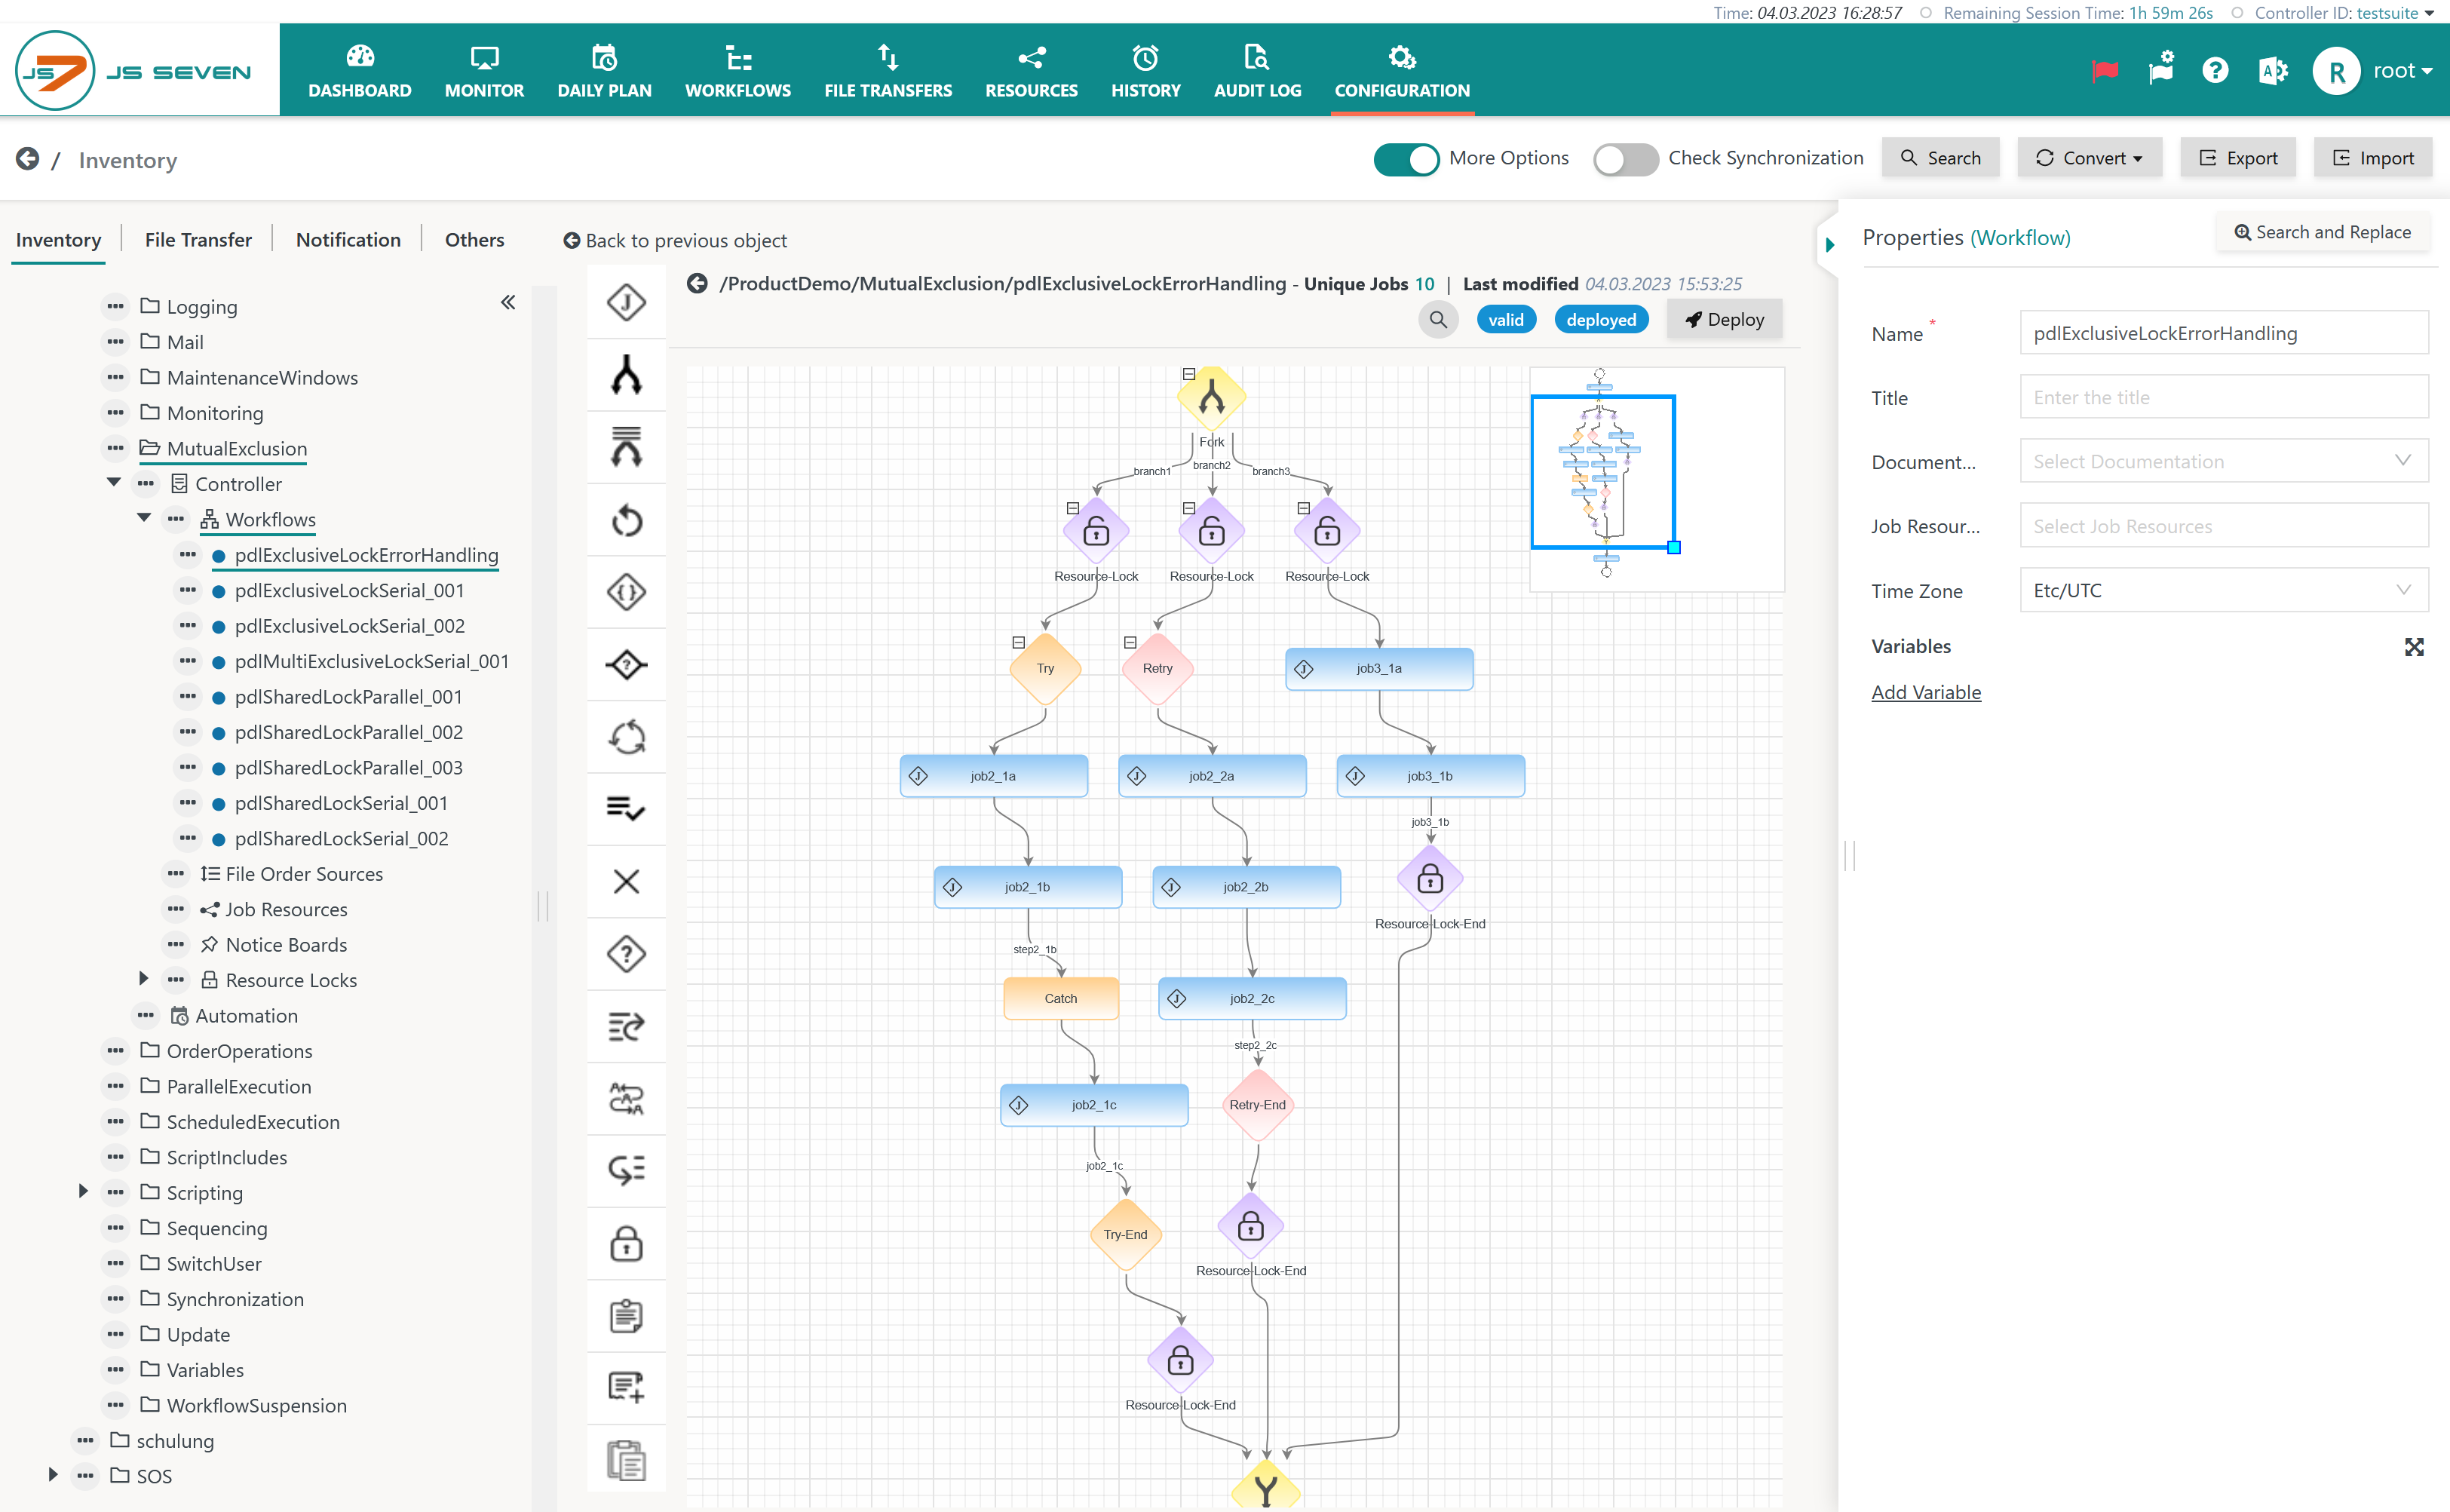
Explanation:
- The workflow implements different ways of error handling per branch of a JS7 - Fork-Join Instruction
- The left branch implements the JS7 - Try-Catch Instruction to handle errors for a job in the Catch block.
- The middle branch implements a JS7 - Retry Instruction that automatically repeats execution of included jobs.
- The right branch implements no error handling.
- The workflow example includes jobs in each branch that will permanently fail.
- Child orders in the left branch recover from failure and are continued.
- Child orders in the middle branch are repeated a number of times, are finally moved to the begin of the Lock Instruction and are put to the FAILED state.
- Child orders in the right branch are immediately moved to the begin of the Lock Instruction and are put to the FAILED state.
At run-time the example should look like this in the Workflows view:

Further Resources
Overview
Content Tools