Introduction
- JS7 - Identity Services implement Authentication Methods and access to Identity Providers, for example credentials such as user account/password are used as an Authentication Method to access an LDAP Directory Service acting as the Identity Provider, see JS7 - Identity and Access Management.
- Depending on the Identity Service Type in use the user accounts are managed and stored with the Identity Service or with JOC Cockpit, see JS7 - Identity Services.
- JOC Cockpit manages permissions and roles for any Identity Services and stores such information independently from the Identity Service.
Manage User Accounts, Roles and Permissions
After installing the JOC Cockpit a user can log in with the default root user account and root password that are available from the JS7 - JOC Identity Service.
- The
JOCIdentity Service is active and is the only Identity Service available by default. - The
JOCIdentity Service includes the defaultrootuser account. Users are encouraged to change the password of therootuser account after initial installation of JOC Cockpit.
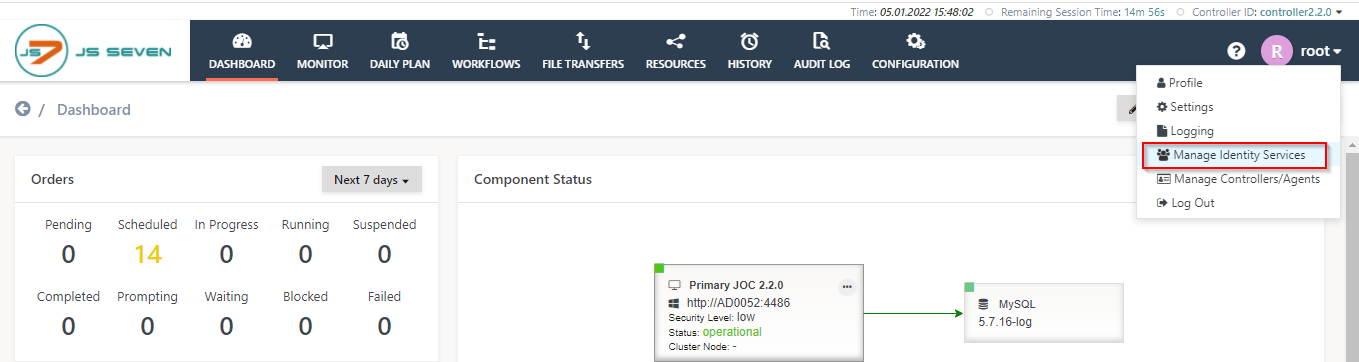
To manage user accounts, roles and permissions from any JOC Cockpit page use the user menu in the right upper corner and select Manage Identity Services:
The Manage Identity Services page holds the list of the available Identity Services. By default the list is populated from the JS7 - JOC Identity Service. Users can add new Identity Services. From this page users can select an Identity Service to manage the user accounts associated with the Identity Service. Assume that the JOC Identity Service is selected by clicking the name JOC.

The JOC Identity Service page offers three sub-views: Roles, Accounts, Profiles. Selecting an Identity Service by default opens the Roles sub-view.
- Roles: Permissions can freely be grouped to roles. This includes to specify permissions for scheduling objects in JOC Cockpit and in Controllers.
- Accounts: Management of user accounts that are stored with the JS7 - Database.
- Profiles: Information about the date of last login by user accounts.
The Roles sub-view
The Roles sub-view allows to assign permissions for access to scheduling objects with JOC Cockpit and Controllers.
When the sub-view is opened after initial installation of JOC Cockpit then it is populated from default roles and permissions, see JS7 - Default Roles and Permissions. Users are free to modify, to add and to delete any roles. Please keep in mind that at least one role that includes administrative permissions to access all objects in JOC Cockpit and Controllers is required and has to be assigned an administrative user account. Should no administrative role be left then this corresponds to locking the door behind you and throwing away the keys. In this situation consider JS7 - Rescue in case of lost access to JOC Cockpit.

Roles indicate default for the Controller which translates to the fact that permissions from default are applied to any Controllers.
If the Roles sub-view is opened by clicking the Account Name in the Accounts sub-view then the Roles sub-view will display roles only that have been assigned the selected user account. The user account selected is displayed with the Account button that can be used to switch to a different user account.
Positioning the mouse over a role name blends in two links as shown in the screenshot above:
- the pencil link allows the role to be edited and
- the X link allows the role to be deleted.
A set of permissions is configured for each role. Each permission set can be inspected by clicking default from the list of roles. This will open the Permissions sub-view for the given role. The matrix of default roles and permissions along with descriptions per permission is provided with the JS7 - Permissions article.
The Accounts sub-view
The Accounts sub-view is available when a user selects the Identity Service from the Identity Management Services page. The sub-view lists the user accounts that are configured along with their roles.
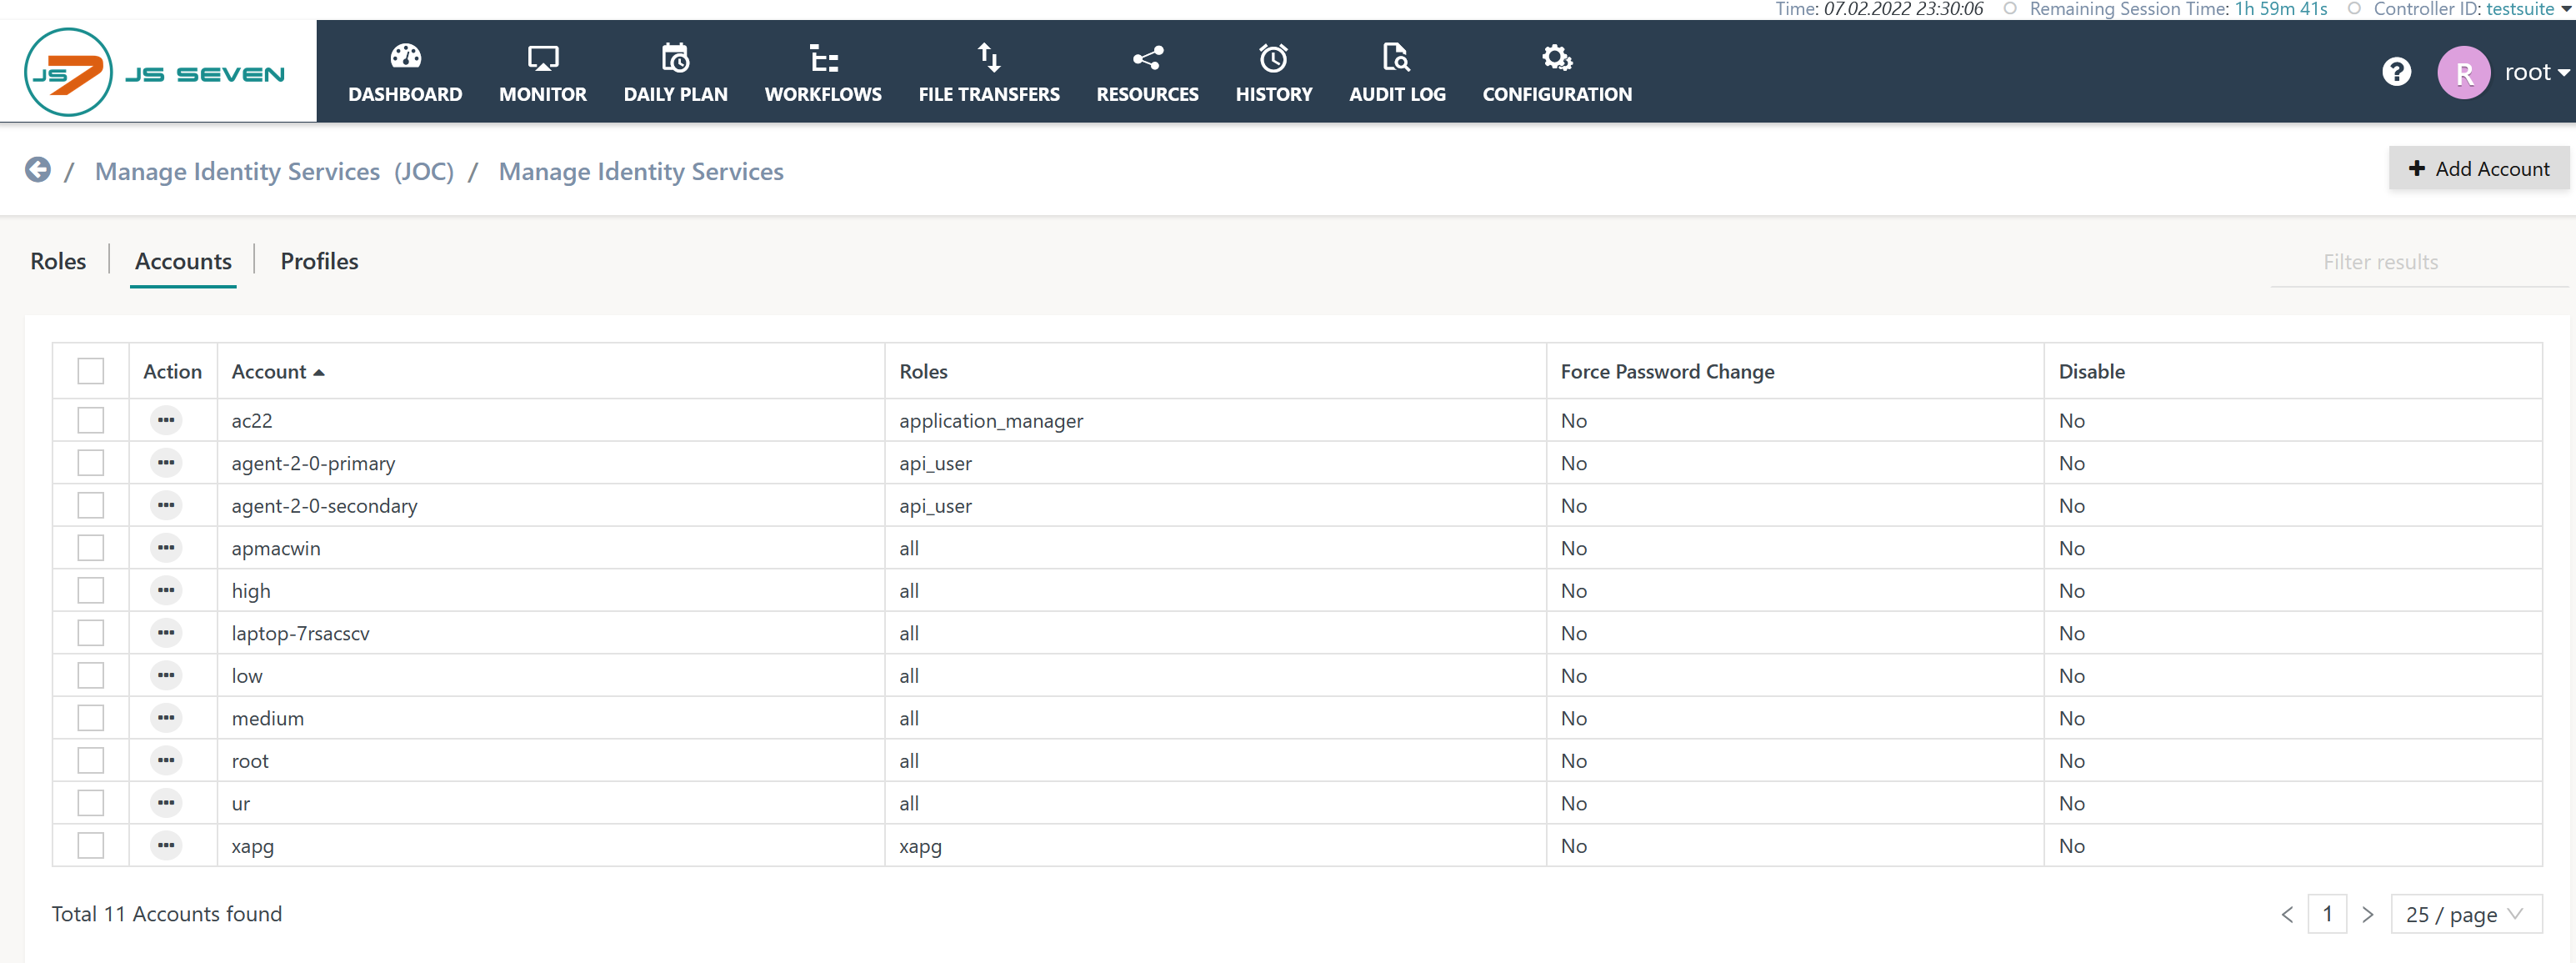
The above screenshot shows the test user account that assigned the test-role role.
The Add Account button can be used to open a popup window to add a new user account.
- The additional options (ellipsis) symbol allows an Account to be edited (change the Account Name and/or Password, select/deselect Roles) and to be copied or deleted.
- Clicking the Account Name navigates the user to the Roles sub-view that offers to assign the role permissions for JOC Cockpit and Controllers.
The Permissions sub-view
The Permissions sub-view allows to manage permissions for roles, optionally limited to specific folders.
- Scope
- JOC Cockpit Permissions are assigned for operations in JOC Cockpit, for example to manage calendars and the daily plan etc.
- Controller Permissions are assigned for operations on scheduling objects per Controller, for example to deploy workflows, to add orders etc.
- If more than one Controller is connected to JOC Cockpit then a user account can be assigned a role that for example allows deployment to one Controller but not to other Controllers.
- Controller permissions can be specified as a default for any Controllers and they can be specified on a per Controller basis.
- States
- Permissions can take one of three states, being unassigned, granted or denied.
- An unassigned permission does not take any assumption if the permission is granted or denied.
- A granted permission is active within limits as is can be overruled by denied permissions.
- A denied permission is active without limits and cannot be overruled by granted permissions.
- Merge
- Permissions are assigned to roles. A user account can accumulate a number of roles, therefore the permissions are merged by the following rules.
- JOC Cockpit Permissions
- Unassigned permissions are ignored.
- Granted permissions work across any roles unless merged with a denied permission from a role.
- Denied permissions work across any roles and cannot be overruled by granted permissions from any role.
- Controller Permissions
- Default Controller
- Unassigned permissions are ignored.
- Granted permissions overrule unassigned permissions from any roles and Controllers.
- Granted permission can be overruled from any roles, they can be
- denied by a permission of the Default Controller specified by some other role,
- denied by a permission for a Specific Controller.
- Denied permissions
- Specific Controller
- Unassigned permissions are ignored, instead the permission of the Default Controller is applied.
- Granted permissions work across any roles unless denied by a permission from any role for the given Controller.
- Denied permissions work without limits across any roles for the given Controller.
- Default Controller
- JOC Cockpit Permissions
- Permissions are assigned to roles. A user account can accumulate a number of roles, therefore the permissions are merged by the following rules.
- Permission Tree
- Permissions are organized from a tree that offers a hierarchy of branches.
- Granting or denying permissions at a higher level inherits the permission recursively to deeper levels of the tree.
Permission Management
A graphical and a textual view are available for management of permissions added to a role.
The Graphical View
This view allows graphical navigation and selection of permissions and is the default view.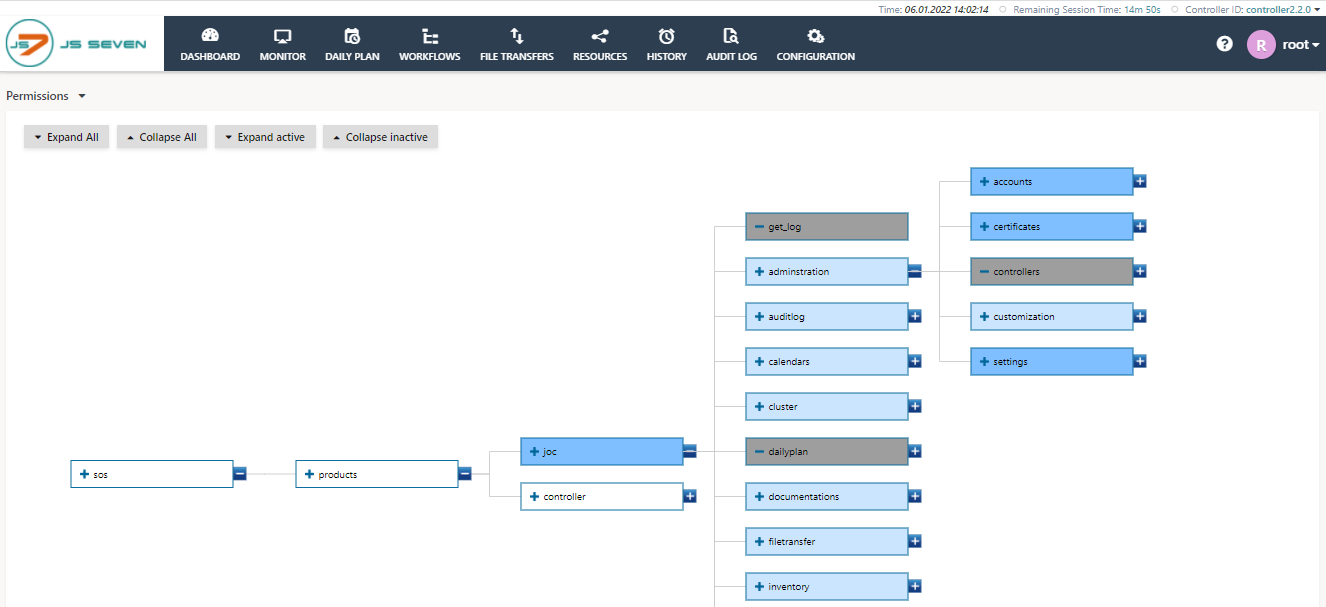
- Explanation:
- Navigation
- The Expand All and Collapse All buttons open and close any child branches.
- The Expand Active and Collapse Active buttons open and close child branches with granted or denied permissions.
- The
+and-icons at the right edge of each permission icon open and close child branches.
- States and Colors
- Permissions show the following background colors to indicate their state:
- White: Permission is not assigned, i.e. is not granted and is not denied.
- Dark Blue: Permission is granted and the grant is inherited to child permissions recursively.
- Light Blue: Permission is inherited from a granted parent permission.
- Dark Grey: Permission is denied and the denial is inherited to child permissions recursively..
- Light Grey: Permission is inherited from a denied parent permission.
- Granting Permissions
- Clicking the middle of an unassigned (white) permission grants the permission (dark blue).
- Clicking the middle of a granted permission revokes the grant and puts the permission to the unassigned state (white).
- Denying Permissions
- The
+icon inside a permission icon denies the permission (dark grey) recursively for child permissions that are located deeper in the permissions tree (light grey). - A denied permission shows the
-icon, clicking this icon revokes the denial and puts the permission to the unassigned state.
- The
- Permissions show the following background colors to indicate their state:
- Undo/Redo
- Changes to the permissions tree are stored to the JS7 database.
- The Undo button allows the last 10 changes to be undone stepwise.
- Any changes held in the Undo button will be deleted when the user leaves the Permissions sub-view.
- The Redo button changes the permissions tree back to its initial state when the Permissions sub-view is displayed.
- The state held with the Redo button is deleted when a user leaves the Permissions sub-view.
- Navigation
The Textual View
The editor displays permissions from a lists of textual entries. The right upper corner of the Permissions sub-view offers to toggle between graphical view and textual view.
- Explanation:
- Individual permissions can be modified and removed from the role using the pencil and X icons that are faded in when the user's mouse is moved over a permission.
- The Edit function allows the permission to be made subtractive, i.e. for permission granted at a higher level to be removed.
- The folder part of the view is used to restrict the role to access particular folders only - this includes that any scheduling objects such as workflows are visible from the assigned folder only.
Folder Selection
Folders are added using the Add Folder button visible in the background of the below screenshot in the upper right corner:

Folders are selected from a tree view that is opened by clicking the folder icon, see screenshot.
Configuration
Manage User Accounts and Roles
Administrators create and configure user accounts and roles, for example, to limit access to resources such as workflows and logs.
It is straightforward to first add roles, then assign permissions - optionally limited to folders - and finally to add user accounts and to assign roles.
Add a Role
- Roles are created from the Roles sub-view using the Add Role button:

- Once the role is created it is added automatically to the list of roles displayed in the background of the above page.
Configure Permissions for a Role
- Now expand the Role using the arrow button click on the default (blue link) to add Permissions and/or Folders in the Permissions sub-view. The procedures available for managing permissions and folders are explained with the Editing User Permissions and Folders sections below.
- Note that roles that neither have permissions nor folders assigned are deleted automatically when a user leaves the Manage Identity Service page.
Further Resources
Pages
Navigation
Overview
Content Tools