Installing the JS7 Controller
Prerequisites
- Java Runtime Environment 1.8 or newer is required.
- For details see Which Java versions is JobScheduler available for?
Installation
Extract the downloaded archive
js7_controller_windows_installer.x.x.x.zipto an arbitrary directory, e.g.C:\Temp.The installer can run with or without a GUI.
- The installer asks for elevated administrator privileges, therefore it is not necessary to change the permissions in the
.\servicedirectory and the installer sets read/write permissions for the log directory. - After the installation you will find ...
- a Windows service "SOS JS7 Controller -id=<Controller ID>"
- an executable
.\service\js7_controller_<Controller ID>.exethat is started by the Windows service
Run the installer dialog for the JS7 Controller using
Windows command to open the installer GUI> C:\Temp\controller.x.x.x\setup.cmd
- The installer asks for elevated administrator permissions.
- Select the language to be used for the setup: English and German are available.

- Click Next on the Welcome to the Installation screen

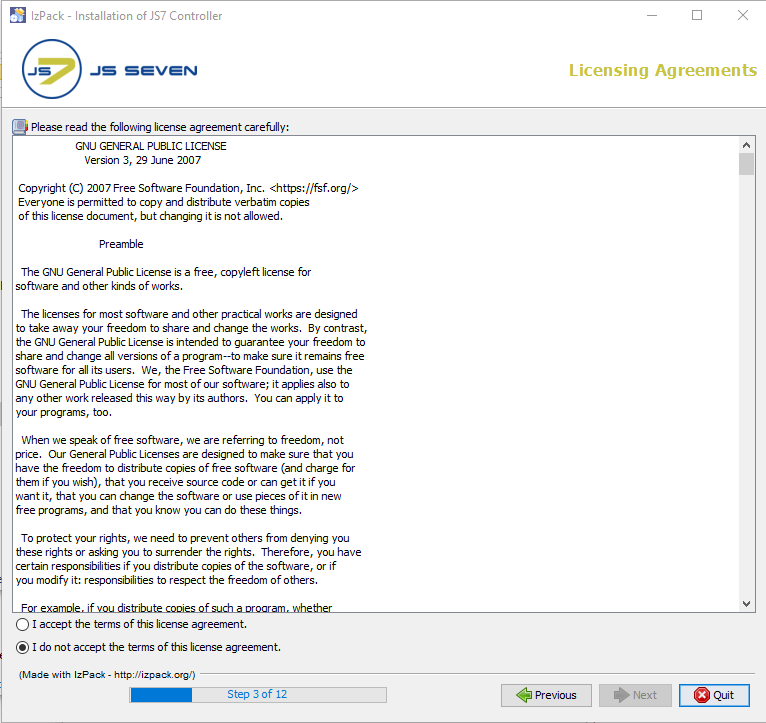
- The License Agreement shown in Step 2 of the installation must be accepted before installation can occur.
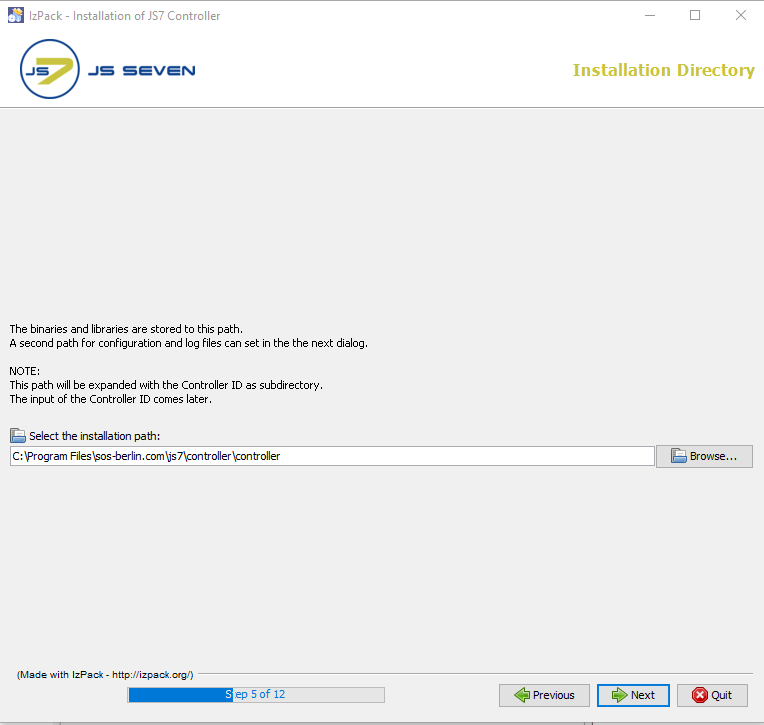
- The installer opens a GUI to specify the installation path after you accepted the terms of the license agreement.
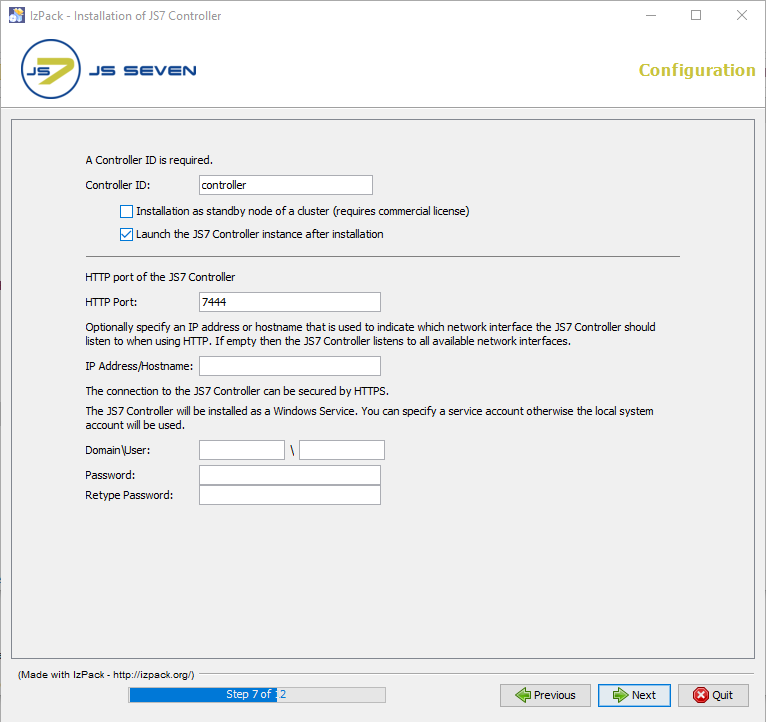
- Add the HTTP port which can be used by the JS7 Controller. Make sure that the HTTP port is available, i.e. not otherwise used. If you run other applications that use this port then choose a different port.
- If you specify a service account then make sure that this account has "Log on as service rights".
- If you selected the installation path to be located in
C:\Program Filesthen it is recommended to choose the log directory outside of the installation path, e.g.C:\ProgramData\sos-berlin.com\js7\controller\logs. - The installer sets read/write permissions for the specified Windows service user but normally exclusively the administrator group should have write permissions for
C:\Program Files.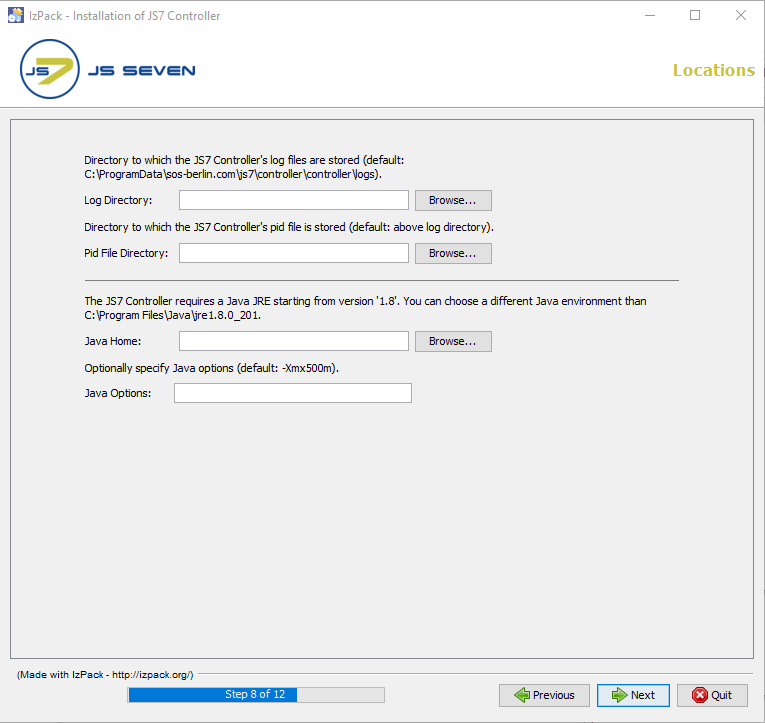
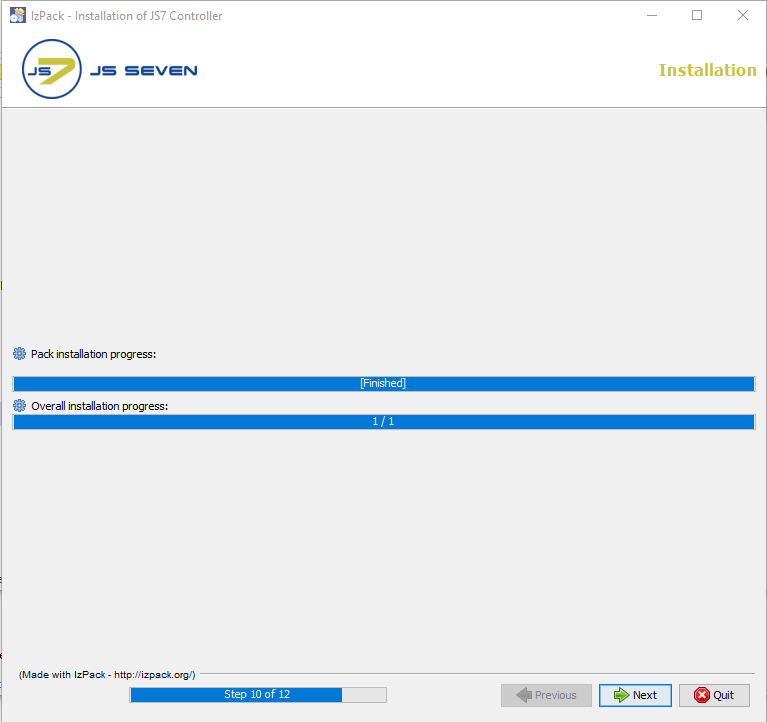
- This step shows the progress of the first part of the installation procedure.
- Changes to the installation configuration can no longer be made once this step has started.
- The Perform External Process shows the progress of the second part of the installation procedure.
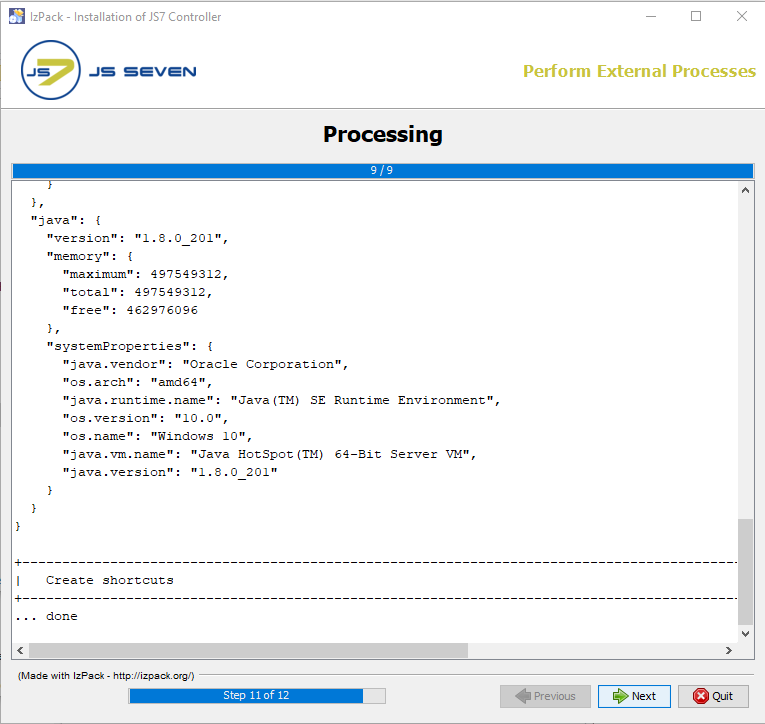
The information shown in this step will be written to the installation log file, which can be found in the
JS7_CONTROLLER_DATA/logsfolder
The last step of the installation shows a summary of the installation (success/error) and paths to relevant information.
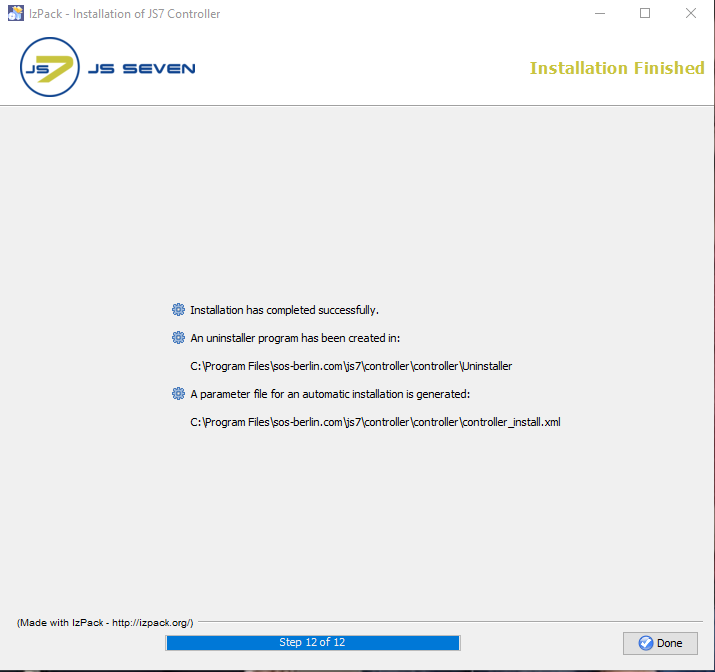
Note that if a problem occurs during installation a warning message will be shown here and a link to the installation log file will be provided.
Updating the JS7 Controller
Preparation
nothing to do
Update
rerun the installer
Rollback
similar to what is explained for headless installation
Installation without GUI
Run the installer for JS7 Controller parametrized with thecontroller_install.xmlthe file that is included with the extracted archive.This parameter file is preconfigured, i.e. you can run it without any changes.Windows command to open the installer GUI> cd C:\Temp\controller.x.x.x > setup.cmd controller_install.xml
If you run the installer without modifications incontroller_install.xmlthenthe installation path isC:\Program Files\sos-berlin.com\js7\controllerthe http port is4444the log folder isC:\ProgramData\sos-berlin.com\js7\controller
If you want to modify the default options then edit thecontroller_install.xmlfile before you start the installer.The defaultcontroller_install.xmlthe file is shown in the code listing below. The extensive comments are intended to be self-explanatory.Content of controller_install.xml<?xml version="1.0" encoding="UTF-8" standalone="no"?> <!-- XML configuration file for JS7 Controller setup The JS7 Controller is available with a dual licensing model. - GNU GPL 2.0 License (see http://www.gnu.org/licenses/gpl-2.0.html) - JS7 Commercial License (see licence.txt) The setup asks you for the desired license model (see <entry key="licenceOptions" .../> below). If you call the setup with this XML file then you accept at the same time the terms of the chosen license agreement. --> <AutomatedInstallation langpack="eng"> <com.izforge.izpack.panels.UserInputPanel id="home"> <userInput/> </com.izforge.izpack.panels.UserInputPanel> <!--com.izforge.izpack.panels.UserInputPanel id="licences"> <userInput--> <!-- Select the license model (GPL or Commercial) --> <!--entry key="licenceOptions" value="GPL"/--> <!-- If you selected GPL as license model than the licence must be empty. Otherwise please enter a license key if available. It is also possible to modify the license key later. --> <!--entry key="licence" value=""/> </userInput> </com.izforge.izpack.panels.UserInputPanel--> <com.izforge.izpack.panels.HTMLLicencePanel id="gpl_licence"/> <com.izforge.izpack.panels.HTMLLicencePanel id="commercial_licence"/> <com.izforge.izpack.panels.TargetPanel id="target"> <!-- SELECT THE INSTALLATION PATH The installation expands this path with the JS7 ID as subdirectory. It must be absolute! For example C:\Program Files\sos-berlin.com\js7\controller --> <installpath>C:\Program Files\sos-berlin.com\js7\controller</installpath> </com.izforge.izpack.panels.TargetPanel> <com.izforge.izpack.panels.UserPathPanel id="userpath"> <!-- SELECT THE DIRECTORY FOR CONFIGURATION AND LOG FILES The installation expands this path with the JS7 ID as subdirectory. The path must be absolute! Default path is C:\ProgramData\sos-berlin.com\js7\controller --> <UserPathPanelElement>C:\ProgramData\sos-berlin.com\js7\controller</UserPathPanelElement> </com.izforge.izpack.panels.UserPathPanel> <com.izforge.izpack.panels.UserInputPanel id="network"> <userInput> <!-- ID of the JS7 Controller --> <entry key="controllerId" value="controller"/> <!-- Choose yes if the JS7 Controller is a Standby-Controller in a cluster --> <entry key="isStandby" value="no"/> <!-- Choose (yes or no) wether the JS7 Controller should be started at the end of the installation --> <entry key="launchController" value="yes"/> <!-- HTTP port of the JS7 Controller --> <entry key="controllerPort" value="4444"/> <!-- Set optionally an ip address or hostname. It could be used for indicating which network interfaces the JS7 Controller should listen to when using HTTP. If it is empty then it listens to all available network interfaces. --> <entry key="controllerHost" value=""/> <!-- The JS7 Controller will be installed as Windows service. You can set the service account otherwise the local system account will be used. The account has to be the form 'Domain\User'. --> <entry key="serviceAccount" value=""/> <entry key="servicePassword" value=""/> </userInput> </com.izforge.izpack.panels.UserInputPanel> <com.izforge.izpack.panels.UserInputPanel id="environment"> <userInput> <!-- Directory where the JS7 Controller's log files are stored (default: '[above user path]\logs'). --> <entry key="logPath" value=""/> <!-- Directory where the JS7 Controller's pid file is stored (default: above log path). --> <entry key="pidFilePath" value=""/> <!-- Working directory for all jobs which started by the JS7 Controller e.g. %USERPROFILE% (default: [installation path]) --> <entry key="workPath" value=""/> <!-- The JS7 Controller requires a Java JRE at least version '1.8'. You can choose a different Java environment than the Java which is used during this installation. --> <entry key="javaHome" value=""/> <!-- Set optionally Java options (default: -Xmx500m). --> <entry key="javaOptions" value=""/> </userInput> </com.izforge.izpack.panels.UserInputPanel> <com.izforge.izpack.panels.UserInputPanel id="end"> <userInput/> </com.izforge.izpack.panels.UserInputPanel> <com.izforge.izpack.panels.InstallPanel id="install"/> <com.izforge.izpack.panels.ProcessPanel id="process"/> <com.izforge.izpack.panels.FinishPanel id="finish"/> </AutomatedInstallation>
Debugging
- The Controller log level can be increased using the Controller's Apache ProcRun Demon Service Manager demon/service.
- On Windows systems, this is installed in the Controller
serviceFolder and will have a name such asjs7_controller_<Controller ID>w.exewhere Controller ID is the unique ID for the Controller - Start the ProcRun Manager, select the Logging tab in the Manager interface and set the level to Debug.
- The location of the log files has already been described above.
- Do not forget to set the debug level back to Info once finished.
Overview
Content Tools