JS7 - Variables are used to parameterize execution of jobs in a workflow. Variables are declared with the workflow by specifying a name and data type and optionally a default value. Variable can be used in a number of places:
- As an Environment Variable: the environment variable is available for all shell jobs in a workflow.
- As a Job Resource: You can assign a set of variables to a job resource and attach the job resource to an individual job. If the job resources is attached the workflow then the variables will be available for all jobs in the workflow.
- As an Order Variable: You can declare variables with a workflow and assign or modify values when adding an order to the workflow.
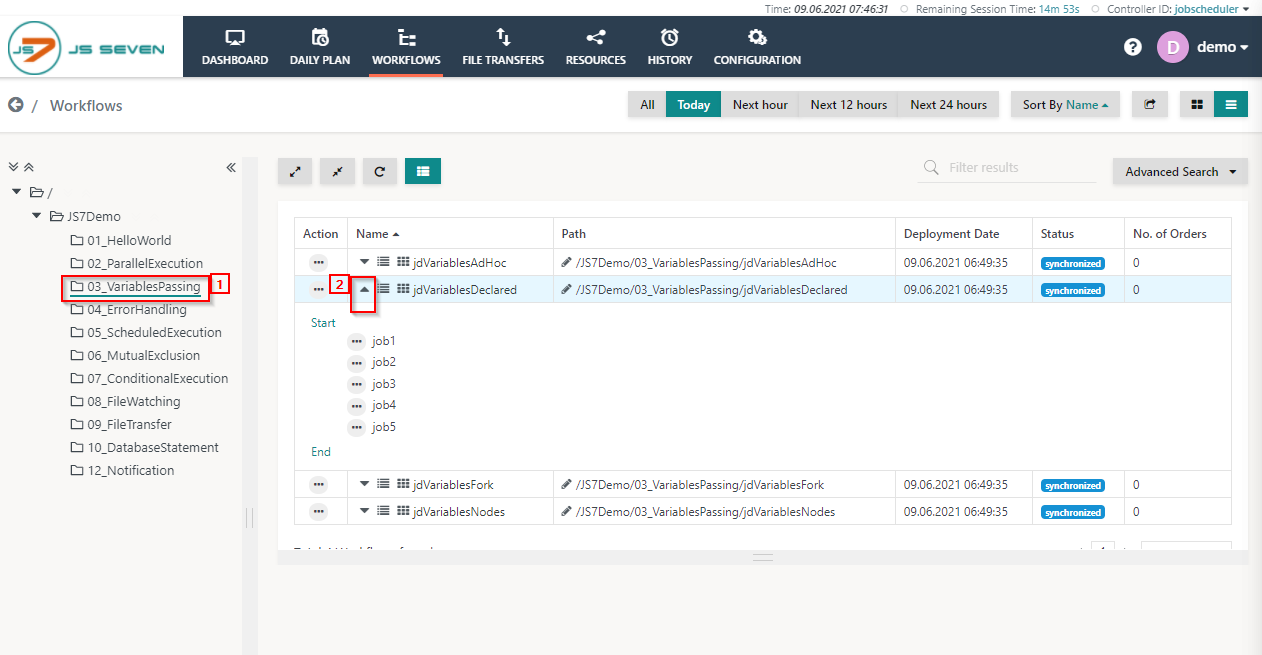
The folder 03_VariablesPassing contains workflows used for variable passing. You can add an order from the action menu of the workflow.
The variables are declared with the default values, the variable flight_destination value change during the order run with the help of the environment variable.
- Click on the folder 03_VariablePassing from the and expand the jdVariablesDeclared workflow.
- To add an order to the workflow click the action menu of the workflow and use Add Order from the drop-down menu.
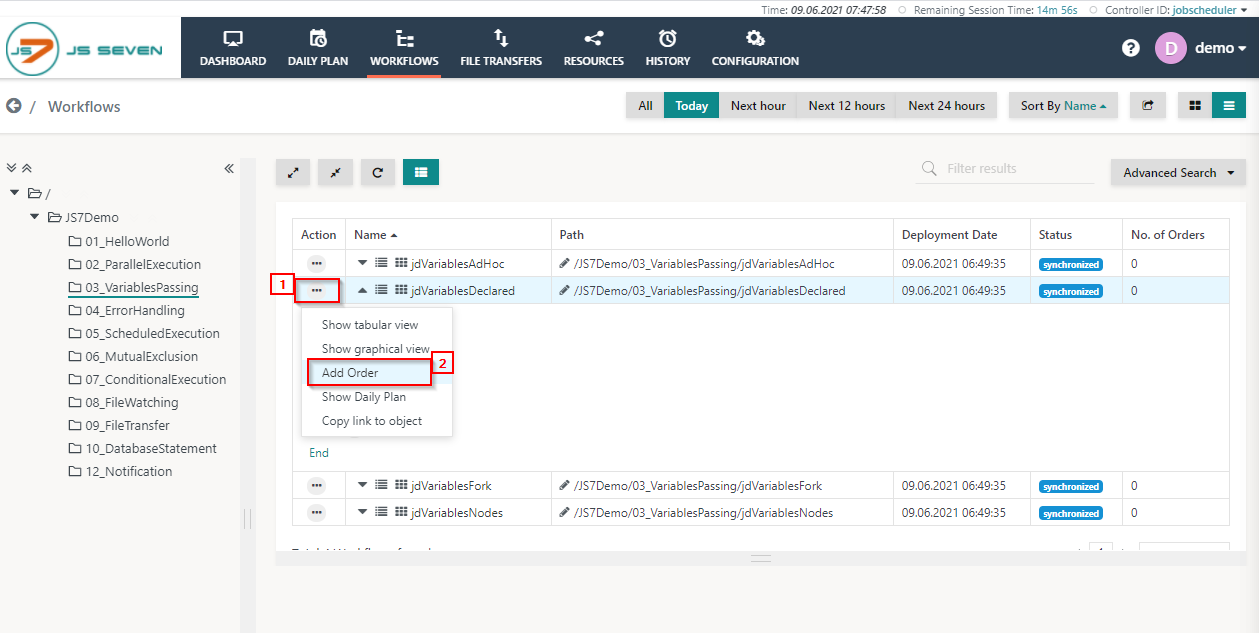
- When clicking Add Order a popup window will appear.
- You can add an Order ID or leave the Order ID value empty, it will then use a default Order ID.
- With the Modify Variable link you can edit the value of the variable assigned the order.
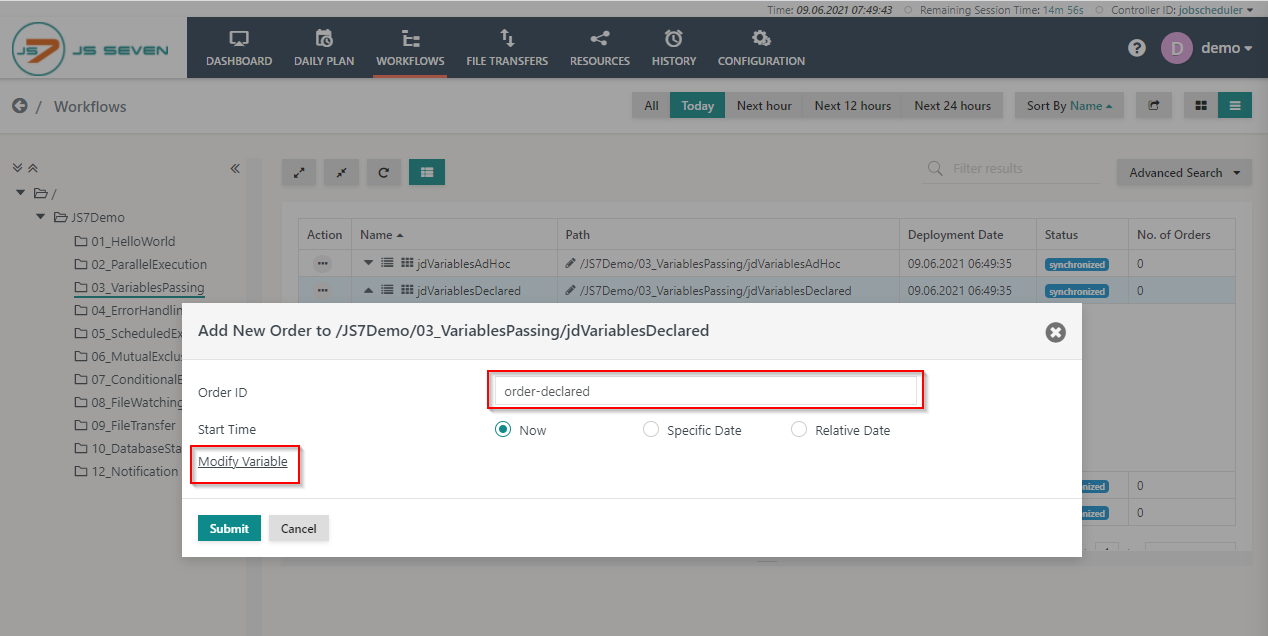
- Click Modify Variable and from the drop-down menu select the name of the variable that you want to modify. The screenshot shows the variable flight_destination with the default value Berlin. The variable and default value are declared with the workflow definition. Click the Submit button to add the order to the workflow.

- To check the status of the order click the name of the workflow. This will make the Order History panel appear.
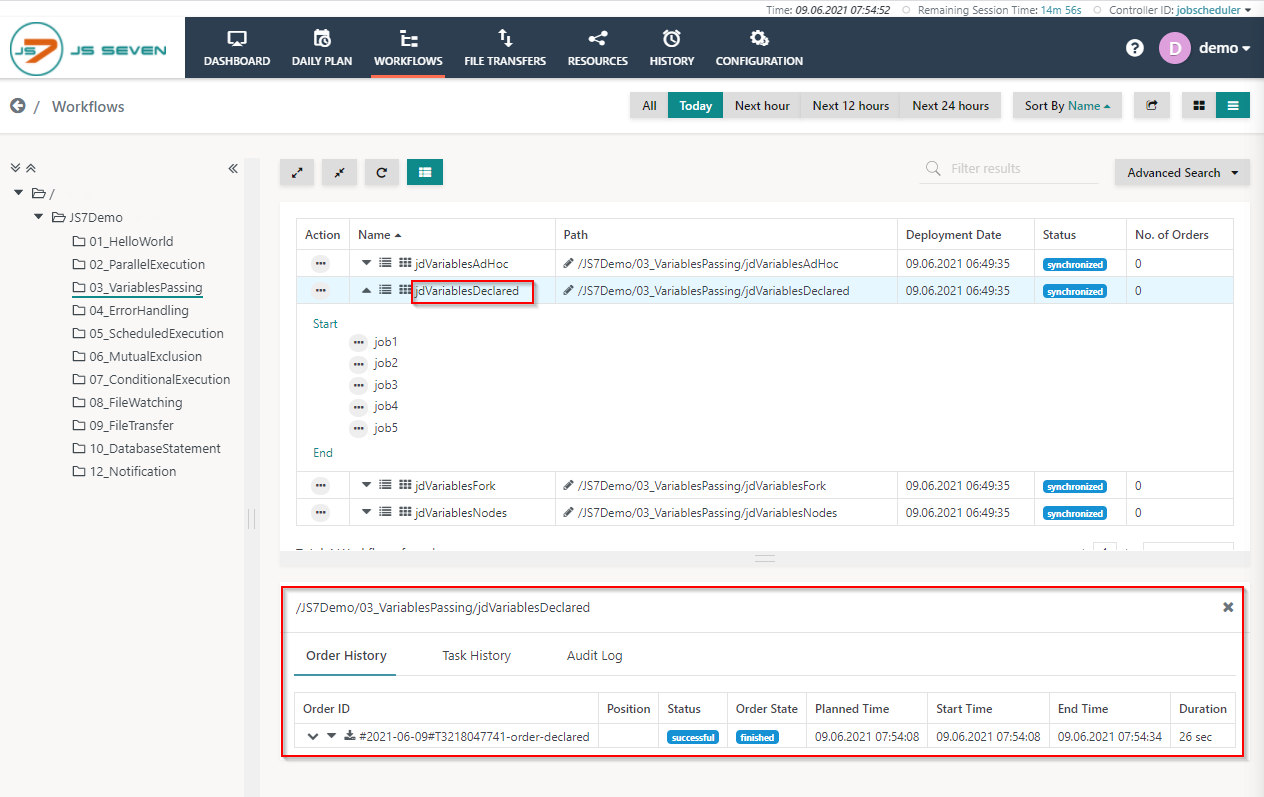
- From the Order History panel you can verify if the order is successful and finished. Click the Order ID to see log output created by jobs executed for this order.

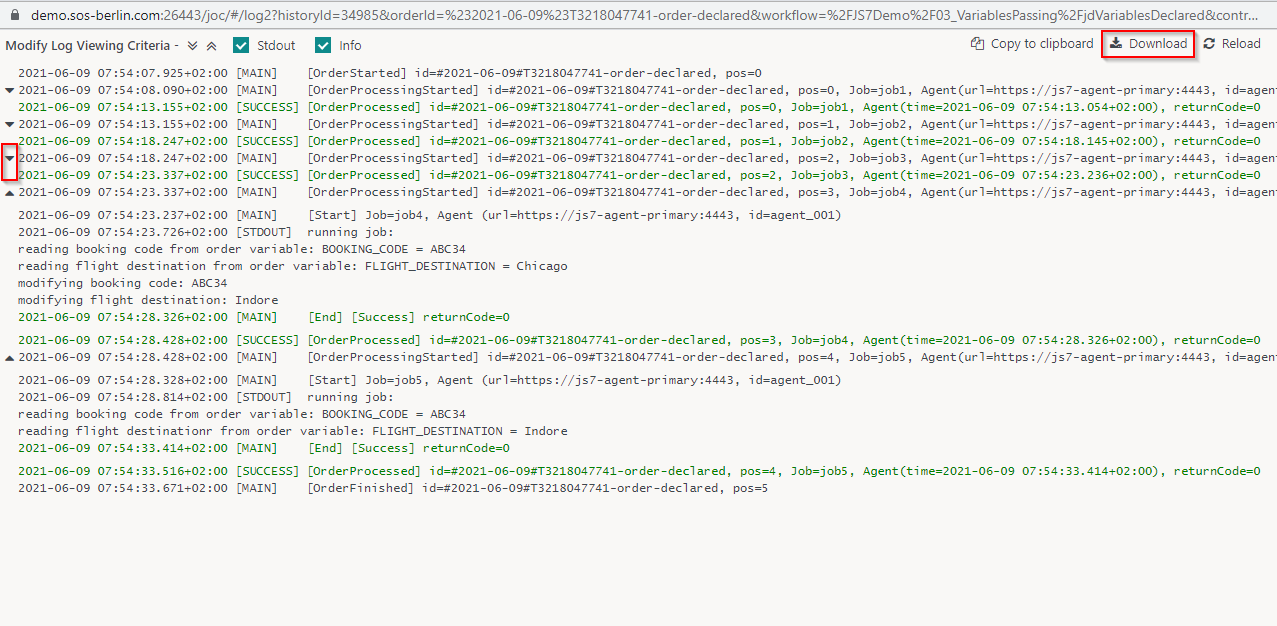
- A log view window will open and the order log will be displayed. This log contains output to stdout/stderr from all jobs executed by the order.
- You can download the log file by clicking the Download button from the upper right corner of the log view window. Also, you can expand and collapse the individual job output using the chevron icons from the left upper corner of the log view window.
Overview
Content Tools