Mohit Shivhare
Introduction
The SOS website offers the Try Out option form to request an immediate demo for product JS7. When requesting the demo you will receive a welcome e-mail that includes an invitation link and credentials to access the JS7 demo.
After clicking the Try-Out: Login to JS7 link from the welcome e-mail, you will be redirected to the Login window of JOC Cockpit. Use the account and password that you received with the welcome e-mail and log in to the JOC Cockpit window.
After login, you will be presented the initial view, which is referred to as the DASHBOARD, for explanations see Dashboard View. The Dashboard gives a bird's eye view of the JS7 operational status.
To run Workflow from the JOC Cockpit, you need to switch to the WORKFLOWS view. From the left panel, you can see the folder tree structure expand the folder by clicking the arrow.
After expanding the top folder, all the show sub-folders will display, each folder contains one or more workflow.
All examples in the demo environment follow the same pattern. Each job chain demonstrates a different JS7 feature.
Shell Script Workflow
The example 01_HelloWorld demonstrates the JobScheduler's capability to execute the shell jobs.
- To start the HelloWorld example, click on the 01_HelloWorld. From the right panel, you can see the workflow list, e.g. jdHelloWorld.
- Click on the arrow button to expand the workflow and view the number of jobs available in the workflow.

- 01_HelloWorld: the workflow includes a single job with a shell script as executable.

- To execute the workflow 01_HelloWorld click on the action menu of the workflow a drop-down menu will appear. Click on the Add Order button

- On clicking the Add Order. A popup window will appear.
- You can add the Order ID or leave the Order Id value blank it will take the default Order Id to process the Order. Click on Submit button.

- To check the status of the Order click on the Workflow name with this new Order history panel will appear.

- From the Order history panel, you can see the Order is successful and finished. Click on the Order ID to open the detail logs of execution.

- A log window will open and the order log will be displayed. The order log contains log output from all jobs executed by the order.
- You can download the log file by clicking the Download button from the upper right corner of the log window.

Parallel Execution
The JS7 - Fork / Join Instruction is used to execute the jobs in parallel within a workflow. Fork instruction allows the creation of a parallel number of branches and processes any further instructions and jobs. Branches allow to include any number of instruction and jobs. When an order is executed in a workflow the all the child process first competed in the execution and after the successful execution of the child process, the parent process will complete the task.
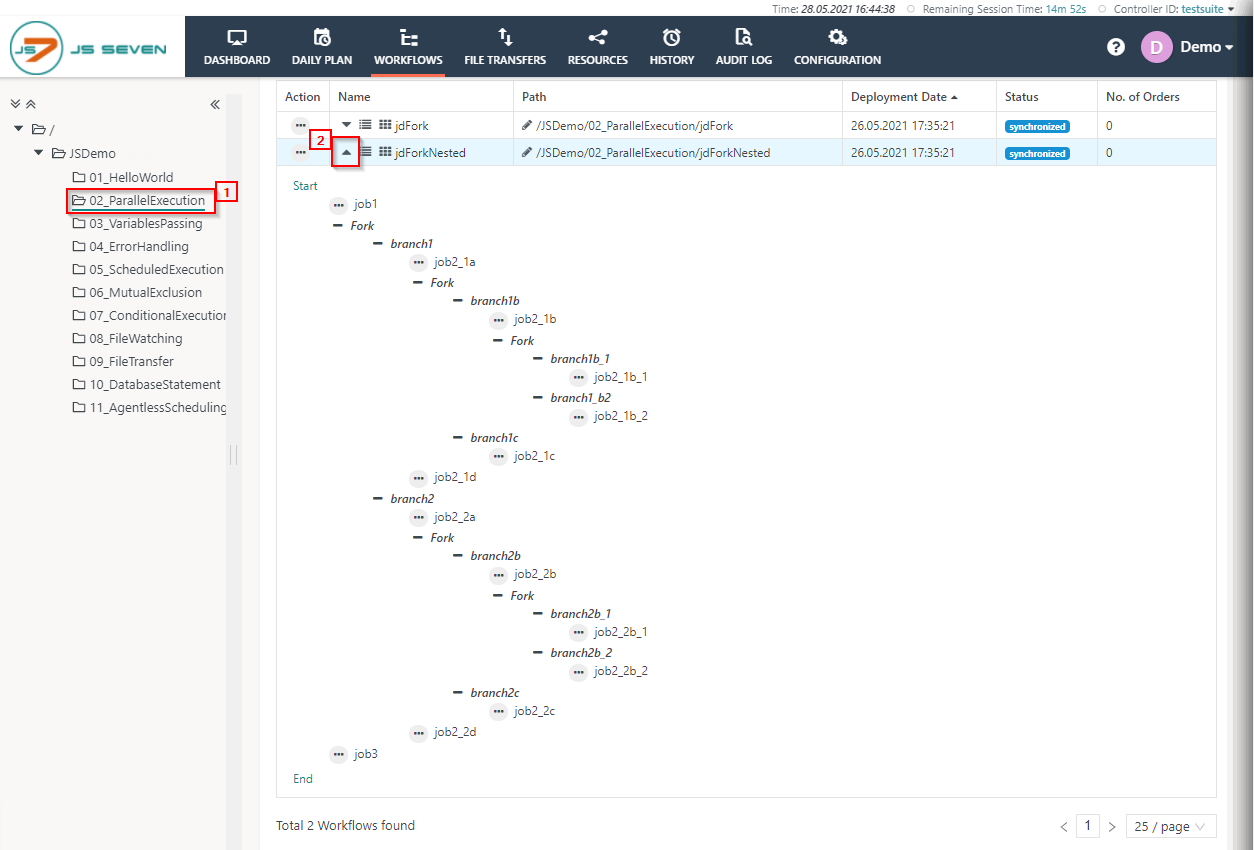
In this example, two workflows are available jdFork and jdForkNested.
jdFork
jdFork contains a simple example of parallel execution with two branches branch1 and branch2. While executing the Order in the workflow and when the order reached the fork statement it execute both the branches and complete the execution after that further job with executing and complete the execution process.
- Click on the folder 02_ParallelExecution and expand the jdFork workflow.

- To add the order in the workflow. Click on the action menu of the workflow and click on Add order button from the drop-down menu.

- On clicking the Add Order. A popup window will appear.
- You can add the Order ID or leave the Order Id value blank it will take the default Order Id to process the Order. Click on Submit button.

- To check the status of the Order click on the Workflow name with this new Order history panel will appear.

- From the Order history panel, you can see the Order is successful and finished. Click on the Order ID to open the detail logs of execution.

- A log window will open and the order log will be displayed. The order log contains log output from all jobs executed by the order.
- You can download the log file by clicking the Download button from the upper right corner of the log window. Also, you can expand and collapse the individual job output using the arrow button from the left corner of the log window.

jdForkNested
jdForkNested contains the nested branches in a workflow and with every branch multiples jobs are added to execute the nested workflow. All the parallel branches execute at the same time and complete the execution.
- Click on the folder 02_ParallelExecution and expand the jdFork workflow.
- To add the order in the workflow. Click on the action menu of the workflow and click on Add order button from the drop-down menu.

- On clicking the Add Order. A popup window will appear.
- You can add the Order ID or leave the Order Id value blank it will take the default Order Id to process the Order. Click on Submit button.

- To check the status of the Order click on the Workflow name with this new Order history panel will appear.
- From the Order history panel, you can see the Order is successful and finished. Click on the Order ID to open the detail logs of execution.
- A log window will open and the order log will be displayed. The order log contains log output from all jobs executed by the order.
- You can download the log file by clicking the Download button from the upper right corner of the log window. Also, you can expand and collapse the individual job output using the arrow button from the left corner of the log window.
Variable Passing
The JS7 - Variables are used to execute the job using different parameters on the order or on a Workflow. Variables are declared by specifying a name and datatype. We can use variable at different places
- In the Environment Variable: The environment variable available for all the Jobs in a workflow.
- In the Job Resources: You can assign variable in the job resources with this the variable are assigned to the whole workflow or on the jobs.
- In Order Variable: You can assign values to the workflow while adding an Order. The default and require value is assigned to the order.
The folder 03_VariablePassing contains the workflow based on the variable passing. There are four workflows available with different use cases. You can add the order from the action menu of the workflow and from the history you can review the detailed information about the workflow.
- Click on the folder 03_VariablePassing from the and expand the jdVariablesFork workflow.

- To add the order in the workflow. Click on the action menu of the workflow and click on Add order button from the drop-down menu.

- On clicking the Add Order. A popup window will appear.
- You can add the Order ID or leave the Order Id value blank it will take the default Order Id to process the Order.
- With the help of Modify Variable button, you can edit the value of the variable assigned to the workflow.

- Click on the Modify Variable and select the variable name you want to modify from the drop-down menu. e.g; I have selected the variable flight_destination and the default value is India. You can change it according to you and click on Submit button to add the Order in a workflow.

- To check the status of the Order click on the Workflow name with this new Order history panel will appear.

- From the Order history panel, you can see the Order is successful and finished. Click on the Order ID to open the detail logs of execution.

- A log window will open and the order log will be displayed. The order log contains log output from all jobs executed by the order.
- You can download the log file by clicking the Download button from the upper right corner of the log window. Also, you can expand and collapse the individual job output using the arrow button from the left corner of the log window.

Overview
Content Tools