Intro
In this use case separate Calendars are used to configure a basic working week - i.e. Monday to Friday as "standard working days" - and annual holiday Calenders. This approach results in changes to the administration procedure in comparison with the single Calendar configuration described in the Calendar Use Cases - Managing Working Day Calendars article. The changes are:
- administration
- it is easier to see which Calender or Calenders apply for a particular Job or Order (Show assigned Calendar function)
- If separate holiday calenders are specified for each year then these have to be individually assigned / removed from each Job and Order at the end of the year.
- improved performance as calendars are ignored when their validity period does not apply. WOULD THIS ALSO APPLY WITH VALIDITY SET??
In this use case the "standard working week" of Monday to Friday is configured as an Included Frequency in a Working Day Calendar and Holidays are configured as an Included Frequency in a Non-Working Day Calendar. SCREENSHOTS FOR SEPARATE ANNUAL HOLIDAY CALS This separation of function brings a degree of flexibility and provides a more transparent configuration than the single Working Days Calendar configured in the Calendar Use Cases - Managing Working Day Calendars article.
Configuration Steps
Fall a) Einrichten eines Non-Working Day Calendars und Zuweisen zu einem Auftrag gemeinsam mit einem Working Days Calendar
Configure a Mo - Fr Working Day Calendar
Create a second Working Day Calendar similar to the wkg_day_mo-fr-hol Calendar created in the Calendar Use Cases - Managing Working Day Calendars article and configure a Monday to Friday Included Frequency in this calendar.
At this point the Create Calendar modal window will look like this:
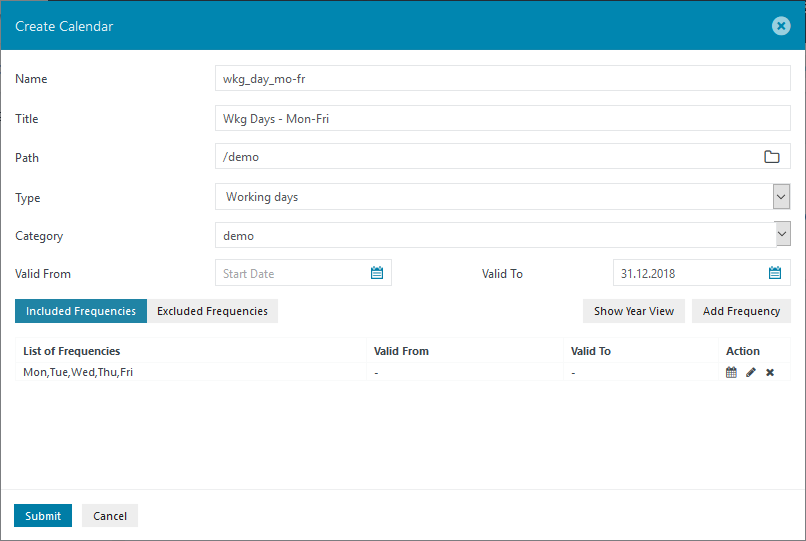
Now click on Submit to save the Calendar.
Configure a Non-Working Day Calendar for Holidays
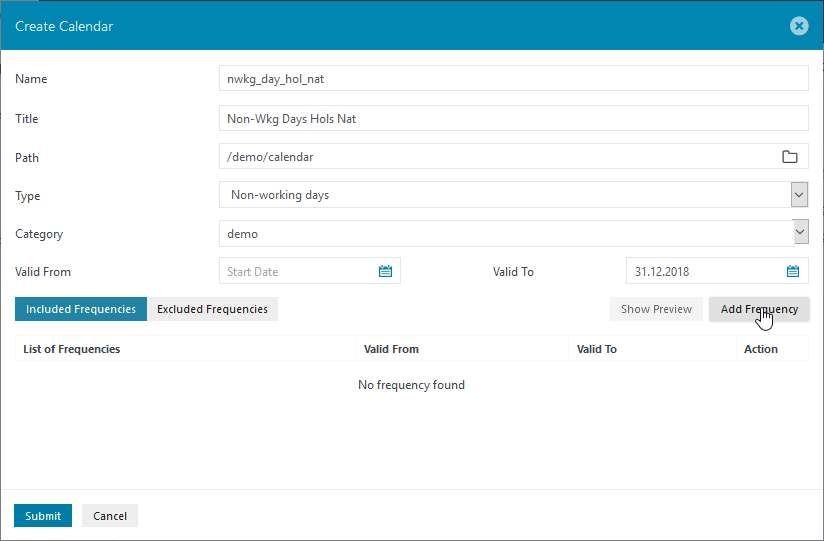
Next, create a Non-Working Day Calendar that is valid for the same period as the working day Calendar described above - i.e. to the 31st Dec. 2018.
Then specify the National Holidays. Note that in contrast with the Calendar described in the Calendar Use Cases - Managing Working Day Calendars article, in which Holidays were configured as Excluded Working Days, in this use case they will be configured as Included Working Days.
To configure the Calendar, ensure that the Included Frequencies tab is selected (the default setting), and then click on Add Frequency as shown in the next screenshot:
Now configure the Frequency for the National Holidays for 2017 - in this Use Case we will be using Holidays from the United Kingdom and selecting all the days.
Click on Add Frequency to note the configuration and then change the Year to 2018 and again select all days. The modal window should now look like this:

Once Add Frequency is clicked for the 2018 holidays the window will appear as shown in the next screenshot:

Note the configuration by clicking the Close button and then click Submit in the Create Calendar window to save the Calendar configuration.
Configuration Tip
This approach to Calendar configuration simplifies administration as individual Frequencies can be deleted from, edited and added to a Calendar without the necessity of a new Calendar having to be assigned to Orders. For example, the National Holiday Frequency can be deleted in January 2018, and the Holiday Frequency for 2019 added in Autumn 2018, both of which will result in performance improvements.
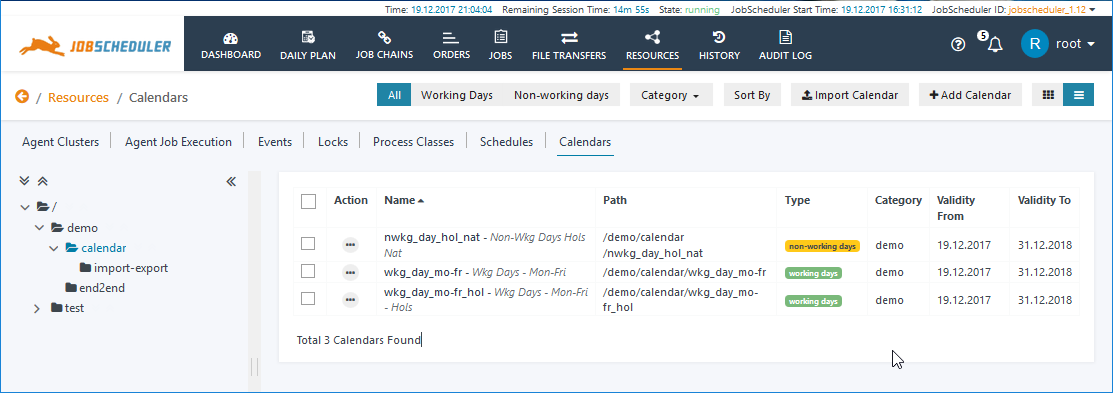
Once the Holiday Calendar has been configured the Resources / Calendars folder should look similar to the following screenshot:
Assign the Calendars to the Order
Now go to the Job Chains View to assign the Working Days and Non-Working Days Calendars configured in the first part of this article.
For the purpose of this demonstration a second Order - order_cs - has been configured alongside the original Order that was configured for the Managing Working Day Calendars use case.
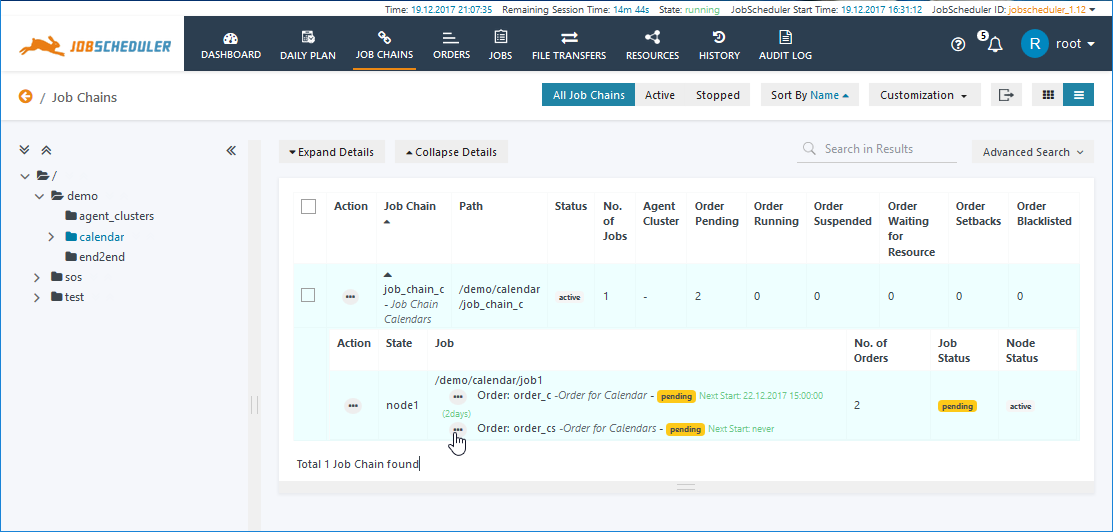
Now click on the Additional Options menu for the order_cs as shown and select Set Run-time.
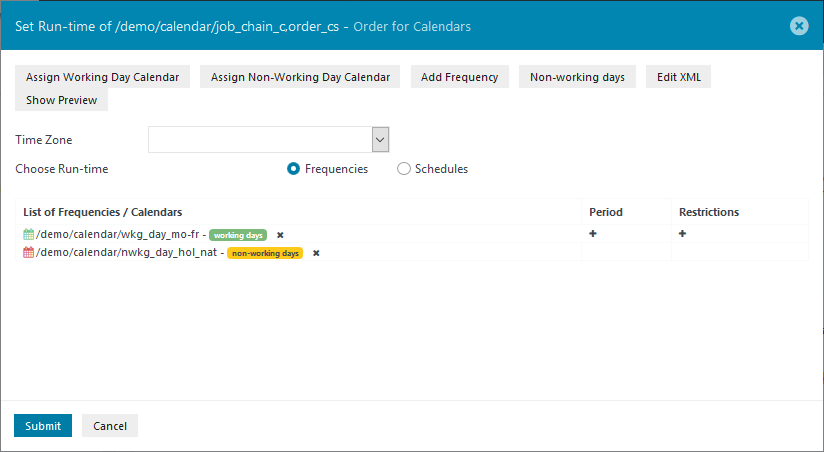
Assign the wkg_day_hol_nat and nwkg_day_hol_nat Calendars by opening the relevant Assign Working and Assign Non-Working days links in the Set Run-time modal window.
The Assign Non-Working day link will open the following selection window:

After selecting each Calendar, click on the Apply button at the foot of the window (not shown in the screenshot) to note the configuration.
Once both Calenders have been selected, click on the Submit button at the foot of the Set Run-time window to save the configuration.
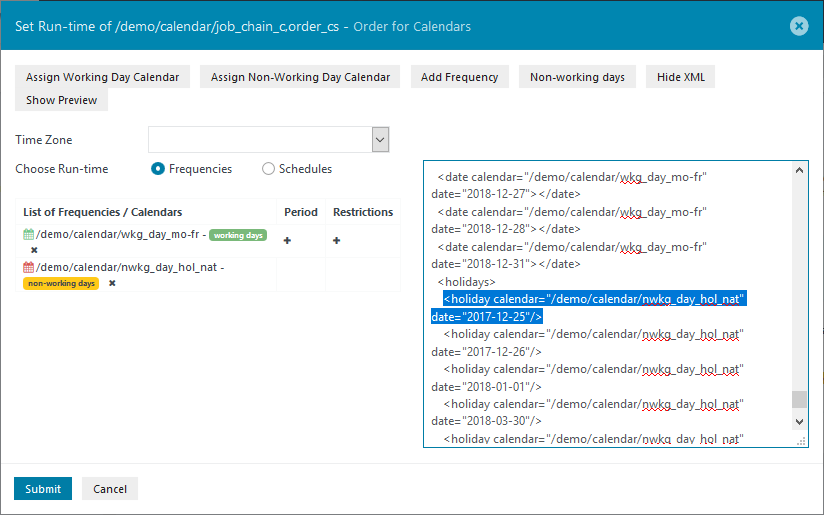
Inspecting the Configuration
The Edit XML function in the Set Run-time window can be used to inspect and - if necessary edit - the configuration for each individual day as shown below. Note that in contrast to the configuration described in the Calendar Use Cases - Managing Working Calendars article, Non-Working Days can be readily identified as such in the XML.
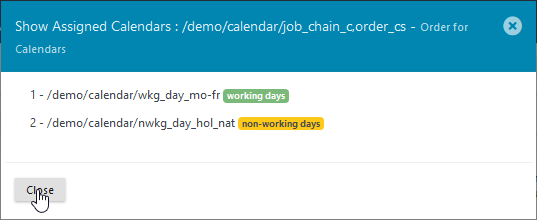
In addition the Show Assigned Calendars item in the Order's Additional Options menu allows the assigned calendars to be checked.
Specifying a Period (Run-time)
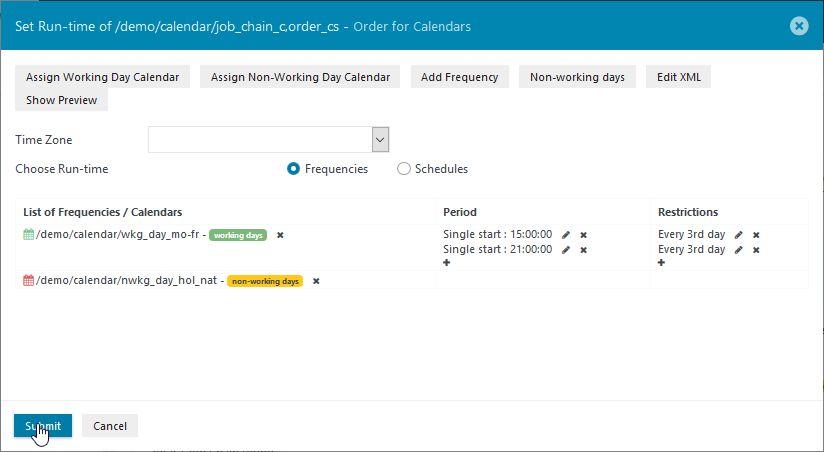
A Period, specifying the Repeat Interval, Start Time and behavior on Non-Working days should now be configured for the Working Day Calendar. This is done in the New Period modal window which is opened by clicking on the + symbol in the Period column of the Set Run-time window (shown in several screenshots above). The configuration in the New Period window shown should be self-explanatory.

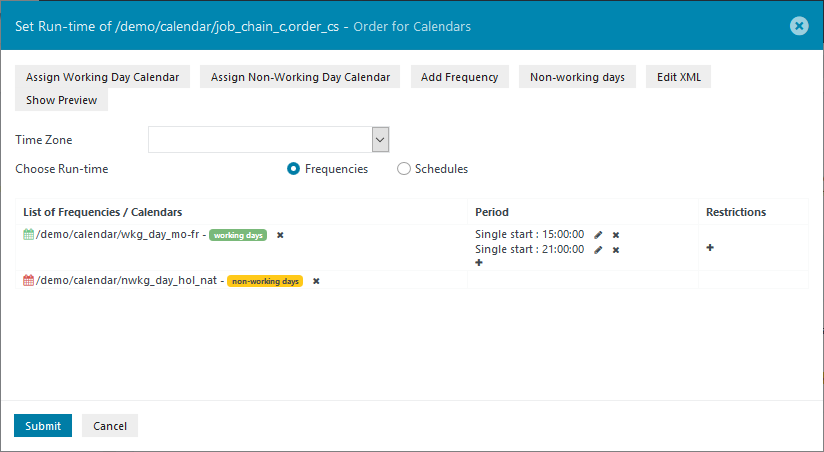
After a second Single Start Period starting at 21:00 has been configured the Set Run-time window will appear as shown in the following screenshot:
Show Daily Plan
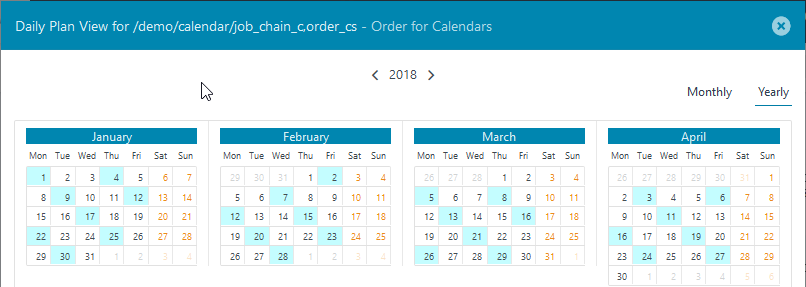
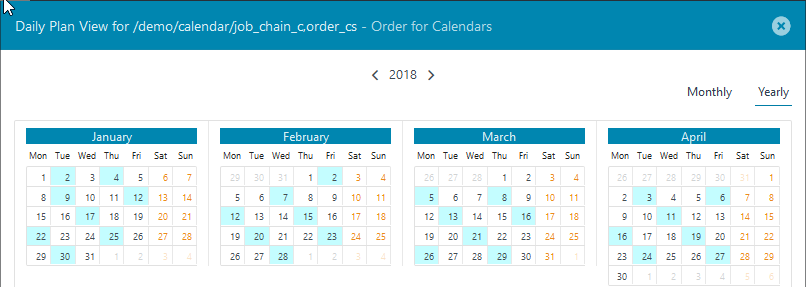
The Show Daily Plan item in the Additional Options menu for the order_cs Order can be used to show how the configuration comes together:

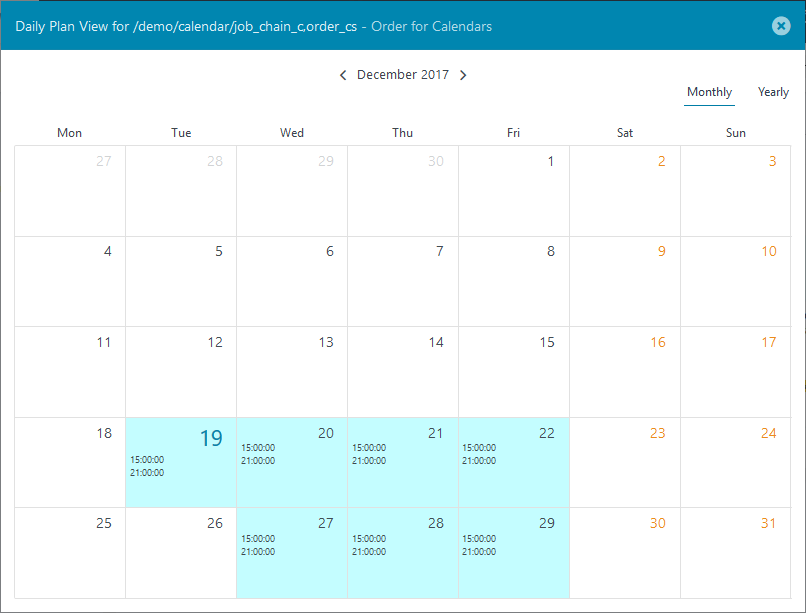
The screen shot shows the Monthly view for December 2017, with Christmas and Boxing Day holidays clearly indicated:
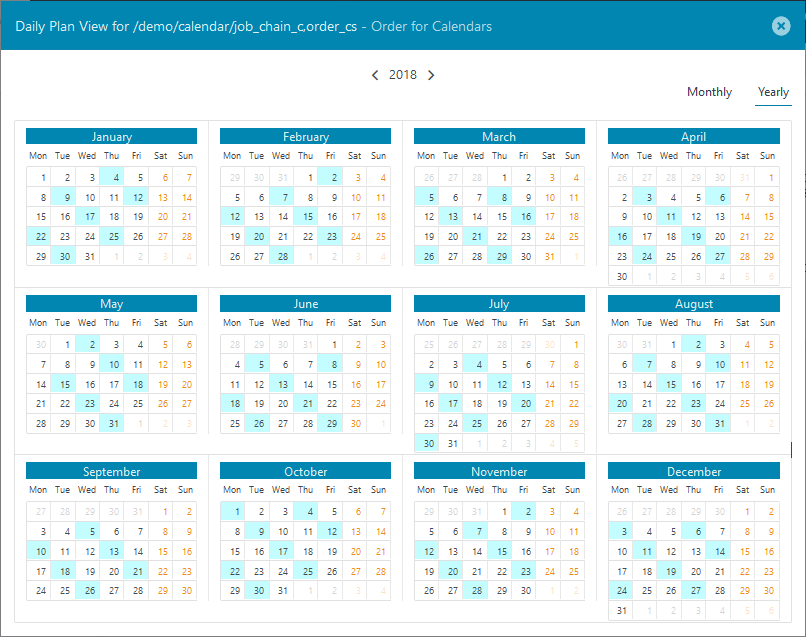
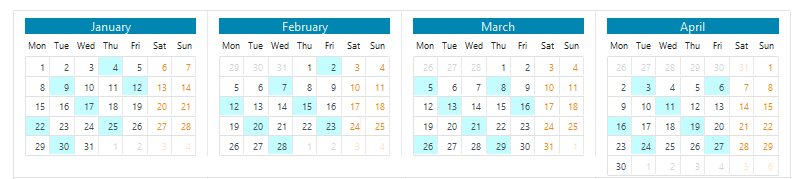
The next screenshot shows the Yearly view for 2018:
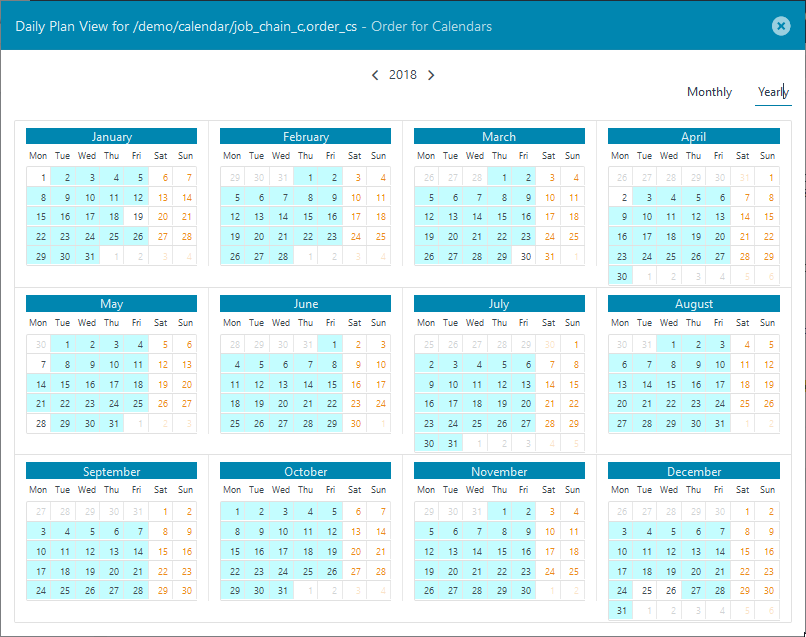
Easter (Friday, the 30th March and Monday, the 2nd April), for example, is clearly shown as Non-Working Days.
Using Restrictions to Configure Job/Order Starts for Every 3rd Working Day
Reopen the Set Run-time modal window fr the order_cs Order and then click on the + symbol in the Restrictions column:

This will open the Add frequency : Recurring Days modal as shown in the next screenshot:
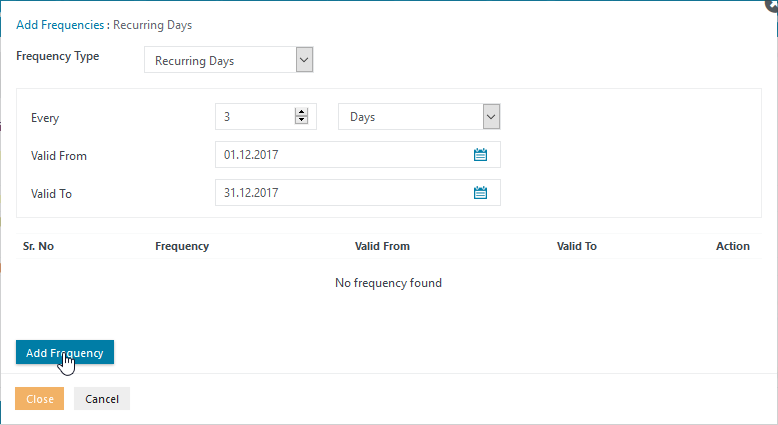
After configuring a Recurring Days Frequency for December 2017 as shown in the screenshot above, repeat this procedure for Every 3rd day for 2018, valid from the 1st January to the 31st of December. In both cases the Valid From date sets the point from which every third day is to be counted. Click on Close once both Restrictions have been set to return to the Set Run-time window, which will appear as shown in the next screenshot:
Show Daily Plan
The effects of the Every 3rd day restriction can be seen in the Daily Plan view for the order_cs Order shown below:
The regular pattern is only changed when the execution date falls on one of the holidays specified in the Non-Working days Calendar. The behavior on Non-Working days was defined for the Order in the Period modal window and described in the Period section above. For both run-times (15:00 and 21:00) the On Non-Working days setting was left at the default suppress execution.
This has the following effects:
- As the 1st of January is a non-working day, execution is suppressed.
- Note that this means that there is no execution between the 27th December 2017 and the 4th January 2018. This is even though the 1st of January was defined as a Valid From date for the Restriction.
- Easter (30th March and 2nd April) and Christmas (25th and 26th December) are simply ignored.
A number of behaviors can be specified for each Period in addition to the default suppress execution. These are:
- execute on preceding working day
- execute on succeeding working day
- the default suppress execution and
- ignore non-working day
To demonstrate the effects these settings can have on the execution dates open the Show Run-time modal window for the Order and then click on Edit Period (the pencil symbol), which will open the following window:
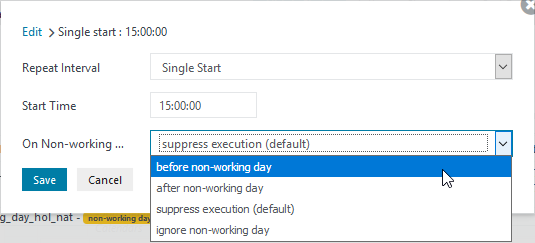
The effect of the remaining On Non-Working Day settings on execution dates will be described next.
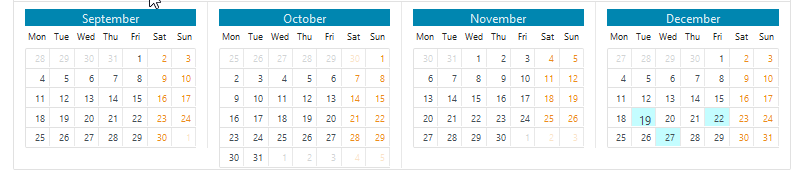
Execute on preceding working day
The last execution date in 2017 is the Wednesday, 27th of December and the last Working day the 29th. The execution for the Monday, 1st January 2018 will be moved to the last working day in December, Friday the 29th as can be seen in the next two screenshots showing part of the Daily Plan for 2017 and 2018:
Execute on succeeding working day
With this setting the Order will be executed, for example, on the day after the first of January as shown in the next screenshot:
Ignore non-working day
This setting means, for example, that execution on the 1st of January 2018 will take place as can be seen in the screenshot below: