Introduction
JobScheduler Calendars can be configured to meet a wide range of business requirements.
Article Scope
This article describes how to configure a basic Working Day Calendar. It is not intended to provide a description of all the possible configuration items.
Configuration Steps
Calendars are created in the Resources / Calendars view by clicking the Add Calendar button as shown in the first screenshot:

This will open the Create Calendar modal window that should be filled out as shown in the next screenshot:

Note that additional fields (Option for Reason, Select Reason, etc.) may be shown at the start of the Create Calendar window. The information for these fields is for the Audit Log and settings in the User's account determine whether or not these fields are shown and are mandatory. See the Reasons setting section of the Audit Log article for more information.
The Name, Type, and End Date fields are mandatory. The Category, Path and Valid From Start Date fields are not mandatory.
The Path is used to ....
If a Valid From Start Date is not set then the current date will be used.
The Add Frequency button will become active once the above information has been entered. Leave the Included Frequencies tab active.
Frequencies are sets of ... description / definition
Click on the Add Frequencies button and in the the Weekdays Tab, which is the default tab, fill out the Weekdays section as shown in the next screenshot.

Clicking on the Add Frequency button as shown above will cause the days selected to be noted as shown in the next screenshot.
Note that no configuration information has not yet been saved.

Click on the Calendar icon under the Action header. This will open a preview of
Now deactivate the current date field - in this case the 24th November - by clicking on it once. This will cause the field background to be colored orange.
Now click on the Close button to close the preview.
and then click on close in the Add Frequencies modal to return to the Create Calendar window.

The Show Year View button could now be used to reopen the Calendar Preview shown above.
Now click on the Excluded Frequencies tab to add days on which it will not be worked and then on Add Frequency.
In the Add Frequencies window now select the National Holidays tab and then a country. This will cause a list of official national holidays to be displayed. Select All and then enter the current year (in this case 2017) in the Year field. Click on Add Frequency. This will result in the following screenshot:

As our Included Frequencies were up to 2018, holidays should also be added for that year.

The list of excluded working days will now appear as shown in the above screenshot.
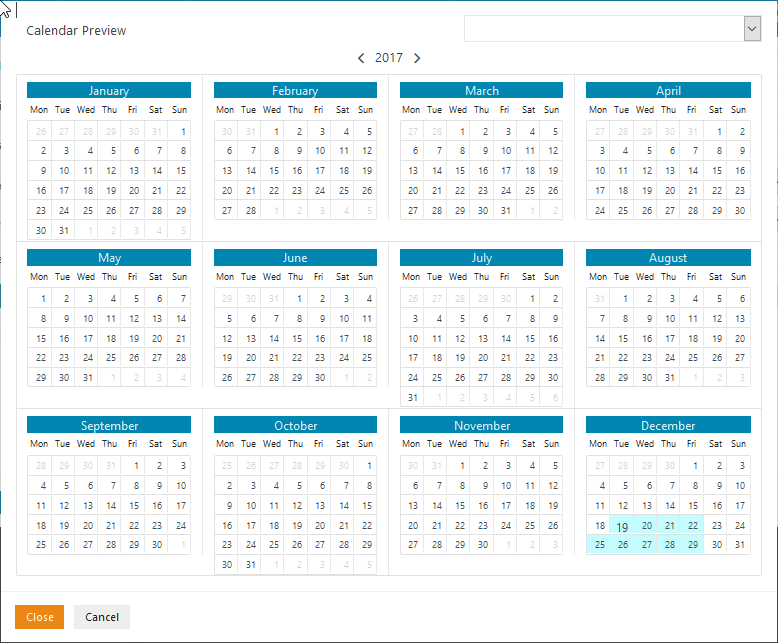
Clicking once again in the Calendar icon below the Action header will reopen the Calendar Preview window.
Selecting the All Frequencies in the Select box at the top right of the window and the Year 2018 will show the following:

Note that days selected in the Holiday tab are marked as active (orange background).
Now click on the Close button to return to the Add Frequencies window and then Close again to return to the Create Calendar window.
Then use the Submit button to save the configuration and return to the Resources / Calendar view as shown in the next screenshot.

This Calendar is now ready to be used for an Order or Job.
Go to the Job Chains view and select an Order. The Job Chain and Order to be used for this article are shown in the screenshot below.
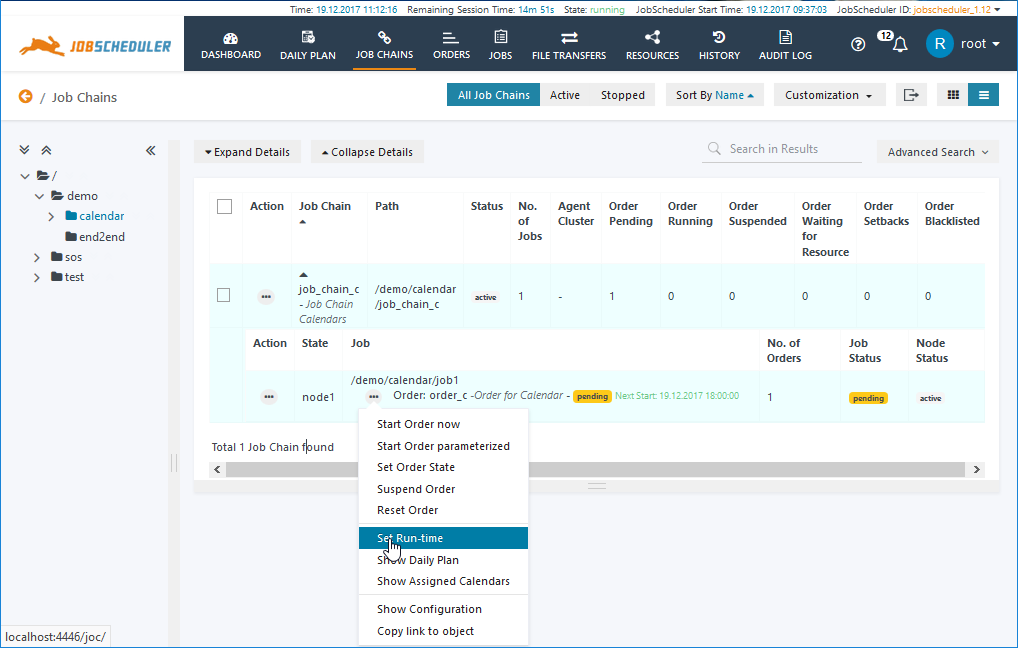
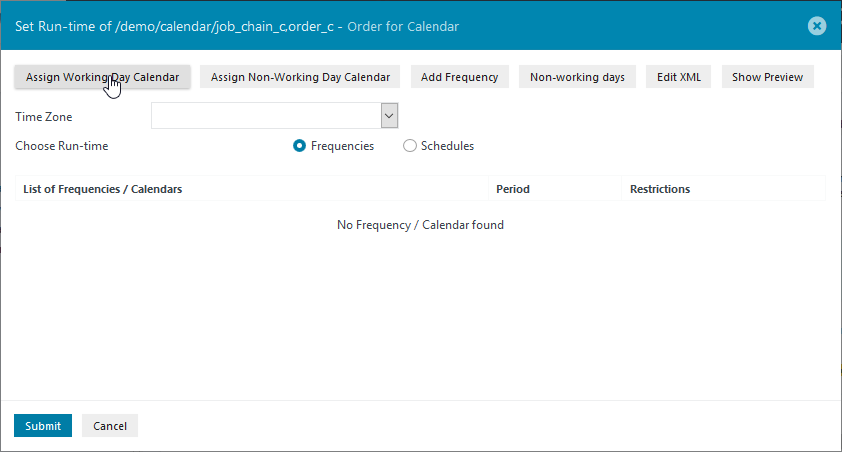
Open the Set Run-time modal window for the Order as shown.

Use the Assign Working Days Calendar button to open the Calendar selection window.
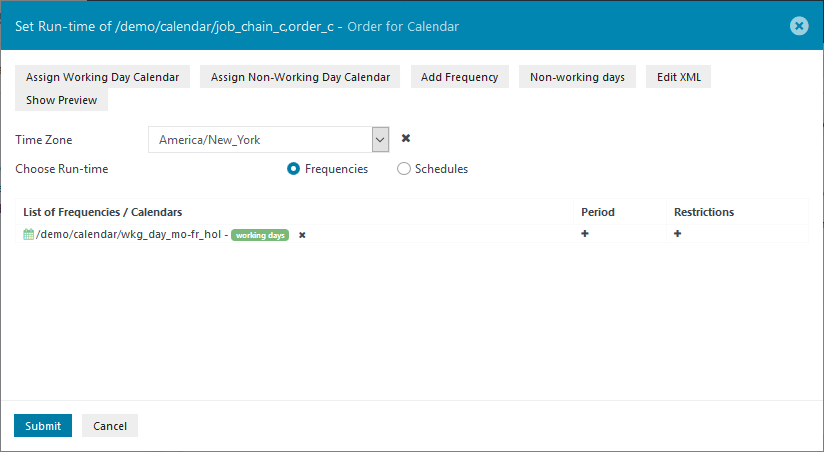
Select the calendar and then click on the Apply button - not shown in the screenshot - to return to the Set Run-time modal window which will now appear as shown below:
The next screenshot shows how the Edit XML button in the Set Run-time window can be used to inspect and edit individual entries in the Calendar configuration:

The Period function is used to configure the time or times at which the job will run on the days specified in the Calendar and is started by clicking on the + symbol alongside the relevant calendar.This will open Create Period modal window.
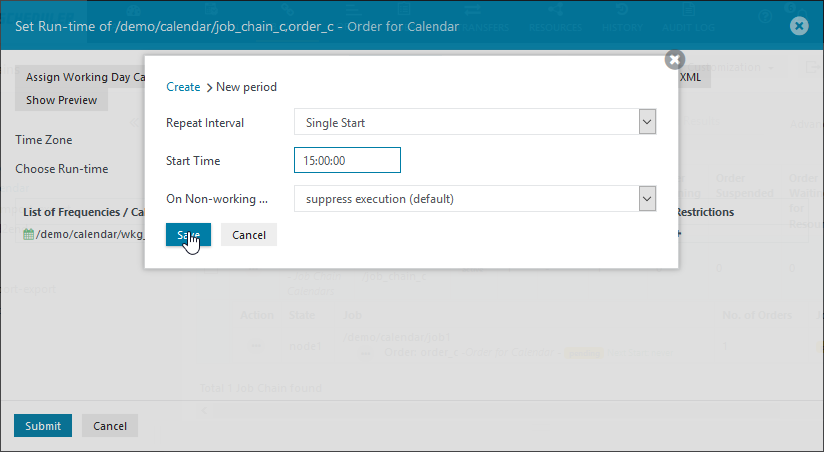
Clicking the Save button now will cause the Period configuration to be added to the Order. The next screenshot shows two Single Start Periods - at 15:00 and at 21:00.

Note that the changes made to the configuration will only be saved when the Submit button is clicked.
Clicking the Submit button will close the Set Run-time modal window and return to the Job Chains view.
A short time after this is carried out the Next Start time for the Order should change from 00:00:00 to the correct value - in this case 24.11.2017 21:00.
