The steps described below should be carried out when making a new installation of the JobScheduler, in the order presented below:
- Database Configuration
- The JobScheduler Master requires a database. (Only the JobScheduler Agent can be operated without a database.) The JobScheduler needs the database to archive logs and to remember Job and Order states. A JobScheduler agent doesn't have own Jobs or Orders and the logging is made by the JobScheduler which calls the Agent. So an Agent is running without a database.
- You find the supported database management systems listed in the Which Database Management Systems are supported by JobScheduler? article.
- Because of licensing restrictions when used with MySql®, Sybase or Microsoft® SQL Server databases, a JDBC® driver appropriate to the database version used must be provided by end users themselves. Alternatively, a jTDS JDBC® driver, which is delivered with the JobScheduler setup, can be used for Microsoft SQL Server and Sybase databases. Similarly, the MariaDB® driver is delivered with the JobScheduler setup and can be used for MySql Server and MariaDB databases. Drivers for Oracle® Database and PostgreSQL are contained in the JobScheduler setup.
- JobScheduler Installation
- Installation of the JobScheduler is carried out using a setup program. This can be downloaded from the SOS Web-Site for Microsoft Windows® and Linux®.
- For more information see the Which platforms is JobScheduler available for and what platform support is provided? article.
1.1 Requirements
The JobScheduler Master is available for Linux and Microsoft Windows in 64-bit and 32-bit versions: the JobScheduler Universal Agent should be used for all other operating systems..
Requirements for the 64-Bit JobScheduler
- Oracle Java® Runtime Environment (JRE) 64-Bit in version 1.8.x. For Unix®:
- A shell in /bin/sh (or a symlink)
The JobScheduler requires some 64-Bit libraries.These are on Linux:
- linux-vdso.so.1
- libz.so.1
- libpthread.so.0
- libdl.so.2
- libm.so.6
- libc.so.6
- ld-linux-x86-64.so.2
Two components (JobScheduler Object Editor (JOE) and JobScheduler Information Dashboard (JID)) of the JobScheduler are SWT applications which requires an X-window system and GTK2. The installation includes a 64-Bit swt.jar, so you need the 64-Bit libraries:
- libgtk-x11-2.0.so.0
- libXtst.so.6
If you use "Remote Configuration" then the Workload JobSchedulers and its Supervisor JobScheduler should have the same version. Further information about "Remote Configuration" can be found in the Which components will be installed on a client and how will jobs be started there? article.
Requirements for the 32-Bit JobScheduler
- Oracle® Database Java® Runtime Environment (JRE) 32-Bit at least version 1.8.x.
- For Unix®:
- linux-gate.so.1
- libz.so.1
- libpthread.so.0
- libdl.so.2
- libm.so.6
- ld-linux.so.2
Two JobScheduler components (the JobScheduler Object Editor, JOE, and JobScheduler Information Dashboard, JID,) are SWT applications and require an X-windows system and GTK2. The installation includes a 32-Bit swt.jar, but you still need the following 32-Bit libraries:
- libgtk-x11-2.0.so.0
- libXtst.so.6
- For Microsoft® Windows®:
- The library
msvcr100.dllmust be stored inC:\windows\system32and also inC:\windows\SysWOW64on 64-Bit Microsoft® Windows®. - You find the
msvcr100.dllin the Java installation [Java Runtime Environment (JRE) install path]\bin. If you use "Remote Configuration" then the Workload JobSchedulers and its Supervisor JobScheduler should have the same version. Further information about "Remote Configuration" can be found in the Which components will be installed on a client and how will jobs be started there? article..
1.2 Installation Using the Setup Program
The following archive files including installer are available:
jobscheduler_linux-x64.[release].tar.gzfor Linux 64-Bitjobscheduler_linux-x86.[release].tar.gzfor Linux 32-Bitjobscheduler_windows-x64.[release].zipfor Microsoft Windows 64-Bitjobscheduler_windows-x86.[release].zipfor Microsoft Windows 32-Bit
Unpack the archive in an arbitrary directory and change to the extracted directory ./jobscheduler.[release].
The installer can be started as a dialog or in batch mode (see Batch Installation. If you use the installer as a dialog on Unix then it will require an X-Server. Use Batch Installation if an X-Server is not available.
/tmp/jobscheduler.[release]> ./setup.sh
c\windows\Temp\jobscheduler.[release]>setup.cmd
The setup requires administrator privileges on Microsoft Windows. The setup opens a dialog for this on Microsoft Windows if necessary. On Unix a sudo prompt will be open. Don't log in as root on Unix but use sudo!
Under Unix, root privileges are not required. If you want to install the JobScheduler without root privileges, then call:
/tmp/jobscheduler.[release]> ./setup.sh -u
The setup dialog starts with the selection of the language to be used in the setup. This is followed by a greeting, acceptance of the license conditions and the specification of two installation directories. The binaries and libraries are stored under the first path.The configuration and log files are stored under the second path.
For the rest of this documentation the first installation directory will be referred to as $SCHEDULER_HOME and the second as $SCHEDULER_DATA. Specification of the installation directories is followed by the Package Selection dialog.
The forms which are subsequently presented for the configuration of the JobScheduler depend on the packages which are selected for installation alongside the JobScheduler. Further details of the JobScheduler configuration are to be found in the Setup Forms section.
After selection of the required packages, the necessary files are copied into the installation directories. After this, the scripts that configure the installation packages are executed. The processing of the installation scripts run during the setup is logged. This log file is to be found in the folder $SCHEDULER_DATA/logs and is named Install_V[release]_[date][time]_[series number].log.
JobScheduler Operations Center (JOC) can be accessed after the setup by entering the following URL in a web browser (Firefox , Microsoft Internet Explorer®, Chrome® are supported): http://localhost:[port] where [port] is the port specified for the JobScheduler instance during setup.
1.3 Licenses
The JobScheduler is available with a dual licensing model. The GNU GPL 2.0 license is available for Microsoft Windows and Linux.
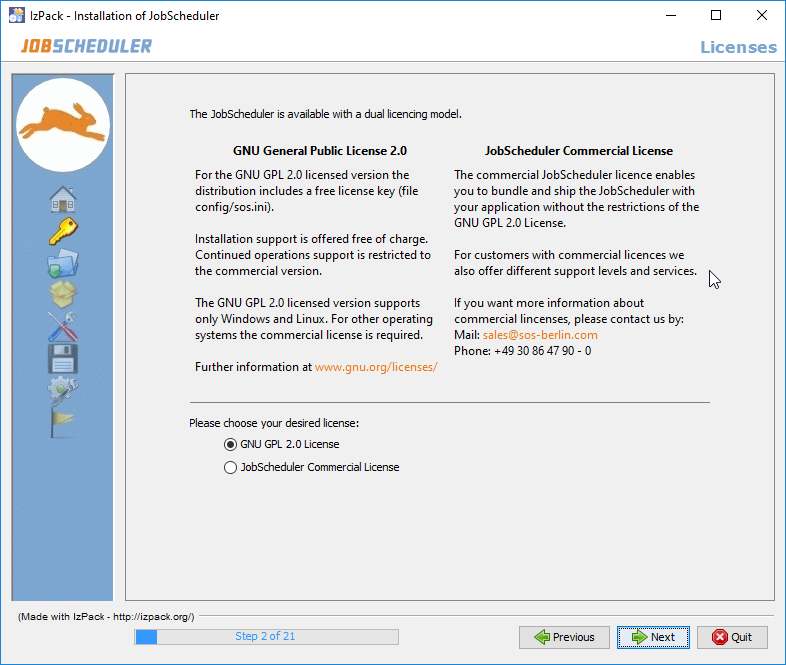
If you choose the commercial license then an input field is shown to enter the license key. The license key will be written in the file $SCHEDULER_DATA/config/sos.ini. If you have problems with the license key you can continue with the installation and edit the $SCHEDULER_DATA/config/sos.ini later.
1.4 Installation Paths
The setup requires two paths. A sub-directory named with the JobScheduler ID will then be added to both these paths. The form for entering the JobScheduler ID will be described later on.
The Installation Path
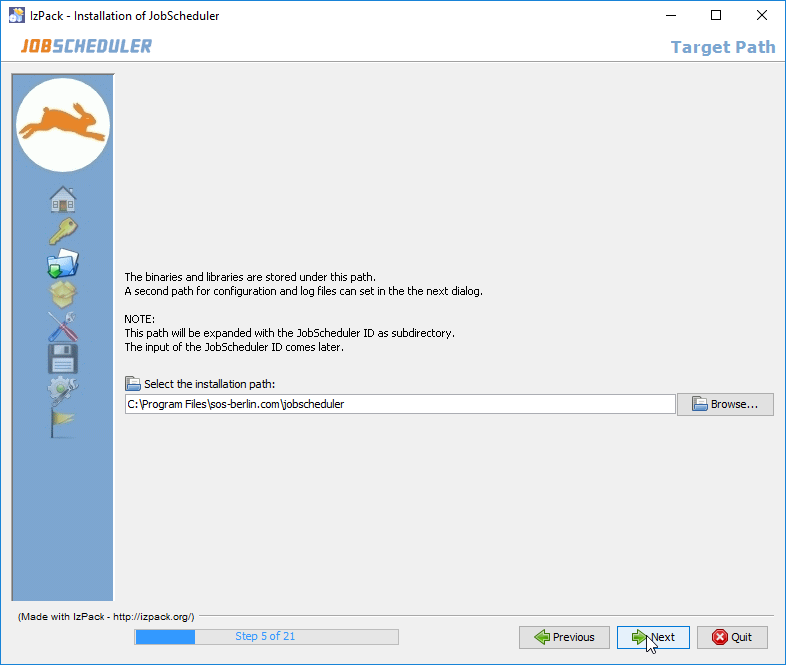
The binaries and libraries are stored in this first path ($SCHEDULER_HOME).The default is:
/opt/sos-berlin.com/jobschedulerfor Unix®. If you use the installer without root permissions then you must choose another folder (e.g./home/[user]/sos-berlin.com/jobscheduler).C:\Program Files\sos-berlin.com\jobschedulerfor Microsoft® Windows®
The Configuration and Log File Path
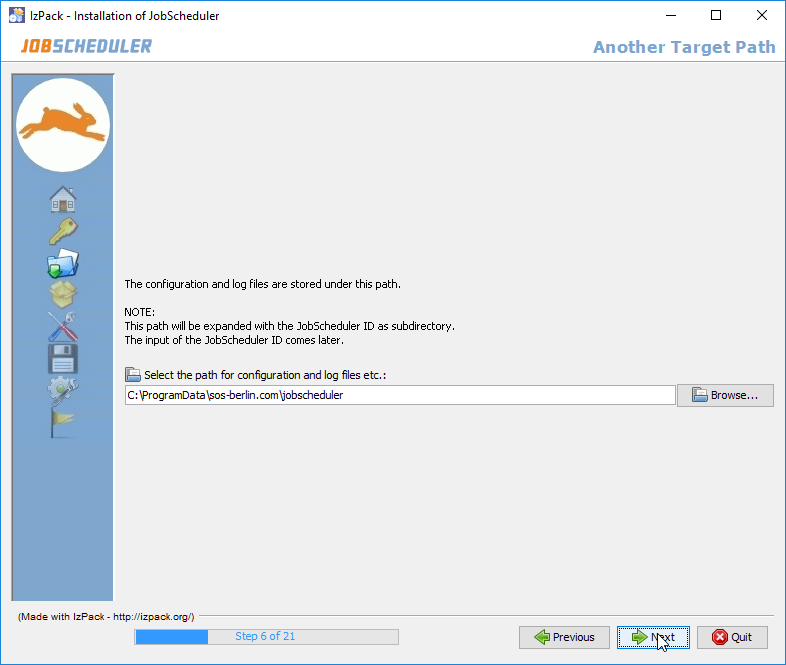
The configuration and log files are stored in this second ($SCHEDULER_DATA) path. The default is:
/home/[user]/sos-berlin.com/jobschedulerfor UnixC:\ProgramData\sos-berlin.com\jobschedulerfor Microsoft Windows Vista/2008/7C:\Documents and Settings\All Users\Application Data\sos-berlin.com\jobschedulerfor Microsoft Windows XP/2003
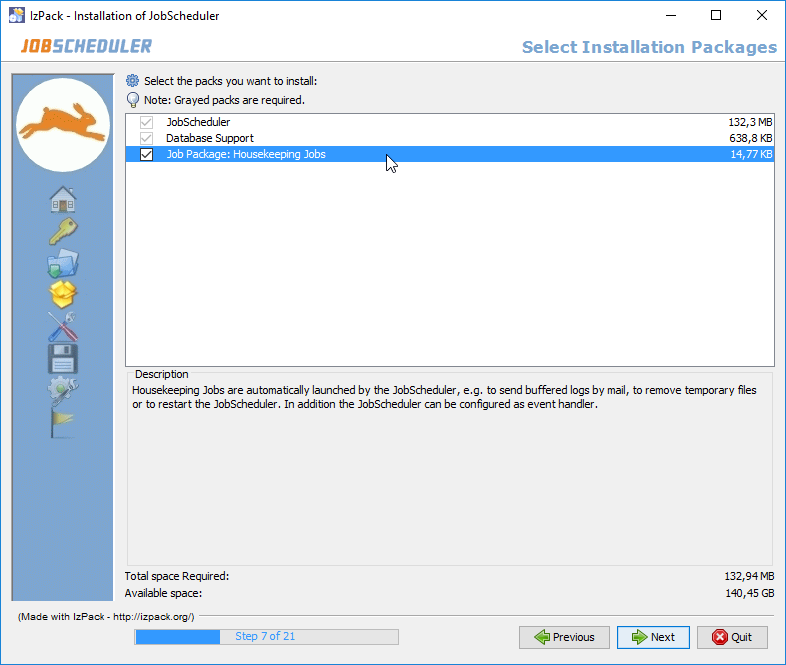
1.5 Setup Packages
The following packages may be selected during setup:
- JobScheduler
- This is the basic package and must be installed. The package contains JobScheduler Operations Center (JOC) which is an Ajax based interface for monitoring and controlling the JobScheduler objects, such as Jobs, Job Chains and Orders. Further the package contains JobScheduler Object Editor (JOE) to create, edit and maintain the JobScheduler objects and JobScheduler Information Dashboard (JID), which provides an overview of the jobs planned and those that have successfully been completed.
- Database Support
- This package must also be installed. MySql (5.x ++), Oracle Database (8.1.x, 9.2, 10g, 11g), Microsoft SQL Server (2000, 2005, 2012), PostgreSQL (8.x, 9.x), and SybaseASE 15.0. are supported.
- Housekeeping Jobs
- Housekeeping Jobs are automatically carried out by the JobScheduler, for example, re-sending temporarily stored protocol mails after a mail server failure; deleting temporary files or restarting the JobScheduler automatically. In addition, the Housekeeping Jobs package enables the JobScheduler to be configured as an event handler.
Package selection is made using the following dialog form:
1.6 Setup Forms
The number of forms shown during setup depends on the packages which have been chosen for installation.
1.6.1 The Basic JobScheduler Forms
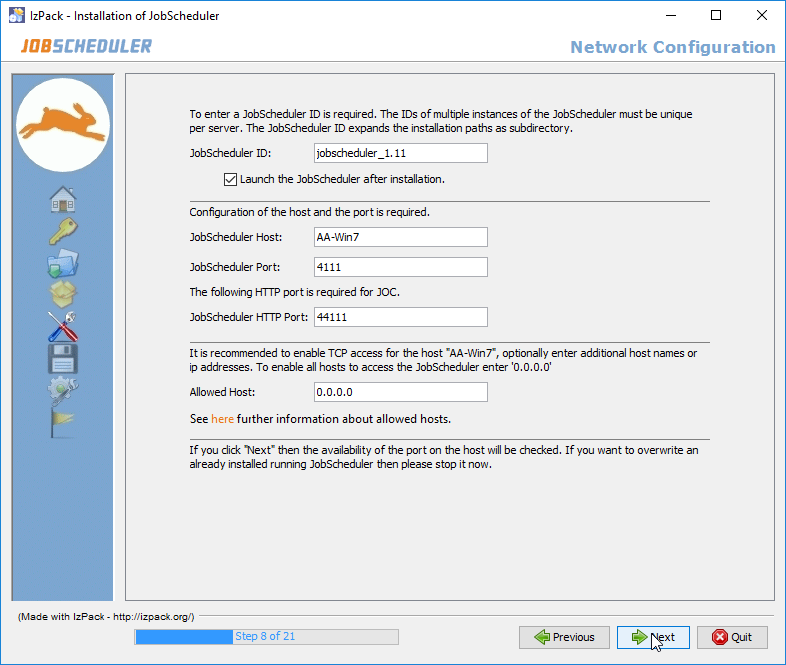
The JobScheduler ID
- The JobScheduler ID is entered in the JobScheduler ID input box. Omit special characters like / \ : ; * ? ! $ % & " < > ( ) | ^
- The ID is used on Microsoft Windows for the name of the JobScheduler service after setup. The service name has the syntax
sos_scheduler_[scheduler_id]. - The JobScheduler ID must be unique over all installed JobSchedulers (except you want to build a cluster).
- Further, the JobScheduler ID expands both installation paths as a sub-directory.
The JobScheduler Host and Ports
- The JobScheduler Host is used for TCP and HTTP/HTTPS communication with the JobScheduler e.g. for JOC and for the JobScheduler Web Services.
- The JobScheduler Port is used for TCP communication with the JobScheduler i.e. for JOC.
- The JobScheduler HTTP Port is used HTTP and HTTPS communication by the JobScheduler Web Services.
This port must be unique for each JobScheduler Master being operated standalone or as a cluster member.
The See also the How to operate JobScheduler with Jetty article for more details about Jetty.
- The JobScheduler Host is used for TCP and HTTP/HTTPS communication with the JobScheduler e.g. for JOC and for the JobScheduler Web Services.
The Allowed Host
- This field is required as a security feature of the JobScheduler, whereby communication can be restricted to particular computers. This is explained in more detail in the JobScheduler
allowed_hostdocumentation. - The Port and the Allowed Host entries are also written to the
$SCHEDULER_DATA/config/scheduler.xmlfile.
- This field is required as a security feature of the JobScheduler, whereby communication can be restricted to particular computers. This is explained in more detail in the JobScheduler
- The JobScheduler ID is written to the
$SCHEDULER_HOME/bin/jobscheduler_environment_variables.(cmd|sh)file. - The ports for Jetty / the Web Services is written to the JobScheduler database
$SCHEDULER_DATA/config/jetty.xmlfile. The configuration files can be changed manually later on.
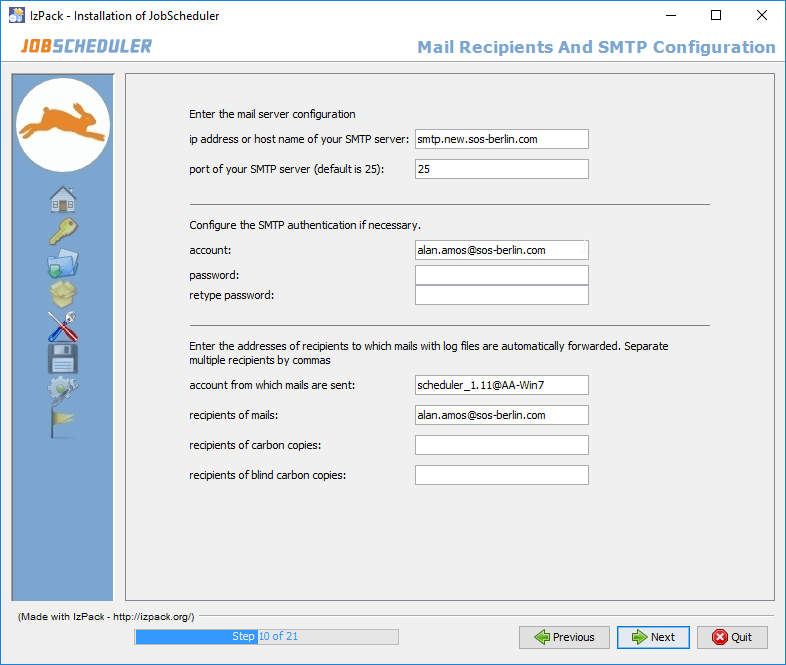
The SMTP Server is specified here along the mail sender, recipient and if required CC und BCC. Multiple addresses are to be separated by commas.
The values entered here configure the $SCHEDULER_DATA/config/factory.ini file, which can also be changed manually later on.
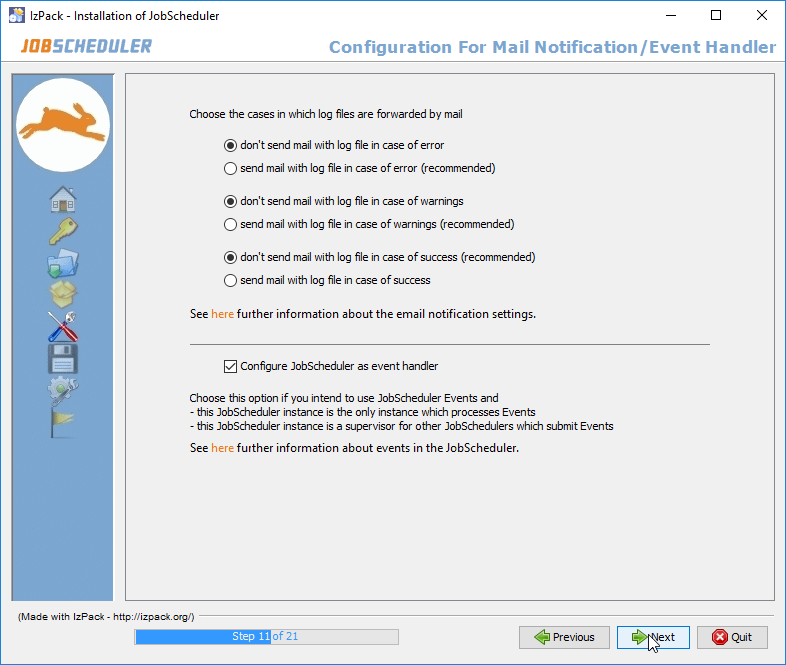
Specify information regarding whether the JobScheduler should automatically forward job log files by e-mail.
The entries made using this form are saved in the $SCHEDULER_DATA/config/factory.ini file, which can also be changed manually later on.
The lower part is only shown when the housekeeping package was selected. It enables the JobScheduler to be configured as an event handler. Corresponding objects will be created in $SCHEDULER_DATA /config/live/sos/events respectively. This is explained in more detail in the Events documentation.
1.6.2 The Database Support Package Forms
The following forms are only shown when the Database Support package was selected.
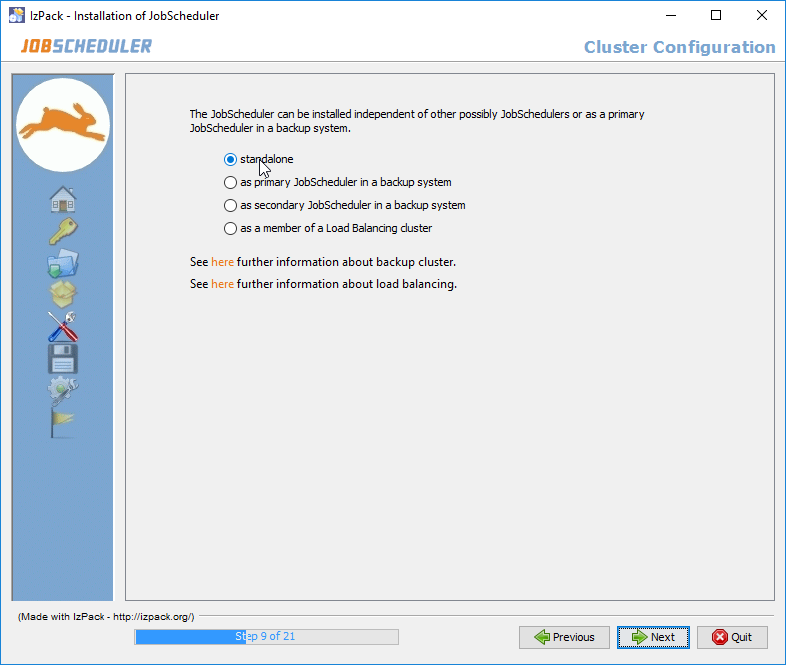
The radio buttons in the form shown above determine whether the JobScheduler should be installed "stand-alone" or in a backup system or a load balancing cluster (see also JobScheduler Master Installation - 10 - Installation of a Cluster. Further information about Backup Cluster can be found here, about Load Balancing look here. You can change the cluster option later (see here).
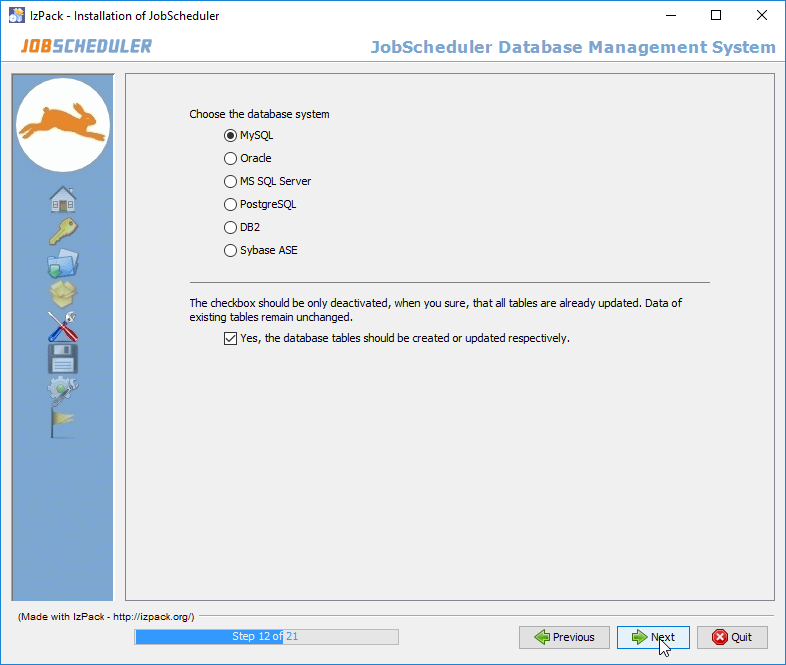
The database system is specified in the upper selection on this form. It is recommended that the box in the center of the form is checked, so that a script which creates and fills the necessary database tables can be executed. Alternatively, the tables can be be changed manually later on (page 28). If you have already installed another JobScheduler with the same database connection then abandon this option.
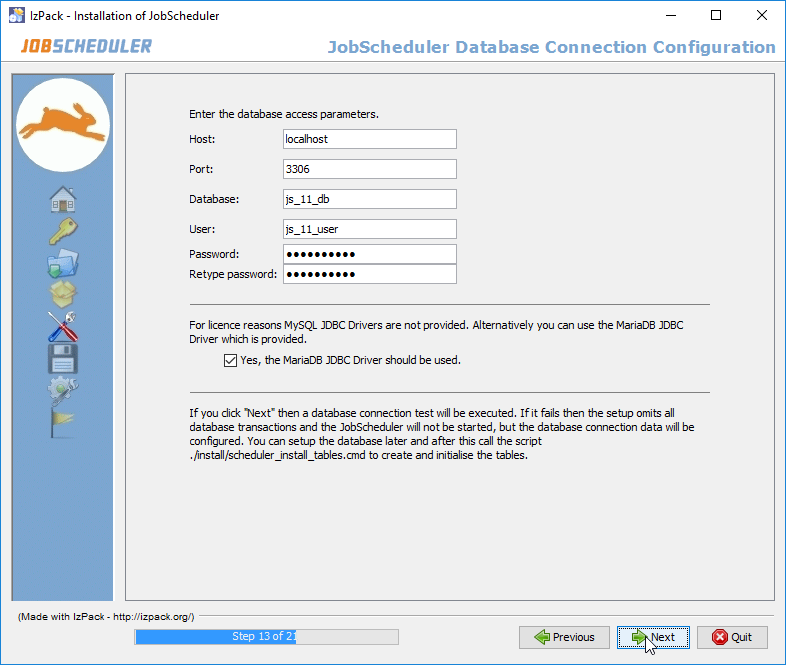
The database connection information is specified in the input fields. The middle part where you can choose the provided jTDS JDBC® driver is only shown for Sybase and Microsoft® SQL Server. If you selected MySql® then you get a checkbox for alternatively use of the MariaDB® JDBC® driver. If the jTDS JDBC® driver or the MariaDB® JDBC® driver is unchecked then you must enter your own JDBC® driver in a next dialog. This configuration is saved in the $SCHEDULER_DATA/config/factory.ini, $SCHEDULER_DATA/config/hibernate.cfg.xml and $SCHEDULER_DATA/config/sos_settings.ini files. All files can be changed manually if required.
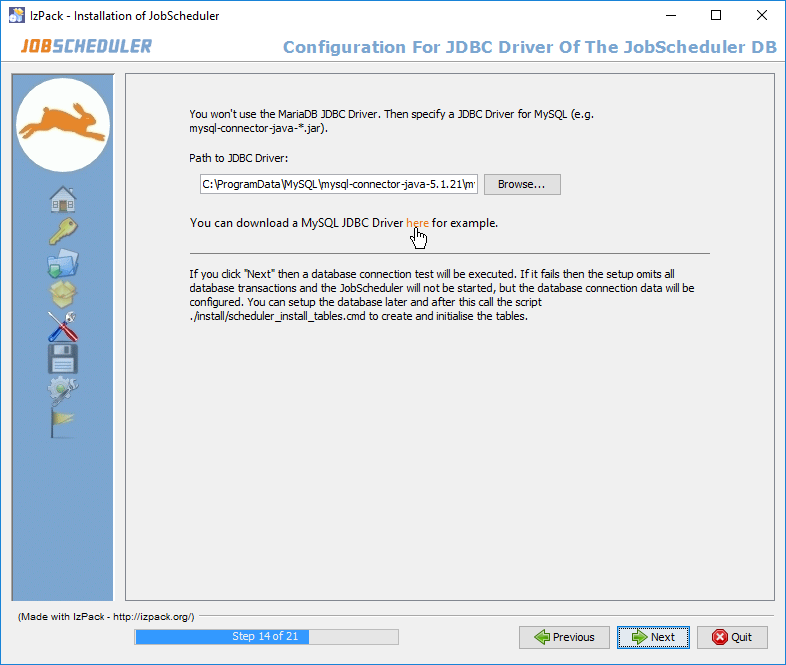
This dialog form is offer for:
- ... IBM® DB2.
- ... MySql® and you have unchecked the MariaDB® JDBC® driver for MySql® databases.
- ... Microsoft® SQL Server or Sybase and you have unchecked the jTDS JDBC® driver for Sybase and Microsoft® SQL Server databases.
The script for the creation of the database tables is started by the setup program and requires a JDBC® driver appropriate to the database system being used. The drivers for Oracle® Database and PostgreSQL are included in the setup. However, the relevant IBM® DB2, MySql®, Sybase and Microsoft® SQL Server JDBC® driver must be manually specified here. Note that for Microsoft® SQL Server and Sybase databases the jTDS JDBC® driver and for MySql® the MariaDB® JDBC® driver that is delivered as part of the JobScheduler setup can be used when the appropriate checkbox in the previous form is activated. For IBM® DB2 you have to provide a license file for the driver too. As this driver will also be required by the JobScheduler later on, it is copied by the setup into the $SCHEDULER_HOME /lib/user_lib folder.
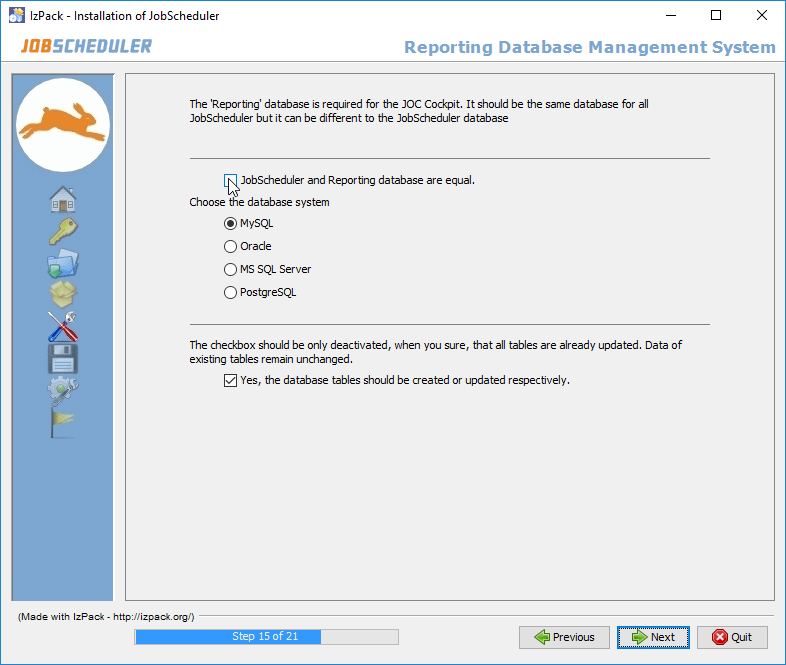
The Reporting Database
Reporting information can be stored in the same database as used by the JobScheduler Master or in a a separate one. The check list for for specifying a DBMS for the reporting database will only be shown if the JobScheduler and Reporting Databases are the same box is unchecked.
If a separate reporting database is to be used a second step for the Reporting database will follow in which the database connection for for this database will be specified. The configuration information entered in this step is identical to that specified for the JobScheduler Database Connection at Step 13.