| Table of Contents |
|---|
Introduction
Getting started with the JobScheduler
This first tutorial shows how to run a simple JobScheduler Order Job. The job starts a simple shell script which writes "Hello World" in its log file.
| Excerpt |
|---|
Standalone Jobs and Order JobsJobScheduler comes with two types of job that can be used to carry out workflow automation tasks - Standalone Jobs and Order Jobs. Standalone Jobs are simple to configure and are often used in simpler job scheduling environments. They are also often used where users have migrated from other job scheduling systems such as TWS which are based on a similar concept. However, Standalone Jobs are neither as flexible nor as powerful as Order Jobs. Order Jobs are run in Job Chains and can be executed both sequentially and in parallel. Order Jobs |
require an Order before they can run. Orders are |
triggers that start a Job Chain and convey information about the state in the job chain corresponding with the job that is being run. Orders can also have a payload of parameters that are processed by individual |
Jobs. These concepts are explained in more detail in our Concepts for jobs, job chains and orders article. In addition, our Job Chains article illustrates some of the basic |
Job Chain patterns that can be implemented with JobScheduler. |
This example shows the steps required to run the "Hello World" Order Job and verify that it has run correctly. The job itself and its job chain and order are available to the JobScheduler once you have copied the job, job chain and order objects to the JobScheduler's live folder as described in the JobScheduler Tutorials Requirements article.
The order will be started and monitored using the JOC web browser interface, the JobScheduler's Operating Center. A good starting point for finding out more about JOC is our JOC - JobScheduler Operations Center article.
Most of these tutorials in this series concentrate on Order Jobs - however the following article provides a step-by-step guide to configuring and running Standalone Jobs:
The tutorials in this series
...
- JobScheduler - Tutorials - Introduction and Requirements
- JobScheduler - Tutorial 1 - Getting StartedRunning a simple job using the JOC Cockpit
- JobScheduler - Tutorial 2 - Editing a Simple Job with JOE
- JobScheduler - Tutorial 3 - Running an Order Using the Run Time Parameter
- JobScheduler - Tutorial 4 - Configuring and Running a JITL Job
- JobScheduler - Tutorial 5 - The YADE JITL Job - Configuring and running file transfer jobs
- JobScheduler - Tutorial 6 - Configuring and Running Standalone Jobs
First Steps
This first tutorial shows how to run a simple Order Job containing a shell script that writes "Hello World" into the job's log file and to verify that this job has run correctly.
The order for the job will be started and monitored using the JOC Cockpit web browser interface. A good starting point for finding out more about JOC is our JOC Cockpit article.
Starting Requirements
Before you start this tutorial, it is assumed that your JobScheduler has been the following software is installed and is running:
- JobScheduler
- JOE, for editing and creating Jobs and Orders
- the JOC Cockpit for operating the JobScheduler
See the JobScheduler - Tutorials - Introduction and Requirements article for instructions about meeting these requirements.
See the
Download the Demo File
You should also have downloaded and unpacked the demo file and copied it to your JobScheduler's live folder.
You will also find the demo file and instructions about the location of the live folder in the JobScheduler - Tutorials - Introduction and Requirements article if you have any problems.
...
article.
Running the "Hello World" Job using the
...
JOC Cockpit
- The simplest way to To start the JOC is by opening Cockpit open a web browser window and calling the host name and port number entered for the JobScheduler during installation.
- The default values are localhost and 4444.
- Refer to the "Installation" chapter of the JobScheduler Installation Guide if you have problems opening JOC.
- On Windows systems you will find a link with the host and port specified during installation in the Start Menu under:
- Start / SOS JobScheduler / JOC (JobScheduler Operations Center)
Once started, JOC should appear as shown in the screen-shot: - Select this tab and open tutorials-getting-started folder and hello_world_job_chain,hello_world_order in a similar way as described for the job tab above.
This will open the Job Chain pane in the right hand half of JOC as shown below: - Now select the Show order history checkbox in the right hand Job Chain pane, which will open a second, right hand Order History pane. Click on the Order menu button to the right of the Job Chain pane as shown in the following screen-shot and select the Start order now option.
- In the Order History pane shown in the screen-shot above the order was run twice before the screen-shot was made and therefore the order is listed twice.
Now click on your hello_world_order listing in the Order History pane, which will open a new browser window containing the log information for the order you have run.
As can be seen in the screen-shot, "Hello World" was successfully entered into the order log and the order successfully ended (set_state success in the third last line).
Per default the Jobs tab should be open and show the tutorials-getting-started folder as shown above.
Click the Update (every 5s) checkbox at the top center of JOE, to cause JOC to be automatically refreshed every 5 seconds.
Clicking on tutorials-getting-started folder will show the hello_world_job and clicking on this job will open the Job and Task History panes as shown in the next screen-shot:
The most useful tab for running the job is the Orders Tab.
The order (and therefore the job) will be processed almost immediately and a hello_world_order listing added in the Order History pane at the bottom right of JOC.
Note that the JOC interface is extremely flexible which can have the disadvantage that new users sometimes lose track of how to obtain the information they require.
However reloading the page - for example, using F5 - reinitializes the interface to the state shown in the first screen-shot.
- tab and call the JOC Cockpit using an address such as:
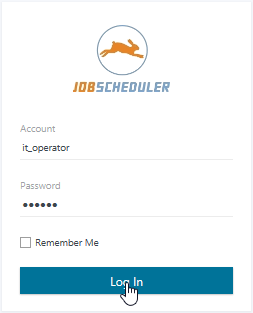
- Log into the JOC Cockpit using an authorized account name and password. The account name shown in the screenshot below is for one of the default accounts configured with the JOC Cockpit. This account - the it_operator - has sufficient permissions for the purposes of these tutorials but has to be activated by a system administrator. See the Authentication and Authorization - Configuration article for more information.
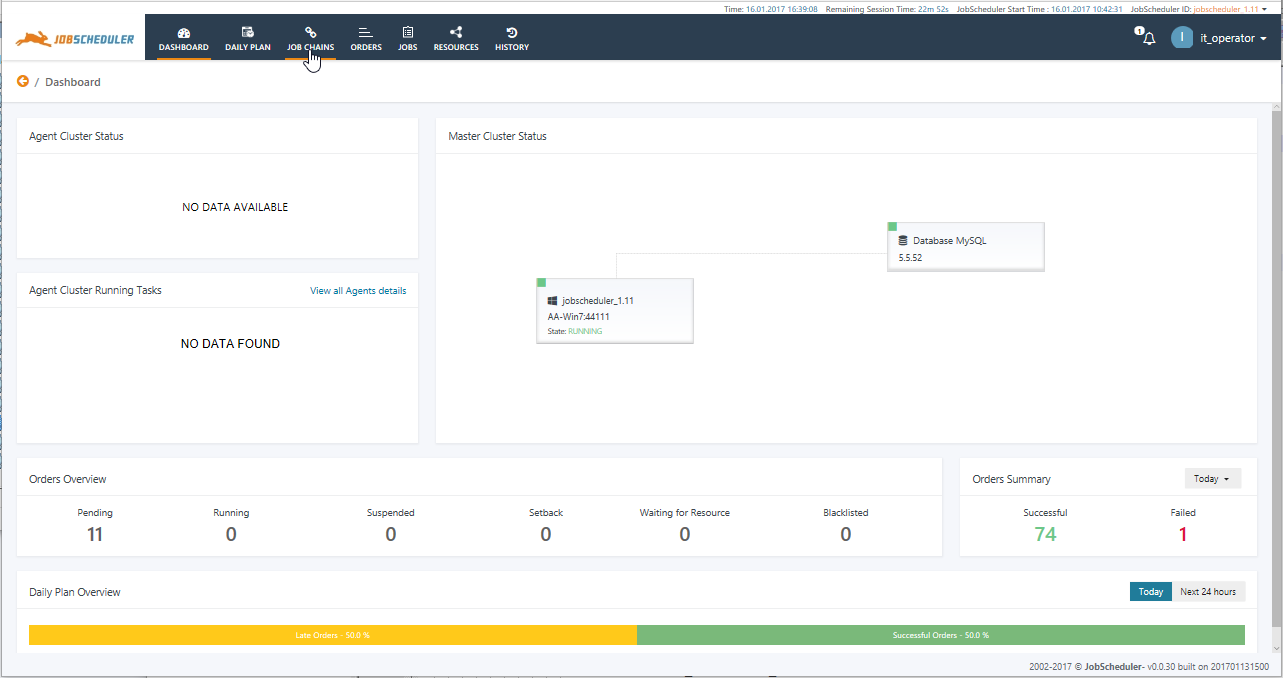
- After logging in successfully the Dashboard view will be shown:
- Now open the Job Chains view by clicking on the Job Chains link in the grey menu bar near the top of the dashboard. This is the most useful view for starting and monitoring individual Orders being run on Job Chains and when first opened only shows the menu tree in the left hand view panel. This menu tree represents the folder structure in the JobScheduler's
livedirectory and is a major tool for navigating to individual Job Chains.- Click on the tutorials link in the menu tree as shown below to access the Hello World Job Chain:
- Click on the tutorials link in the menu tree as shown below to access the Hello World Job Chain:
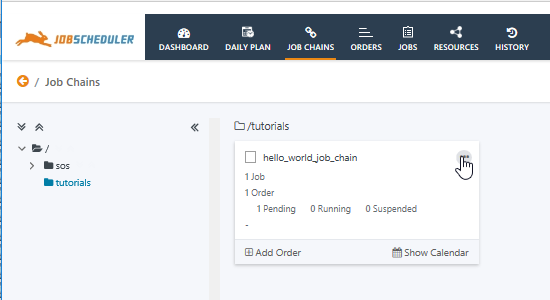
- At this stage the Hello World Job Chain is the only Job Chain in the tutorials folder. It is shown in card form as can be seen in the next screen shot:
The card view provides two possible ways of generating an Order for the Job Chain:- the Add Order link at the bottom left of the Card and
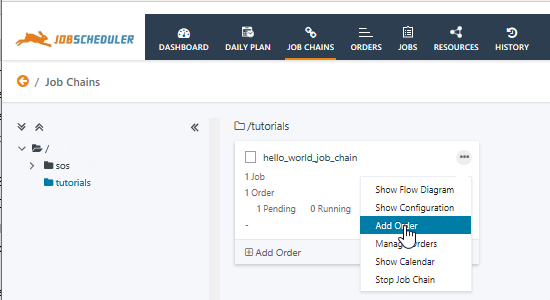
- via the Additional Options (ellipsis) icon shown behind the pointer in the screen shot above. This will open a list of options for the Job Chain as shown in the next screenshot:
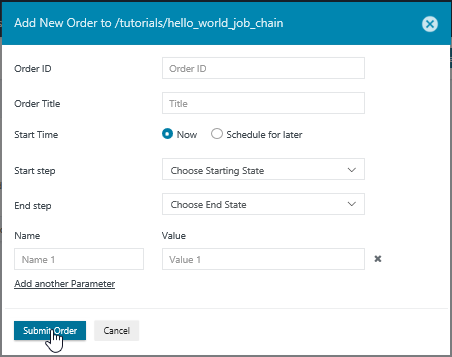
- Now select the Add Order option to open the form to configure how the order will be started. This form is shown in the next screenshot, where the Order can be seen to be configured by default to start Now and without any change to other parameters:
Click on the Submit Order button to start the order. - The Hello World Job Chain will be processed very quickly so you may not notice a change in the Job Chain card which will very briefly show:
- 2 Orders and
- 1 Pending 1 Running before the order is completed.
- The presentation form used for the Job Chain view now needs to be changed to access the History for the Hello World Job Chain.
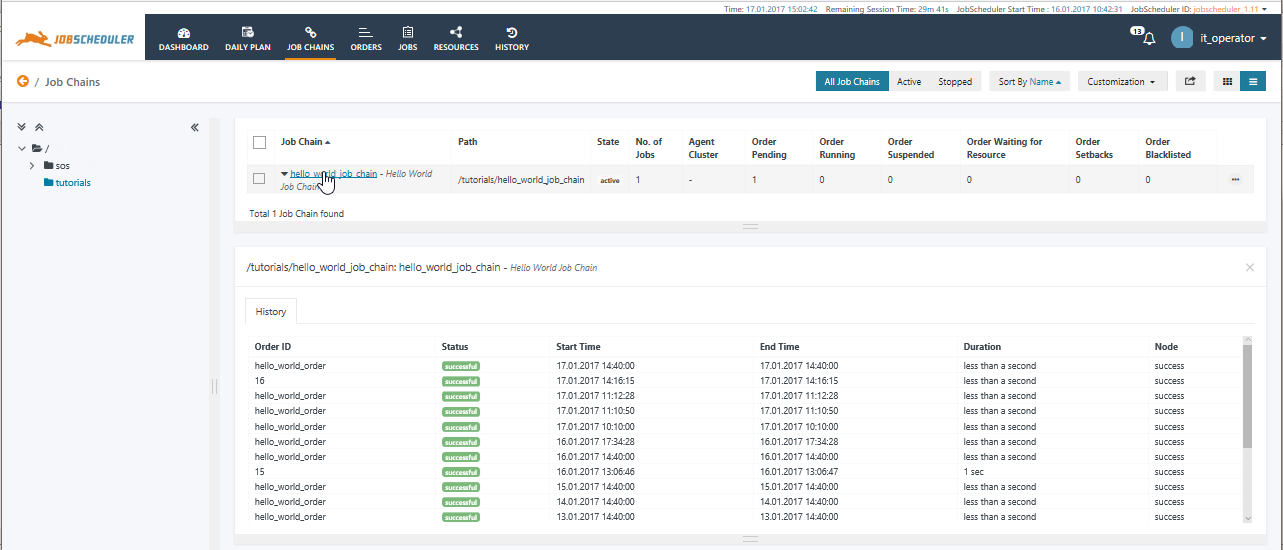
Click on the Show List button in the View Header menu as shown in the next screenshot:
This will change the presentation of the job Chain to a list form, as shown in the next screen shot, and includes a link to show the Order History.
- Now click on the Hello World Job Chain link in the Job Chain list, which will open the History tab for the Job Chain as shown above.
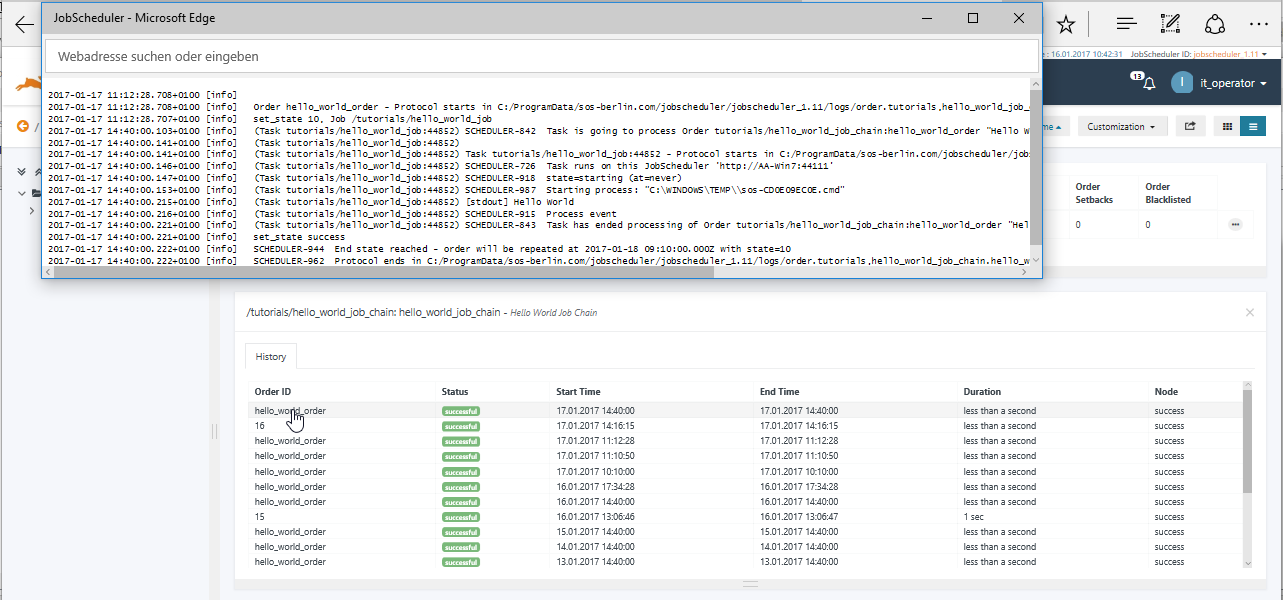
By default the History tab lists the 30 most current and recent Orders run on the Job Chain with their Status, Start and End date and time as well as the Current Node. (The Success Nodes listed for all Orders shown is an end node of the Job Chain when it runs without error and all the Orders shown have run to completion. End nodes will be introduced in the next tutorial.) - Clicking on any of the entries for an Order provides a direct route to opening the log file for the Order as shown in the screenshot below.
Summary
Congratulations!
You have just run your first Order Job with the JobScheduler and verified that it has run successfully.
In the next tutorial you will extend this Job Chain with the JobScheduler Object Editor, JOE and be able to observe the processing of the Job Chain as it happens.
