Page History
Introduction
The JS7 - Lock Instruction specifies the mutually exclusive jobs for mutual exclusion, i.e. to limit it limits parallel execution of jobs. Resource Locks in a workflow are used to limit job access to resources by jobs and to force orders to wait before executing a job. Orders wait until the Resource Lock is released by some other jobs holding the Resource Lock. There are two types of Resource Locks available with the JS7:
- Exclusive Resource Lock: only one Lock Instruction can hold the Resource Lock at any given time. Any further Lock Instructions that try to acquire the same Resource Lock have to wait.
- Shared Resource Lock: the Resource Lock is assigned a limit that can be shared by a number of Lock Instructions. Each Lock Instruction carries a weight that counts towards the Resource Lock's limit.
...
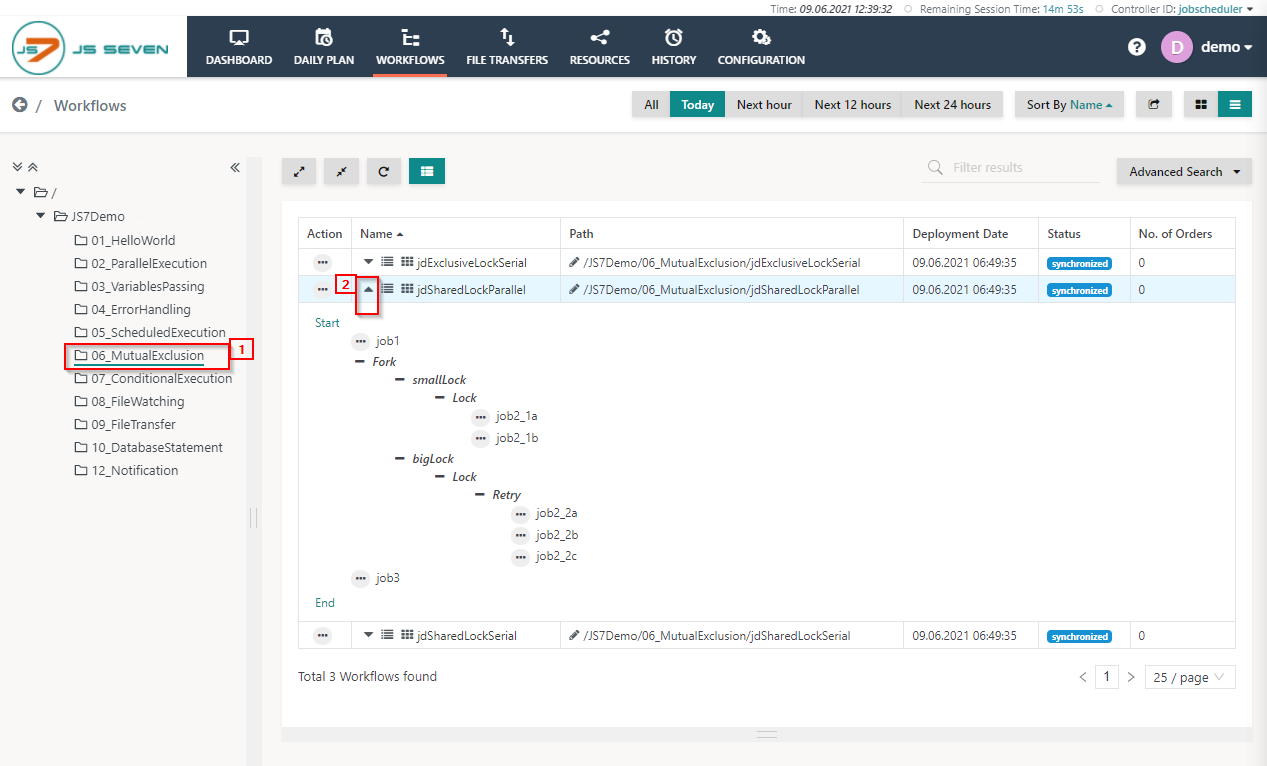
In the jdSharedLockParallel workflow a Shared Resource Lock is used. In the workflow, the Resource Lock has a limit to which it can be shared from by a number of Lock Instructions. In the workflow, parallel execution of jobs is performed as long as the limit of the Shared Resource Lock is not exhausted.
To execute the workflow in the folder 06_MutualExclusion please follow the steps described below steps:
- Click the folder 06_MutualExclusion and expand the jdSharedLockParallel workflow.
- To add an order to the workflow click the action menu of the workflow and use Add Order from the drop-down menu.
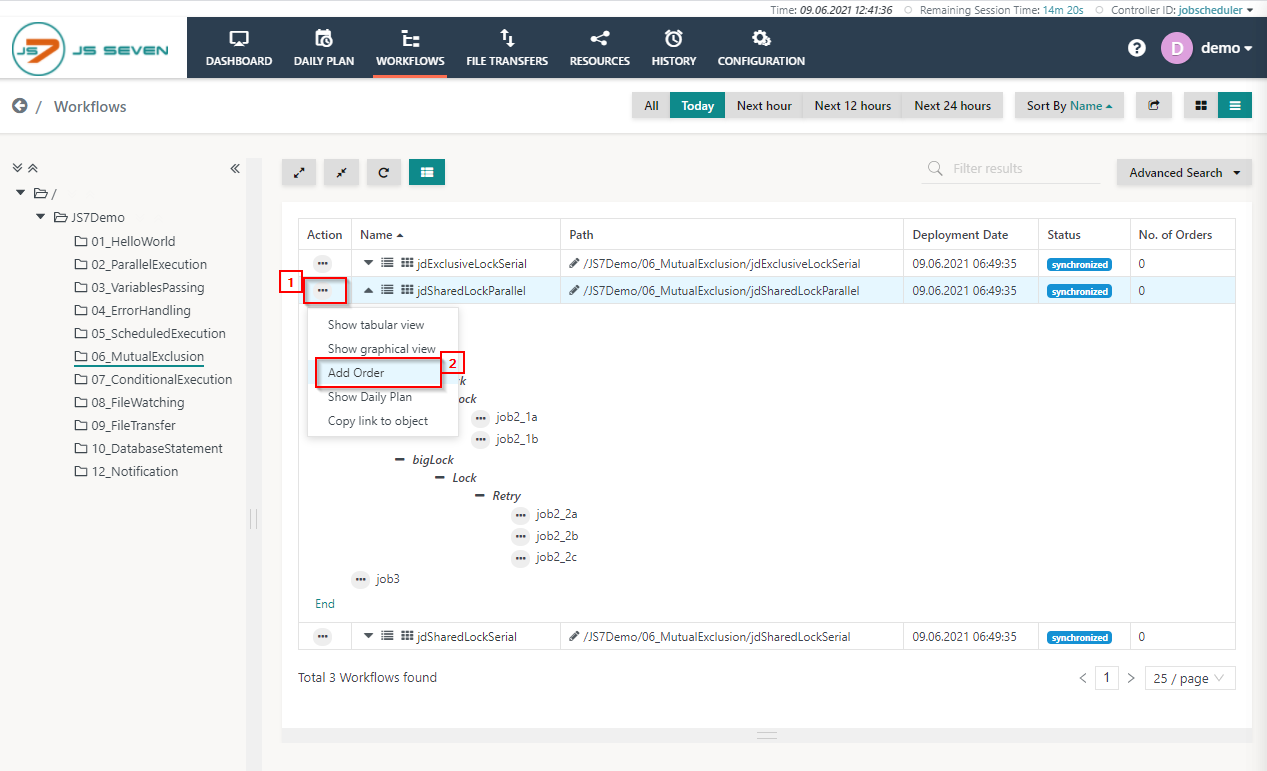
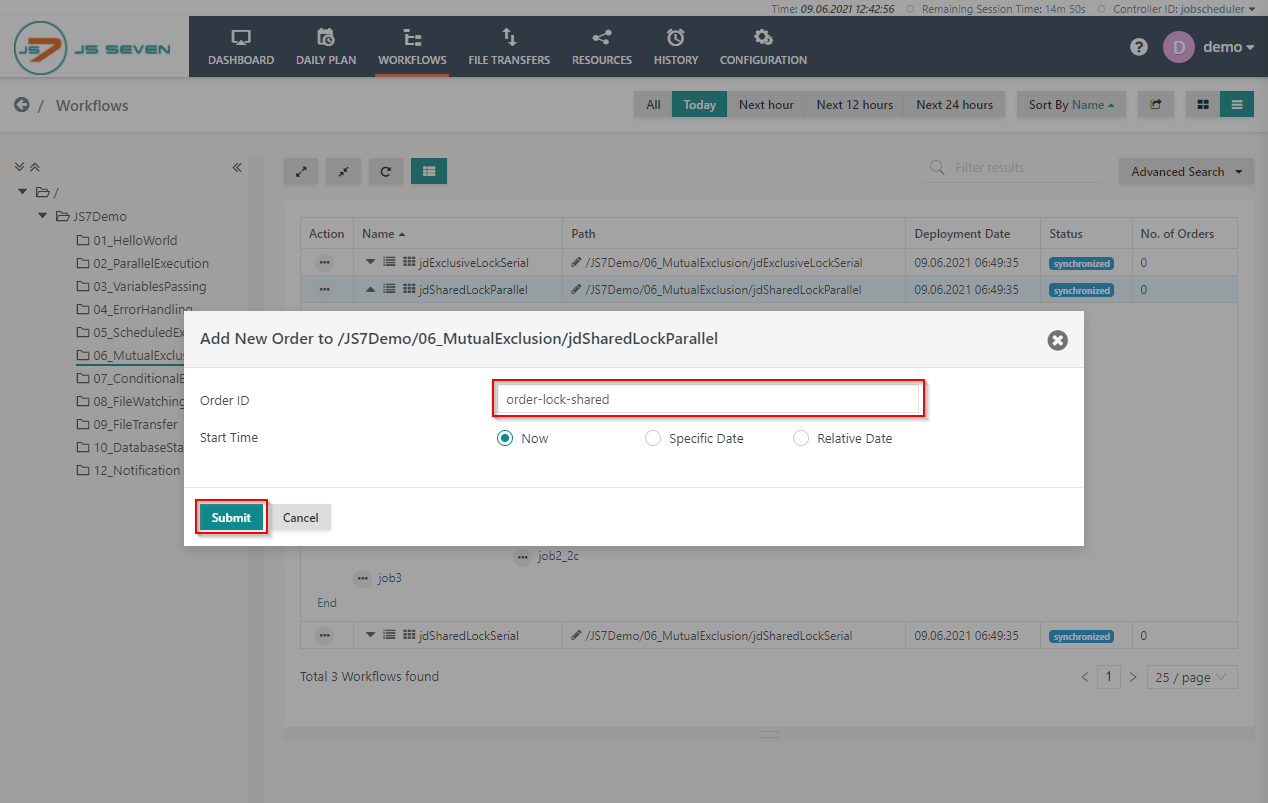
- When clicking Add Order a popup window will appear.
- You can add an Order ID or leave the Order ID value empty, it will then use a default Order ID. Click the Submit button.
- Add two orders If you add a second order to the workflow to observe , you can see that the Resource Locks are acquired and retained by the jobs executing for the first order both orders running at the same time in the workflow.
- To check the status of the order click the name of the workflow. This will make the Order History panel appear.
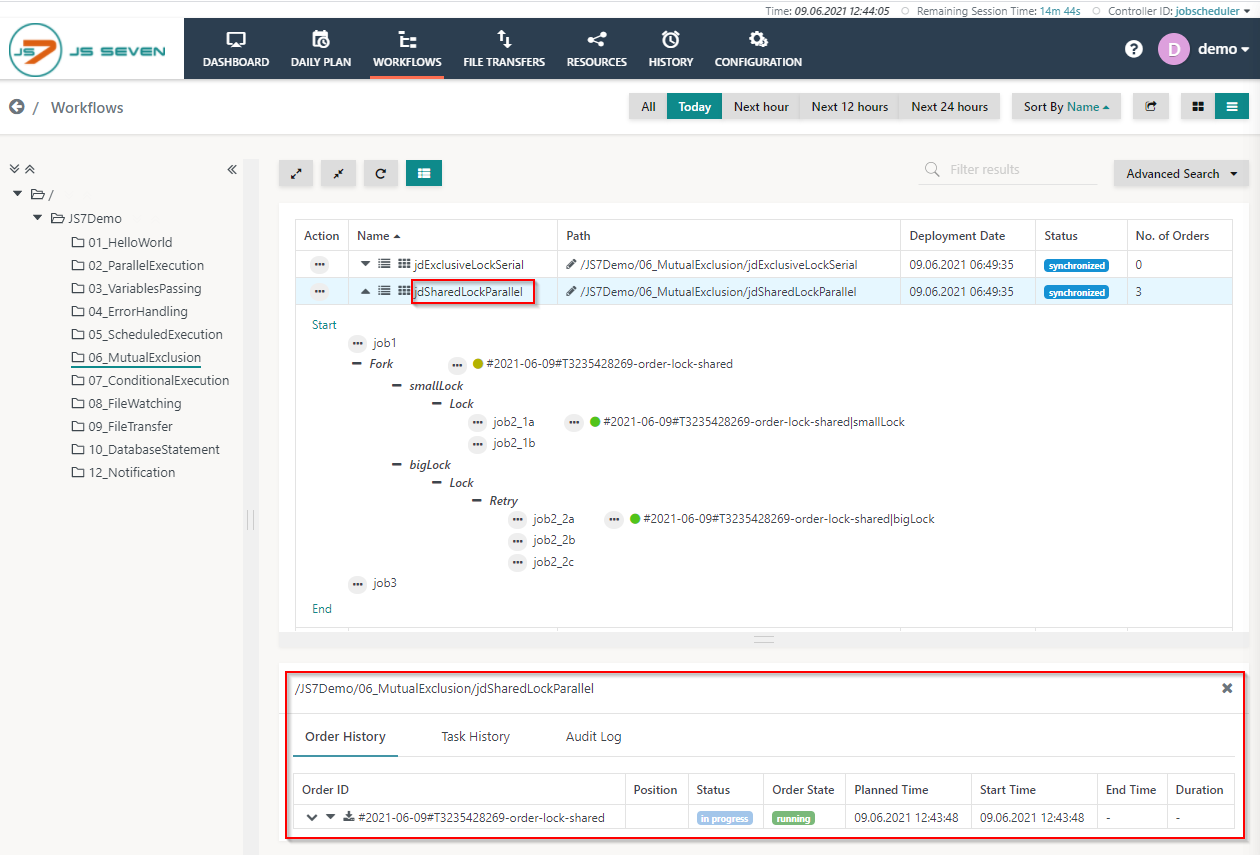
- From the Order History panel you can verify if the order is orders aresuccessful and havefinished. Click the Order ID to see log output created by jobs executed for this each order.
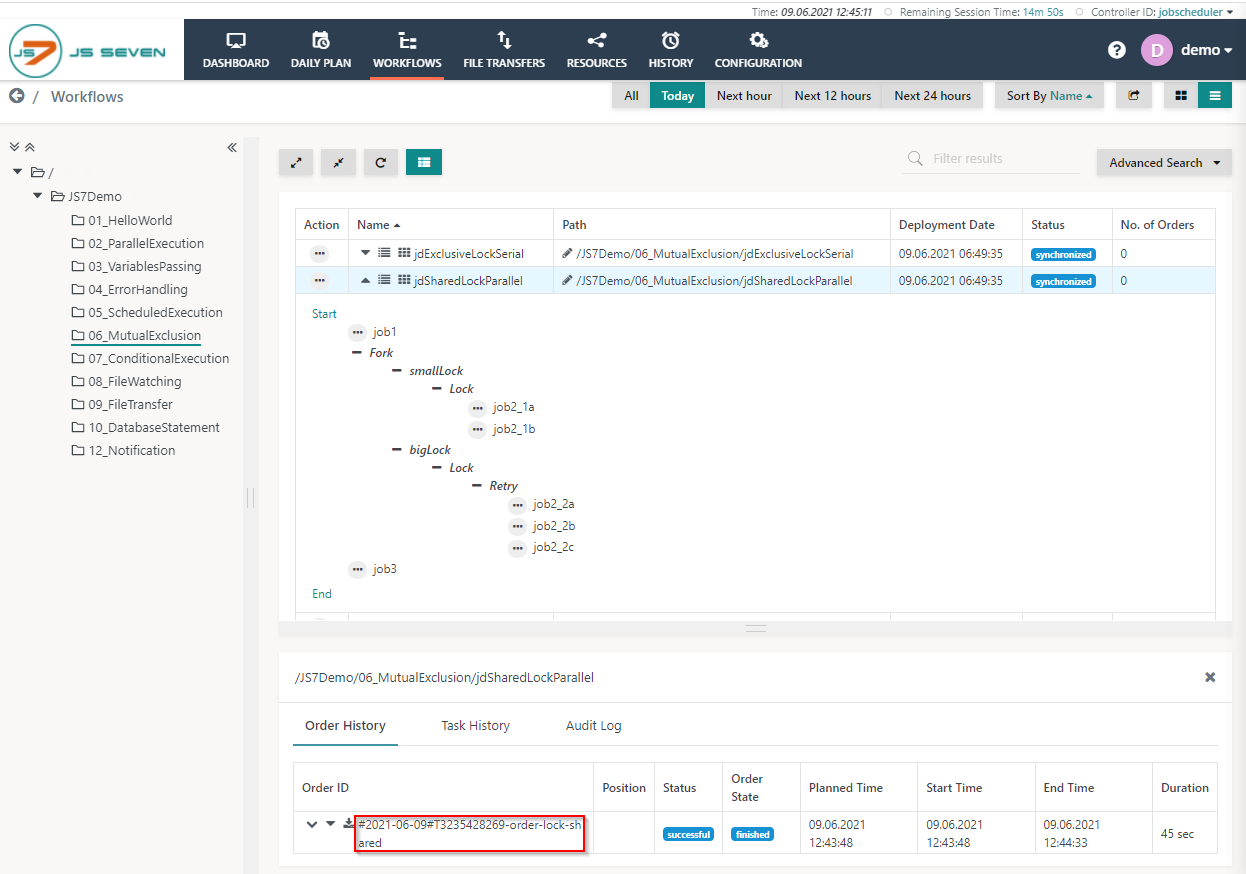
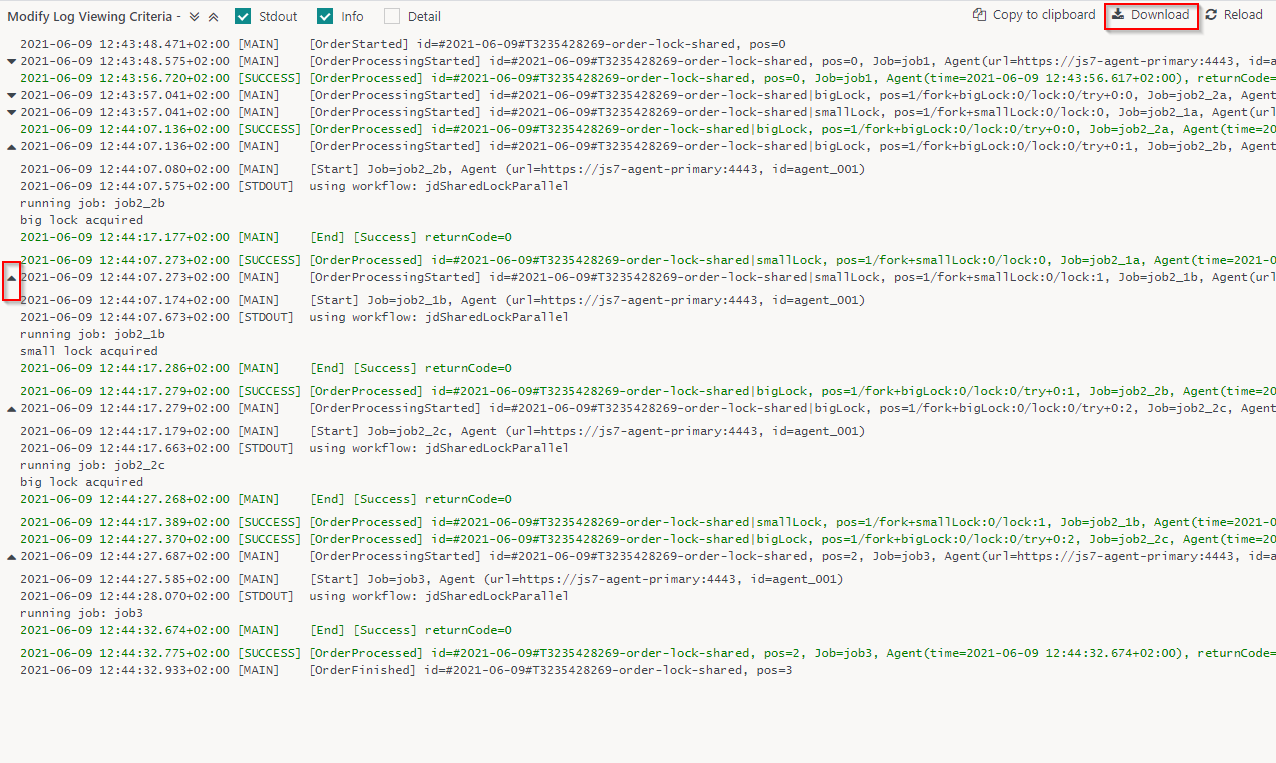
- A log view window will open and the order log will be displayed. This log contains output to stdout/stderr from all jobs executed by the each order.
- You can download the log file by clicking the Download button from in the upper right-hand corner of the log view window. Also, you can expand and collapse the individual all job output using the chevron icons from in the upper left upper -hand corner of the log view window.
...
Overview
Content Tools