Introduction
The JOC Cockpit Resources / Calendars view has import and export functions to allow reliable Calendar deployment, for example, from a source, such as an Integration System (INT, UAT) to a target, such as a Production System (PROD).
In general, such a deployment will involve 3 - 4 steps:
- Export of the Calendar from the INT environment JOC Cockpit to the file system, where the Calendar will be saved as a JSON file.
- Transfer of the JSON calendar file to the PROD file system.
- Import of the JSON calendar file to the PROD JOC Cockpit with automatic integration into the PROD JOC Cockpit Daily Plan.
- Updating of the Daily Plan will be required in particular situations.
Details of the deployment procedure will depend on:
- whether a Calendar is to be deployed on the PROD system for the first time - i.e. a "new" deployment - or whether an existing Calendar on the PROD system is to be updated.
Note that Calendars are always exported with usage and folder information - i.e.
- with information about the Orders or stand-alone Jobs which the Calender has been assigned to and the run-time information (Period and Restrictions).
- with the Calendar Path parameter.
If an Order or standalone Job is found on the target system with the same Path parameter, i.e. name and directory, as an Order or standalone Job on the source system which the Calender has been assigned to then the Calendar and run-time information can be assigned to the Order or standalone Job on the target system.
"New" Deployment of a Calendar
Consider the situation where a new Calendar has been tested in an INT environment and is now to be deployed to a PROD environment.
Example Configuration
The following configuration will be used to demonstrate deployment of "new" Calendars:
- On the INT System:
- Two Orders have been configured for a job chain:
- inpexp_1, with the Frequencies:
cal_sat, configured with every Saturday, and a Single Start Period at 12:00cal_sun, configured with every Sunday, and a Single Start Period at 18:00
- inpexp_2, with the Frequency:
cal_sat, configured with every Saturday, and a Single Start Period at 21:00
- inpexp_3, with the Frequency:
cal_sun, configured with every Sunday, and a Single Start Period at 15:00
- inpexp_1, with the Frequencies:
- In addition, a further Calendar has been configured but not assigned to an Order:
cal_mo-frconfigured with every day, Monday to Friday,
- Two Orders have been configured for a job chain:
- On the PROD System:
Two Orders have been configured for a Job Chain:
inpexp_1, with no Calendars assigned
- inpexp_2, with a Single Start Period at 21:00 and the following Calendar assigned:
cal_fr, configured with every Friday, and a Single Start Period at 24:00
- The Calendars to be exported are:
cal_satandcal_mo-fr.- The
cal_satCalender is not to be exported.
Export Procedure
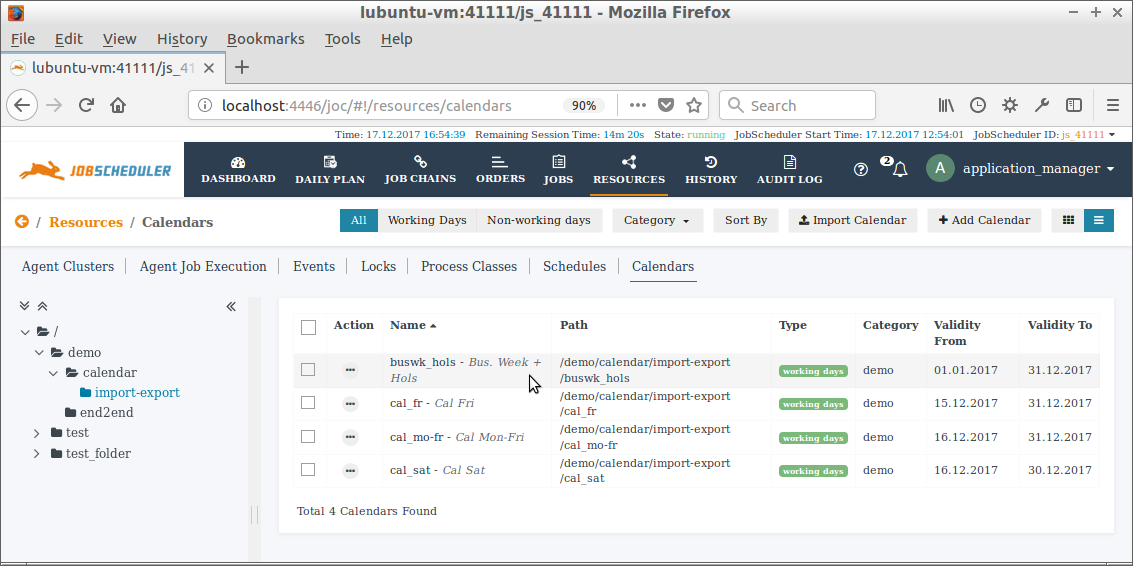
Calendar Export is carried out from the Resources / Calendars view of the JOC Cockpit:
- The Calendar or Calendars to be exported are selected using the select boxes shown either in the Calendar Cards (as shown in the screenshot below) or at the left of the list of Calenders.
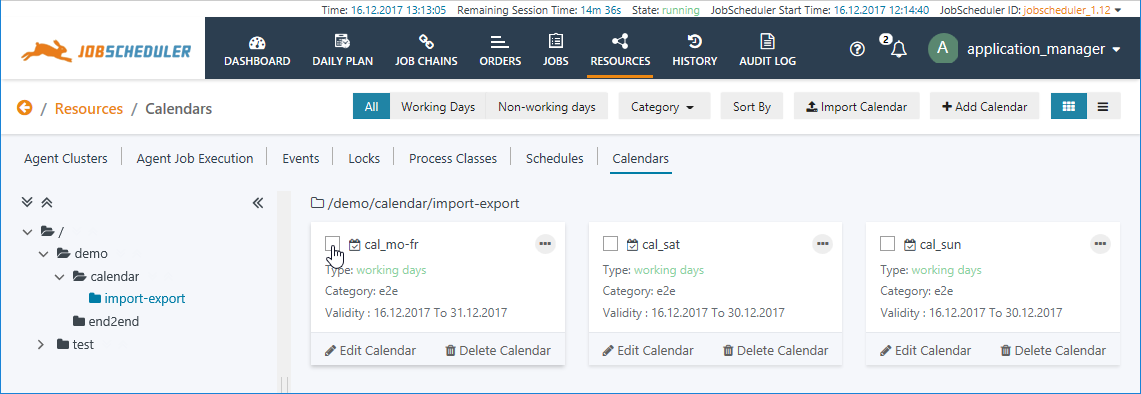
- Selecting a first Calendar will cause the default Import Calendar button (shown in the screenshot above) to be replaced with the Export Calendar button as shown in the next screenshot.
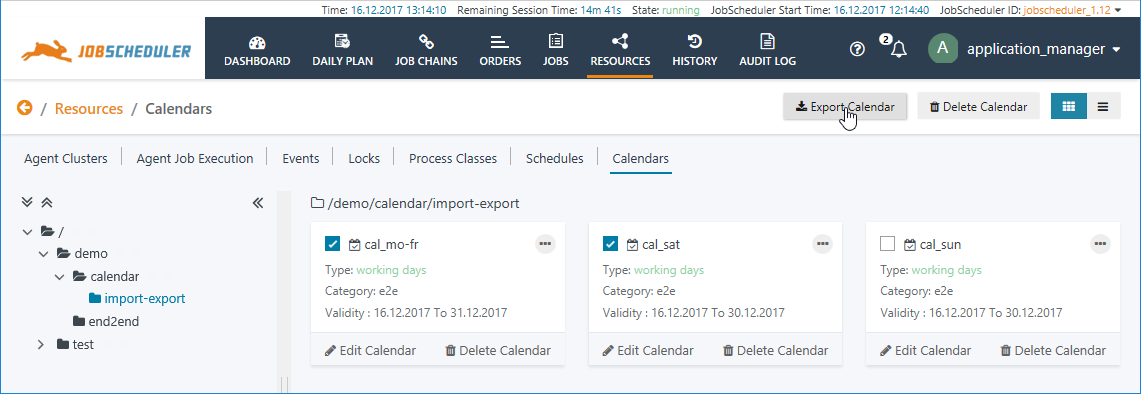
- Clicking the the Export Calendar button will open a standard browser file-saving menu that is then followed to save the Calendar(s) selected as a single
.jsonfile to the INT file system. This file can now be transferred to the PROD file system. - In the configuration used for the screenshots the impexp_cal_sat Calender is assigned to two Orders on the INT system and the impexp_cal_sun Calender is not assigned to any Order. Both Calenders are none-the-less exported in the
.jsonfile.
The content of the .json file showing the exported Calendar and usage information is shown in the code listing below:
Import Procedure
The Import procedure is started in the Resources / Calendars view of the target system by simply clicking the Import Calendar button (any folder can be selected in the folder tree) as shown in the screenshot below.

This will open a standard browser-based file import procedure allowing file selection either by drag-and-drop or by menu.
Once the file has been selected an Import Calendar modal window will open as shown in the next screenshot:

As can be seen from the screenshot, selection of individual Calendars is allowed during the import.
After the import has been completed the Calendars will be shown the folder specified in the Path parameter alongside the cal_fr calender that had already been configured on the PROD system.
Behavior of the Import Function
The import function is conservative, preserving existing configurations on the target system where appropriate.
- Orders on the target PROD system with the same names as Orders on the source INT system will be automatically assigned the Frequency or Frequencies for the exported Calendar(s) that the Orders on the INT System were assigned, where Frequencies are Calendar, Period and Restrictions. In the current example, this means that on the target PROD system:
- The Order inpexp_1, will be assigned the Frequency:
cal_sat, configured with every Saturday, and a Single Start Period at 12:00
Note that a Frequency for thecal_sunCalendar will not be assigned to this Order as the Calendar for such a Frequency was not included in the export.
- The Order inpexp_2, will be assigned the Frequency:
cal_sat, configured with every Saturday, and a Single Start Period at 21:00
Note that the already assigned Frequency with thecal_frCalendar will neither be modified nor overwritten.
- The Order inpexp_1, will be assigned the Frequency:
- Frequency information for an Order on the INT system that was included in the export will not be imported into the PROD system if an Order with the same name is not found on the PROD system.
- This means that in the example, the exported information for the inpexp_3 Order will not be imported.
Verifying the Import
Once the import has been carried out the imported Calendar(s) can be seen in the Resources / Calendars view, in the appropriate folder, as can be seen in the next screenshot, which shows the already existing cal_fri Calendar and the imported cal_sat and cal_mo-fr Calendars.

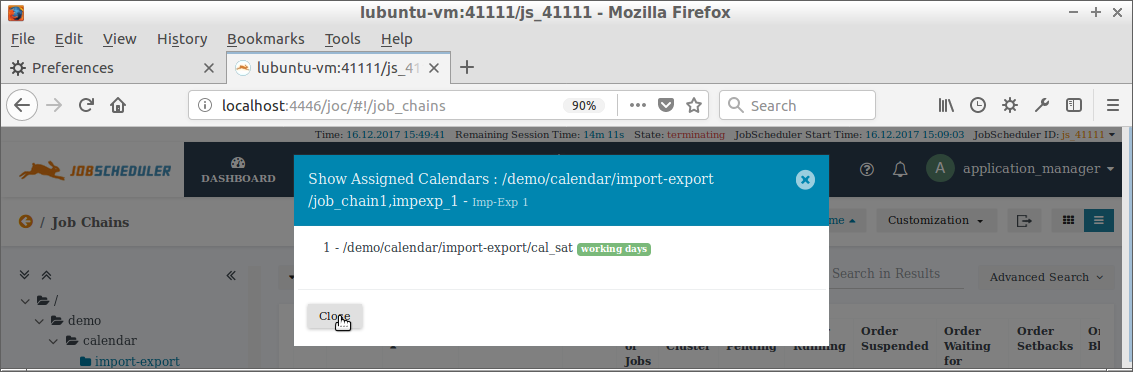
In addition the imported Calendar(s) will be shown in the Assigned Calendars modal window for the relevant Order as can be seen in the next screenshot:
In the Job Chains view, the Set Run-time modal window will show the Calendar(s) that have been imported as shown in the next screenshot, where they can be seen in the list of Frequencies along with any Period and Restriction information that has been imported:

Note that the imported Calendars are not yet included in the Daily Plan.This is described in the next section.
Updating the Daily Plan
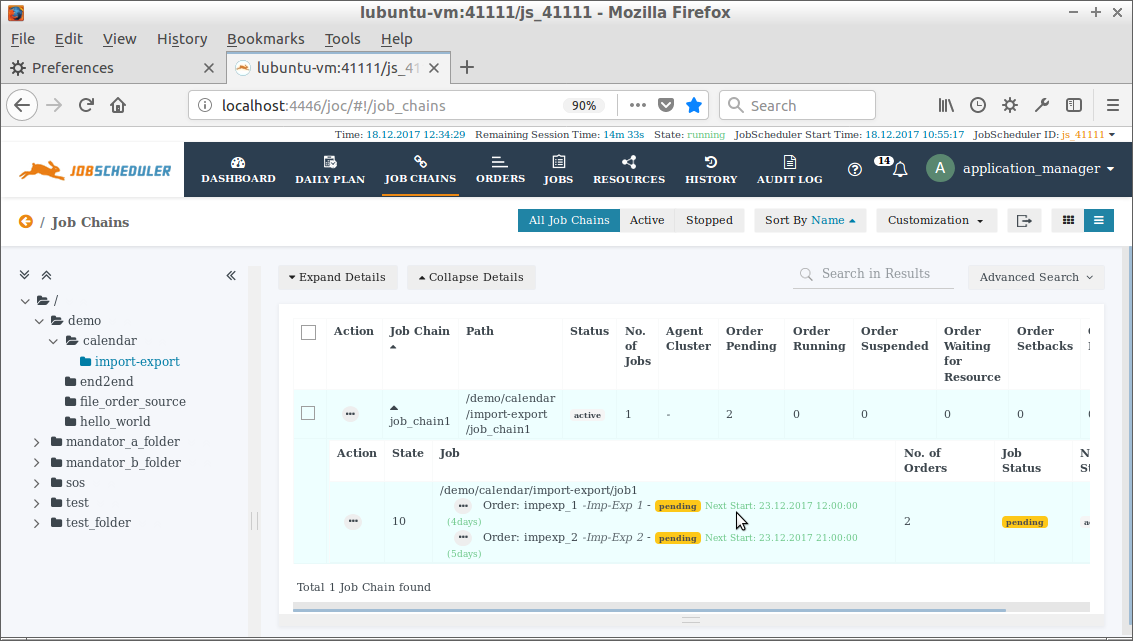
The Set Run-time Submit button should now be clicked to cause the "new" Calendar to be integrated into the Daily Plan. Depending on the complexity of the Daily Plan, it can take up to a minute before the Next Start dates, as shown in the next screenshot (in green) or the start dates in the Order's Show Daily Plan function are updated.
- Once the Daily Plan has been updated, the Next Start information (shown in green) in the Job Chains view will be renewed:
- the Show Daily Plan function for the relevant Order will also show the correct start information.

Deployment of a Calendar Update
Consider the situation where a Calendar is already in use in a production environment and requires to be updated.
A typical scenario would be where the Calender is to be extended for a further year and the non-working days for that year added.
In the following example, a Working Week Calendar buswk_hols has been configured for 2017 (Valid From 01.01.2017, Valid To 31.12.2017) with a Monday to Friday working week configured as an Included Frequency and the German national holidays for 2017 as an Excluded Frequency. This Calendar is deployed on the PROD System and appears in the Resources view as shown in the next screenshot:
This Calendar is to be updated with a newer version which includes the national holidays for 2018. In addition, the Valid To date for the Calendar is to be changed from 31.12.2017 to 31.12.2018. This Calendar has been assigned to the impexp_4 Order with a Single Start Period at 18:00 and no Restrictions.
The updated and tested version of the buswk_hols Calender is installed on the INT system with the same Path parameter value and is assigned to an Order with the same name as the assigned Order on the PROD system and the same Period and Restrictions.
The export procedure followed is exactly the same as that already described for the deployment of a "new" Calendar.
The following listing shows the exported buswk_hols Calendar .json with the new holiday information for 2018 and the updated Valid To parameter.
The Import procedure is also started in the same way as already described for the deployment of a "new" Calendar, via the Import Calender function in the Resources / Calendars view and using the standard browser file upload procedure to select the file.
The following modal window will open once the file has been read:

Note that the Calendar is shown with an orange "object already exists" warning.
If the update is to proceed the Calendar(s) to be updated should be selected and the Import button clicked.
This will cause a confirmatory window to open as shown in the next screenshot:
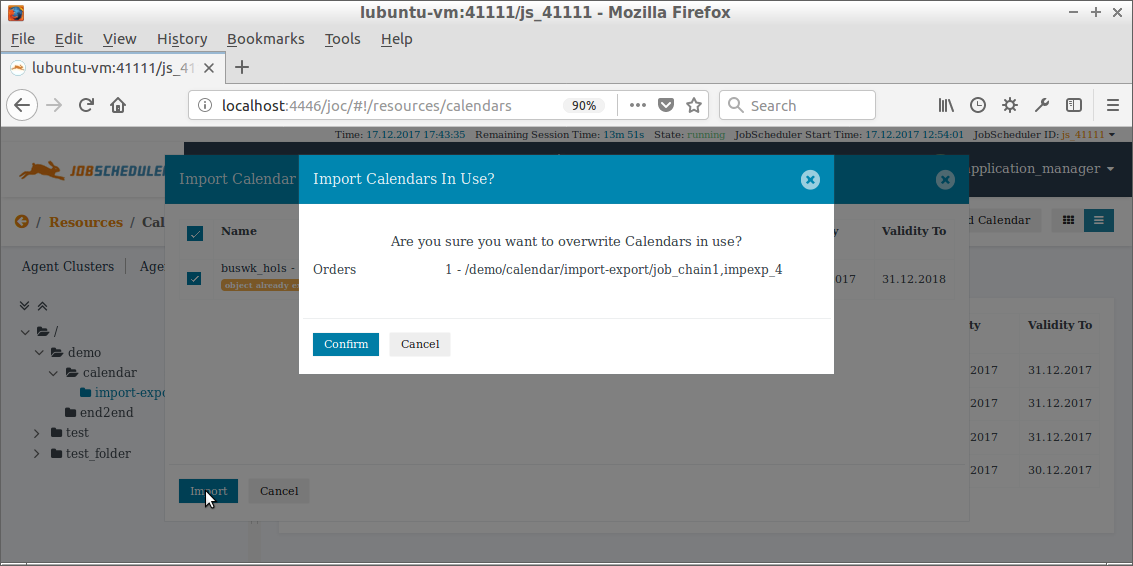
Note that the deployment procedure for updating an existing Calendar is as conservative as already described above for a "new" Calendar.
The next screenshot shows that after the update has been completed the 2018 National Holidays are available as a fully editable Frequency:
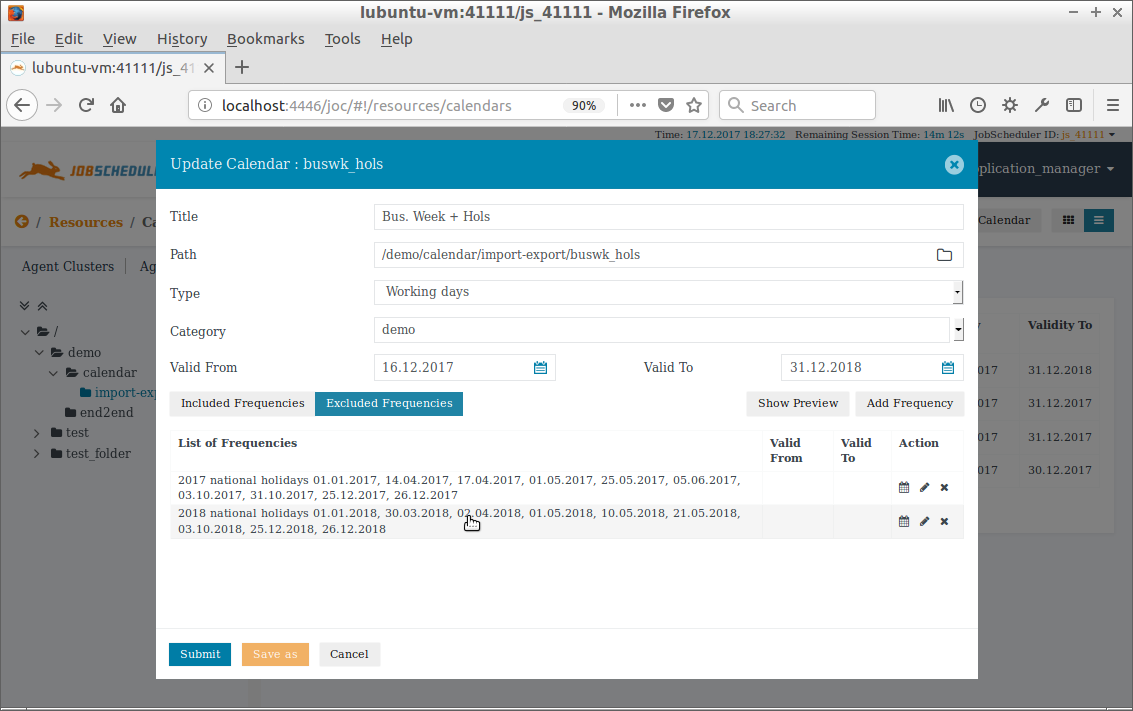
Note that in contrast with the procedure described for deploying a "new" Calender, when updating an already existing Calendar there is no need for the createDailyPlan Order to be run before the Daily Plan is updated. The next screenshot shows the Calendar after the update with the Validity To setting now changed to 31.12.2018.
Update Verification
The Set Run-time Show Preview function in the Job Chain or Order view for an Order or Job that has been assigned the updated Calendar can be used to check that the update has been correctly applied as shown in the next screenshot:
