Introduction
JS7 allows users to provide their own User Documentation for scheduling objects in a number of formats and which can be imported to the JOC Cockpit. Once imported, the User Documentation can be linked to workflows, jobs etc.
In addition, an export operation is available that allows User Documentation to be rolled out, for example, from a development environment to a production environment
JS7 ships with a number of JS7 - Job Templates that include documentation by default.
User Documentation Formats
The User Documentation can be provided from a number of formats:
- HTML (not all component file types are supported, for example .eot font files)
- Markdown (must use the file extension .md or .markdown)
- XML
- Zip (for both Linux and Windows operating systems, tar.gz is not supported)
- The following file formats are also supported since they can be addressed by a relative path to a file:
- XSL (XML with the file extension .xsl or .xslt)
- images (.gif, .jpeg, .png)
- JavaScript
- CSS
Note:
- If an HTML file contains links with a relative address then the linked file either has to be imported as well or an HTTP address can be used.
- Additional file formats that are used as embedded objects in an HTML file such as audio files can be displayed but need an HTTP address instead of a relative address.
- Markdown files are converted to HTML when displayed:
- Markdown files have to match the syntax of John Gruber.
- During HTML conversion, a default .css file (
/sos/css/default-markdown.css) is used and the title of the page is considered the name of the Markdown file. - The Markdown can start with reference-style links that are invisible.
- These links can be used as header information for title and .css file
- [css]: http://myHost/my.css or relative [css]: my.css
- [title]: myTitle
Managing User Documentation
Importing User Documentation
Permissions
By default user accounts assigned the application manager role are granted permissions for importing documentation items.
Import Procedure
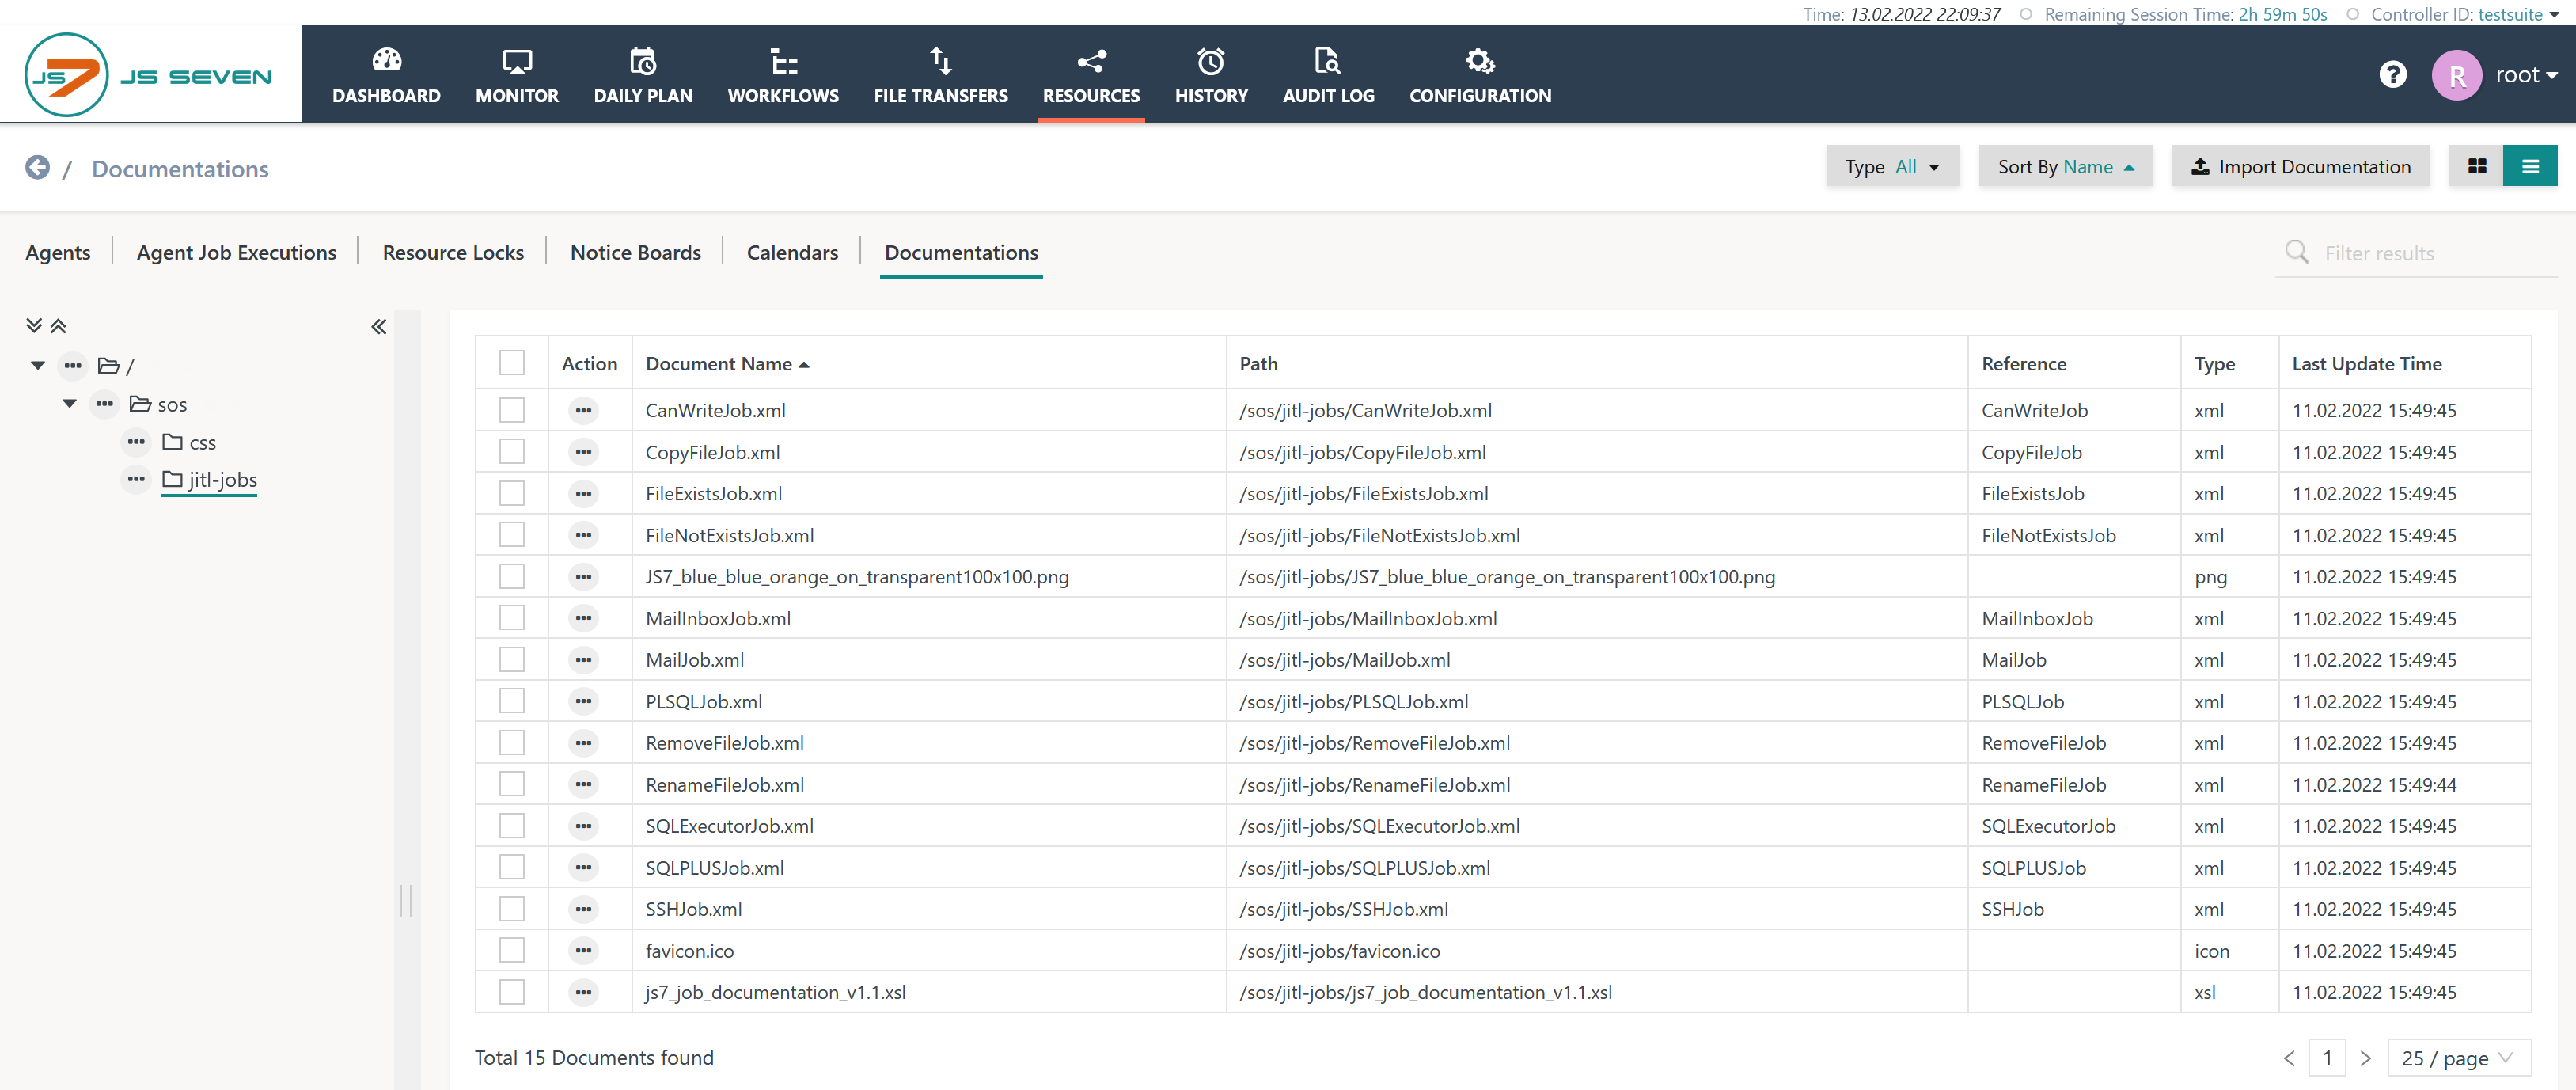
The below screenshot shows the Import Documentation button in JOC Cockpit's Resources->Documentation sub-view. The view displays the User Documentation by default available for JS7 - Job Templates like this:
Import Procedure for PDF Documents
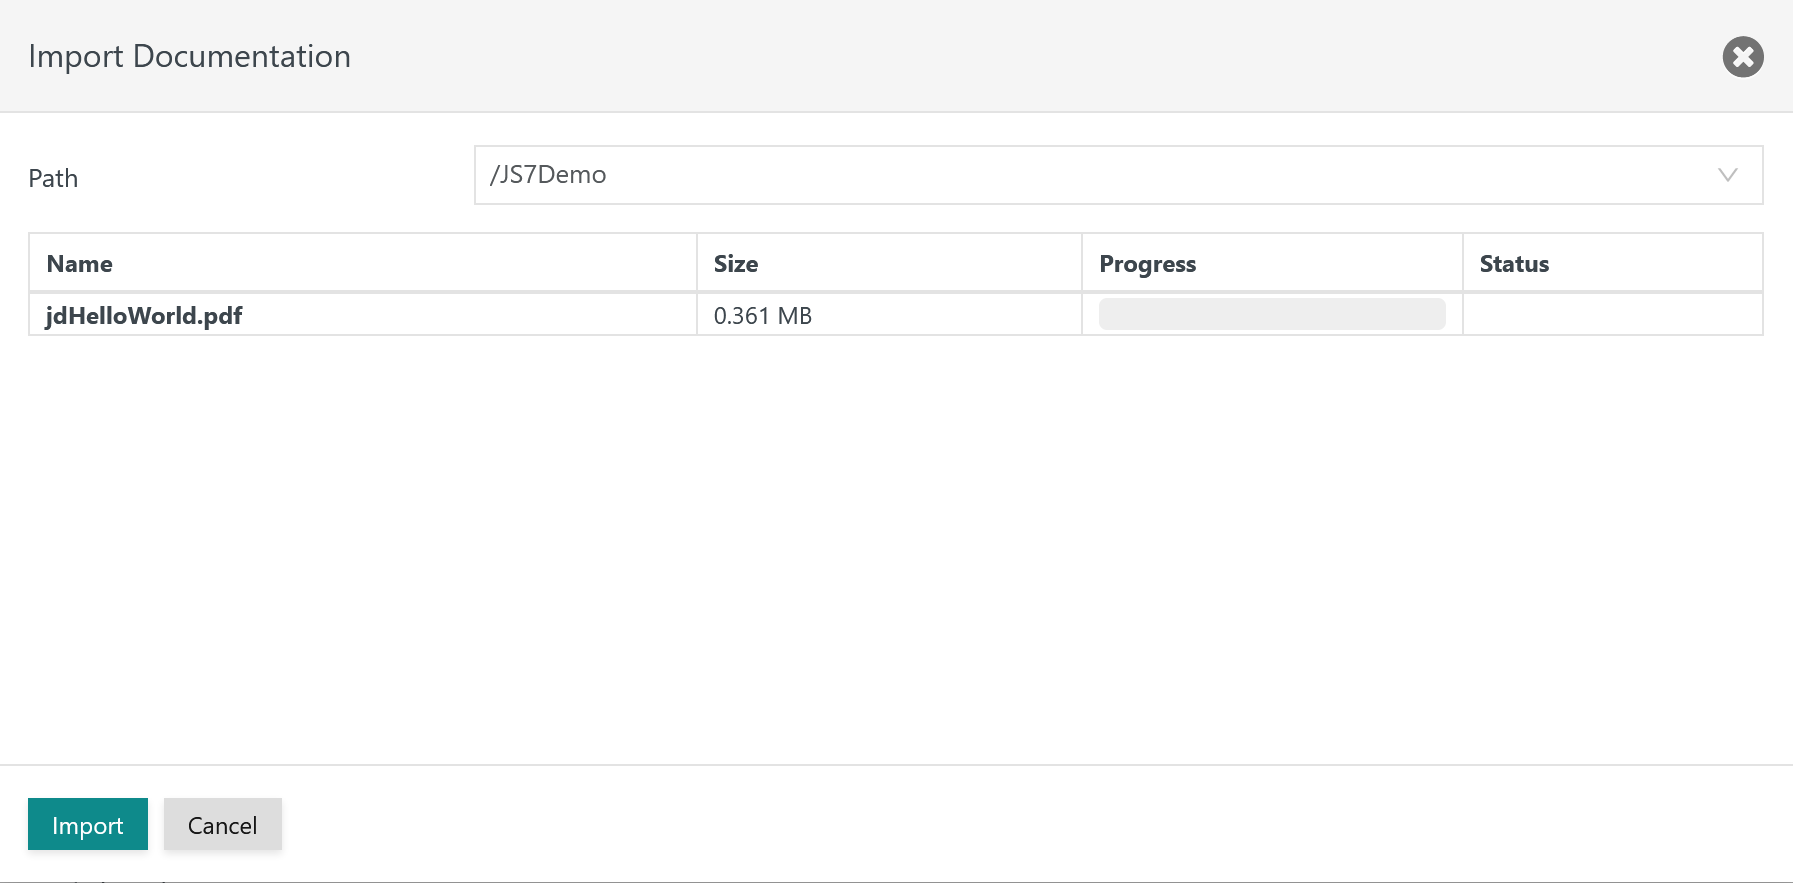
When using the Import Documentation button from the Resources->Documentation view then the following popup window is opened:
Explanation:
- The popup window offers to specify the
Pathto a folder in which to store the uploaded PDF document. An existing folder can be selected or the path to a new folder can be specified that will be created on-the-fly. - The
Pathis used to specify to which folder the documentation files should be stored. ThePathspecified does not have to reflect the folder structure used by scheduling objects such as workflows that later on should be assigned the User Documentation.
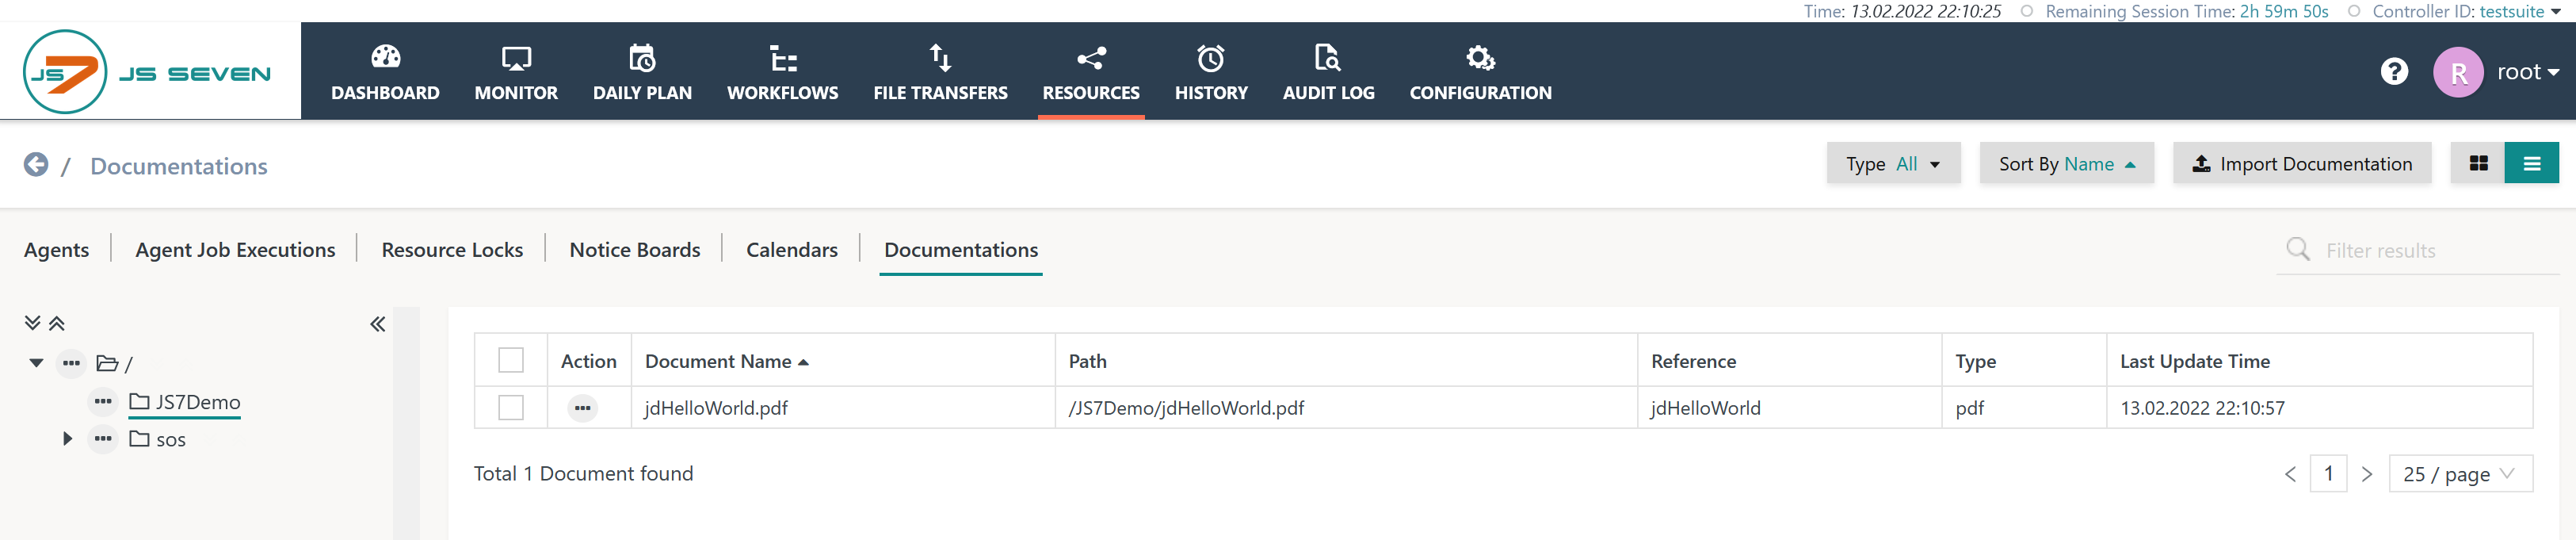
Having selected a PDF document for upload and having performed the import then the view displays the entry for the uploaded PDF document like this:
Import Procedure for HTML Documents
The following example uses a simple HTML User Documentation: a single HTML file with CSS and image files in sub-folders. The files making up the example are zipped to preserve dependencies. The sample_test_job.zip archive is assumed to hold a sample_test_job folder that includes the following files and sub-folders:
Download: sample_test_job.zip

When clicking the Import Documentation button the archive is uploaded like this:

Explanation:
- For import the path
/Samplesis specified that points to a new folder that is created on-the-fly. - The
Pathis used to specify to which folder the documentation files should be stored. ThePathspecified does not have to reflect the folder structure used by scheduling objects such as workflows that later on should be assigned the User Documentation.
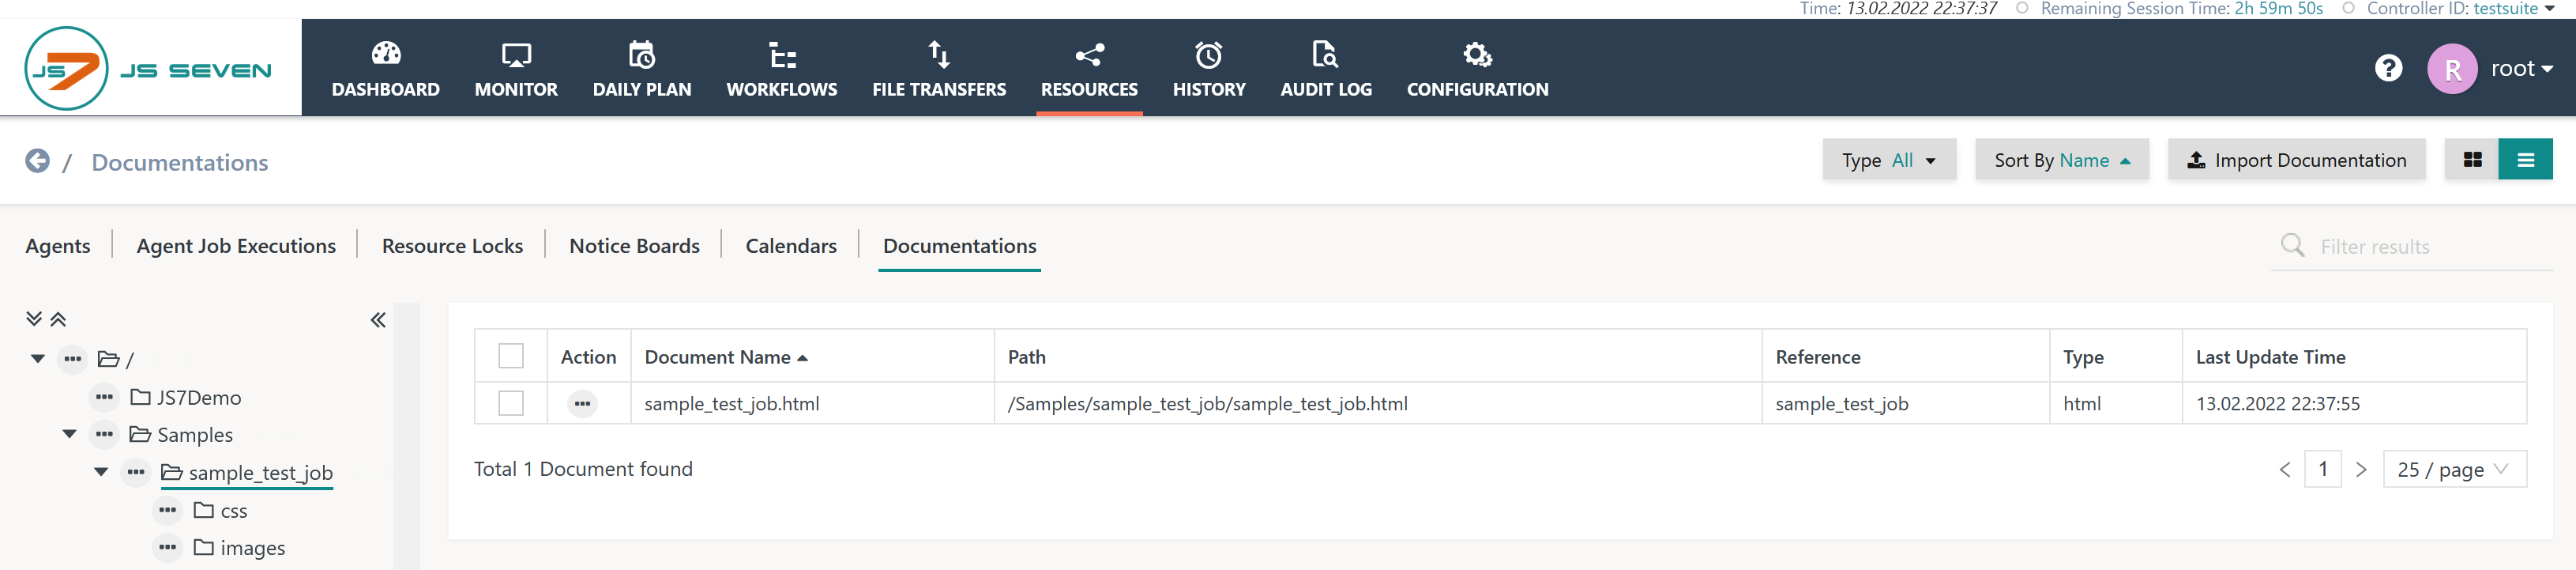
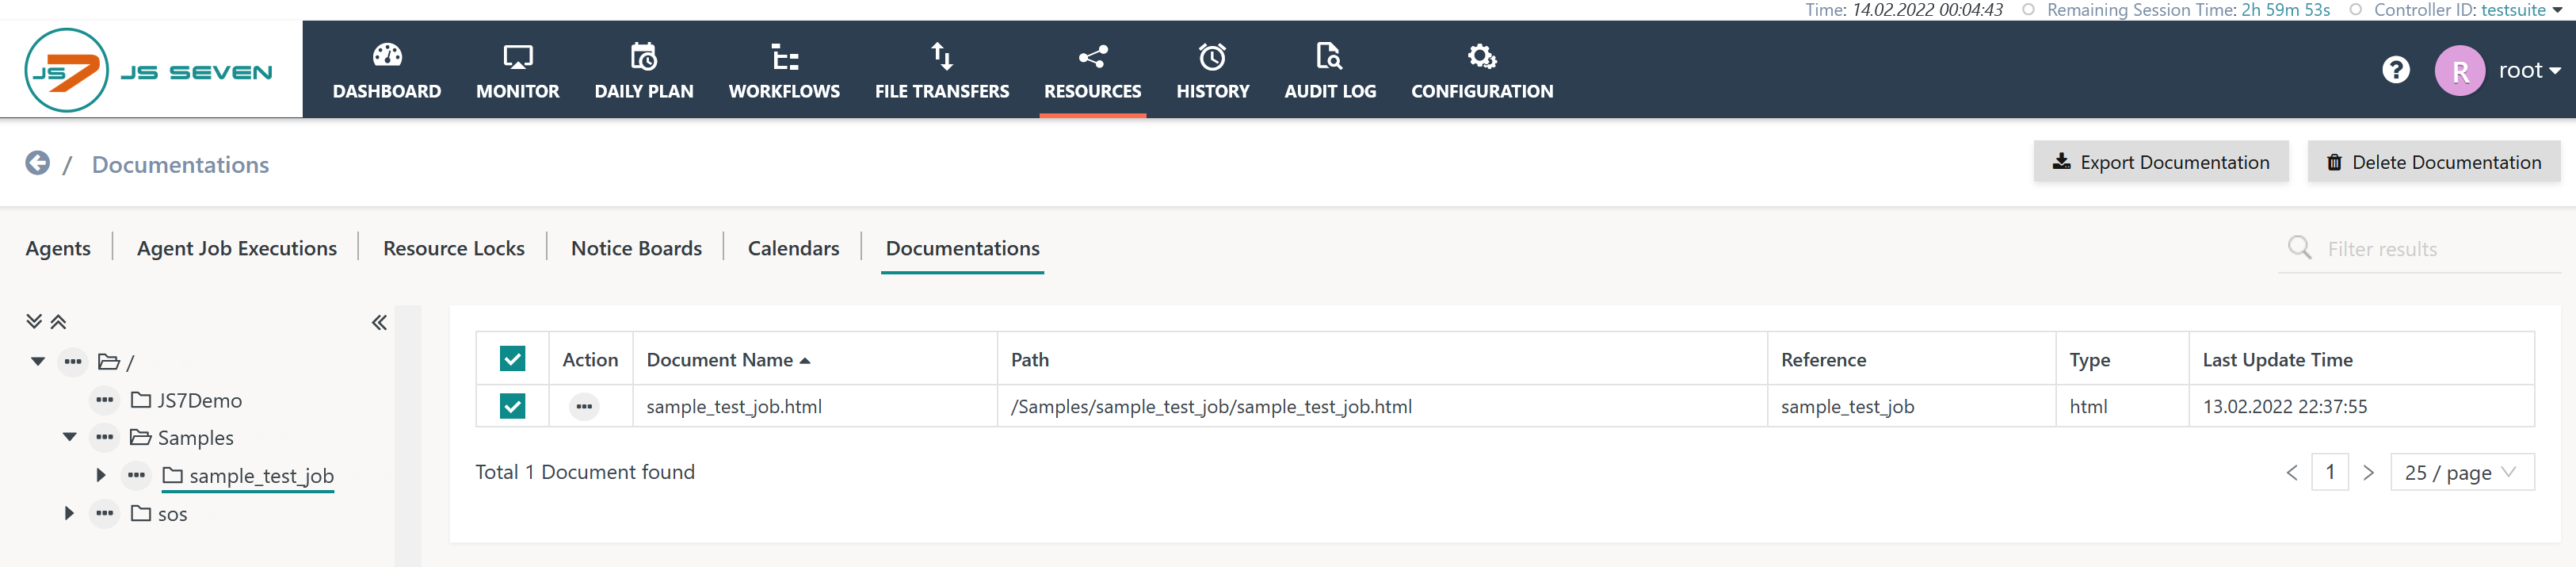
After import the Resources->Documentation sub-view looks like this:
Explanation:
- The
/Samplesfolder is available with thesample_test_jobsub-folder from the .zip archive.- The
sample_test_job.htmldocument is available. - The
cssandimagessub-folders are available with respective files.
- The
Assigning User Documentation
Permissions
By default the application manager role is granted permissions to assign User Documentation to scheduling objects.
Assignment Procedure
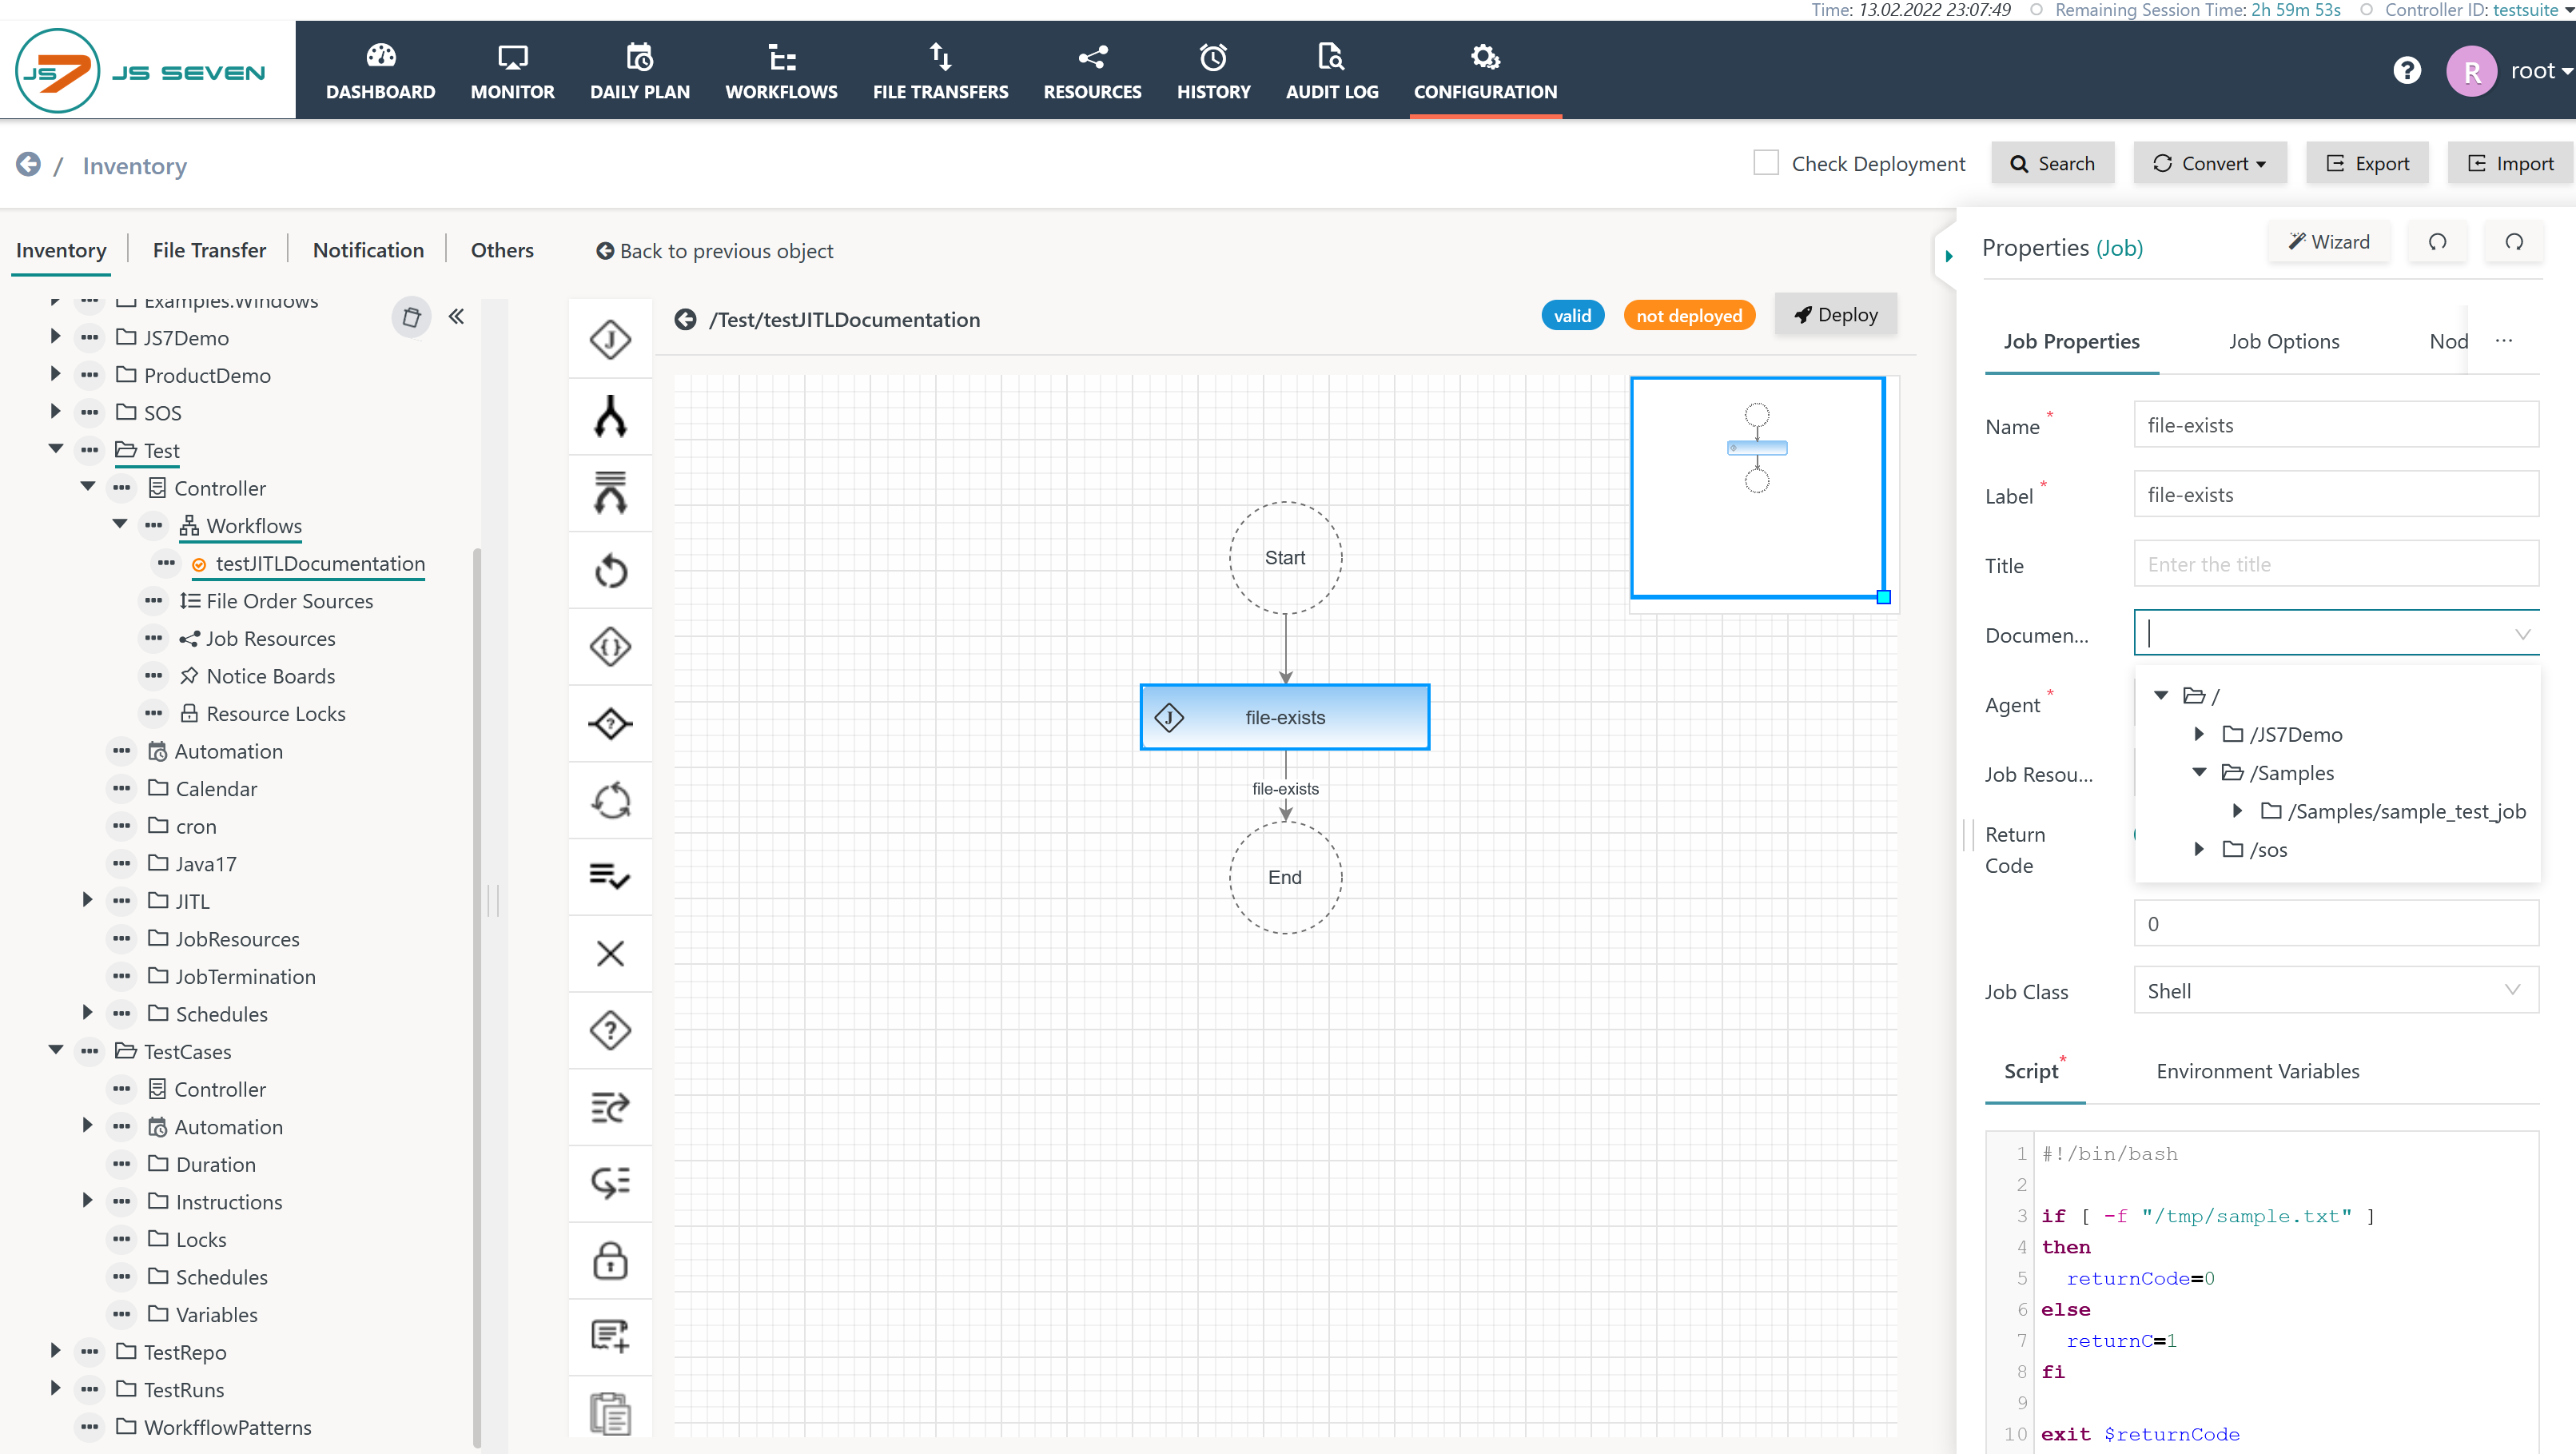
Any scheduling objects can be assigned a User Documentation from the Configuration->Inventory sub-view like this:
Klick the "More Options" checkbox to enable the Documentation input field.
With the User Documentation being assigned and the workflow or respective scheduling object being deployed the User Documentation is visible with the Workflows view like this:
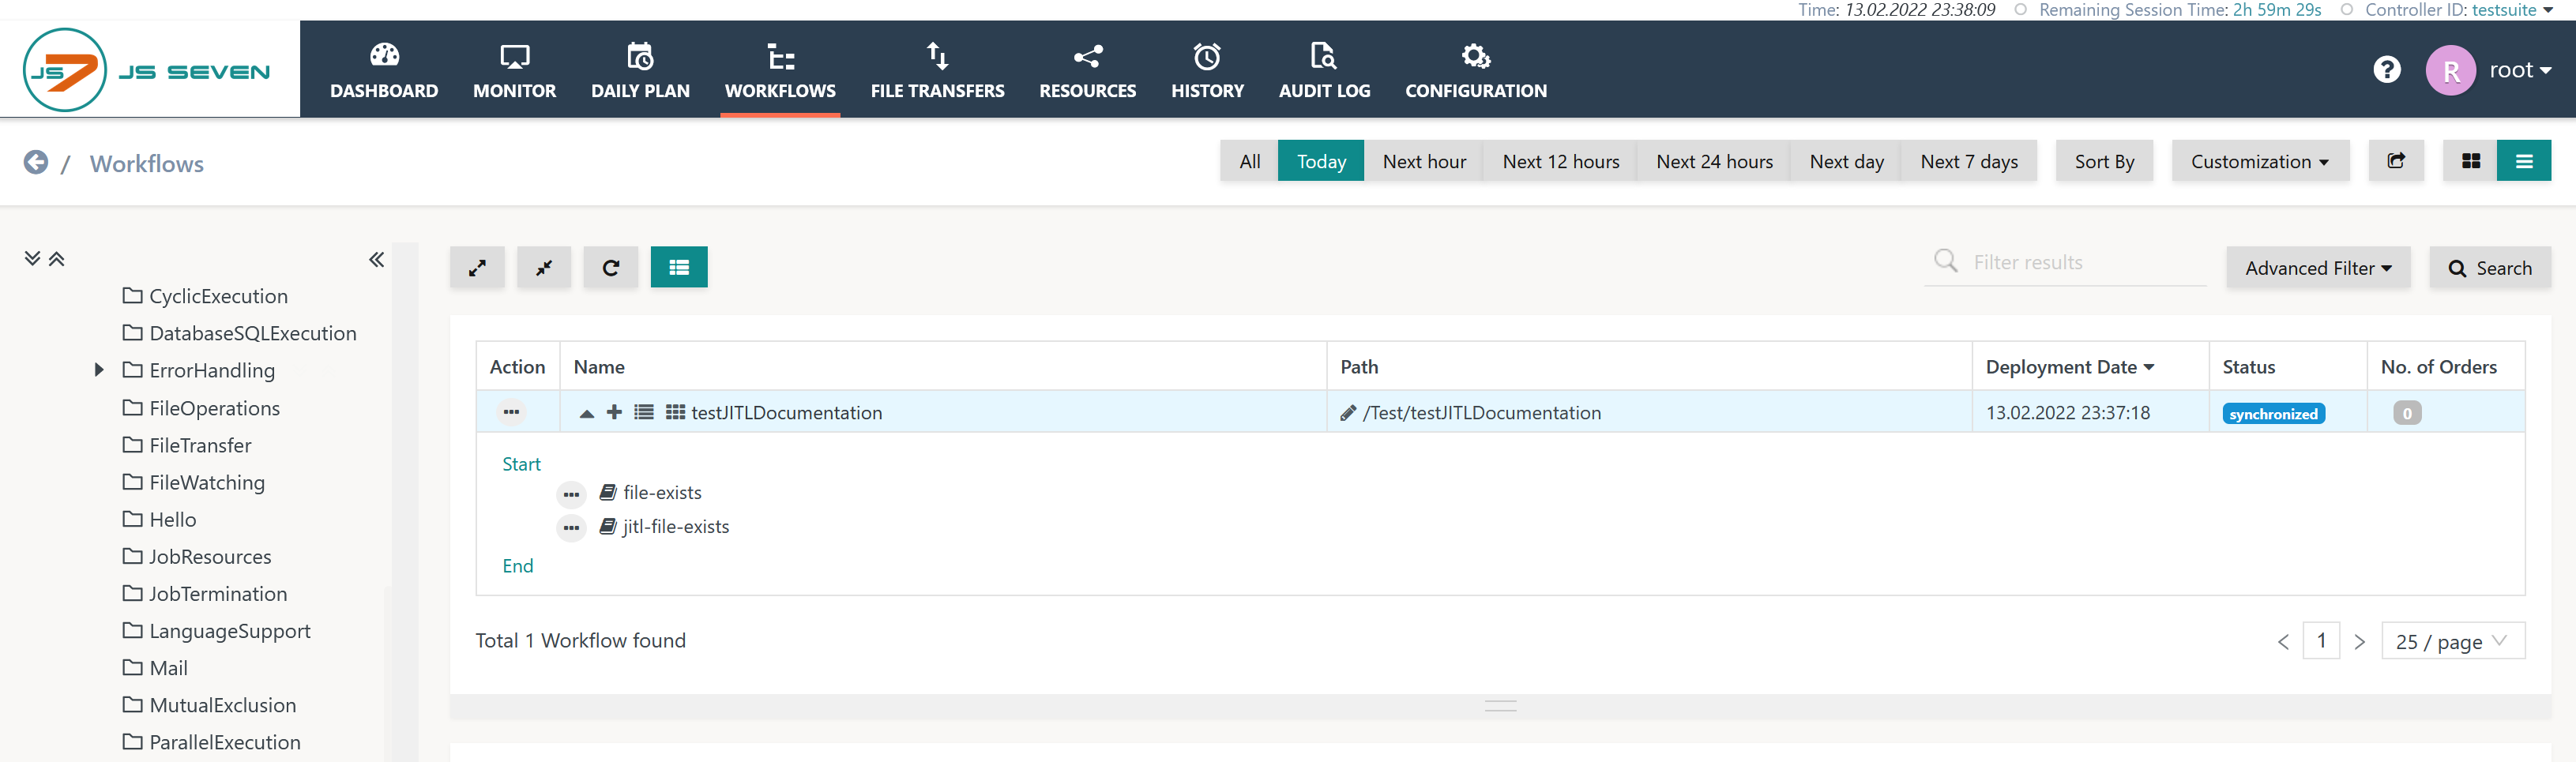
Clicking the![]() icon left to the job name opens the User Documentation in a new browser window or tab, depending on the configuration in the user account's profile, see Profile Settings.
icon left to the job name opens the User Documentation in a new browser window or tab, depending on the configuration in the user account's profile, see Profile Settings.
The proceeding to assign User Documentation is the same for any scheduling objects such as Resource Locks, File Order Sources etc..
Updating User Documentation
The import procedure described above can be used to update documentation files in case of changes.
The updated User Documentation will be immediately available for all objects it has been assigned to.
Deleting User Documentation
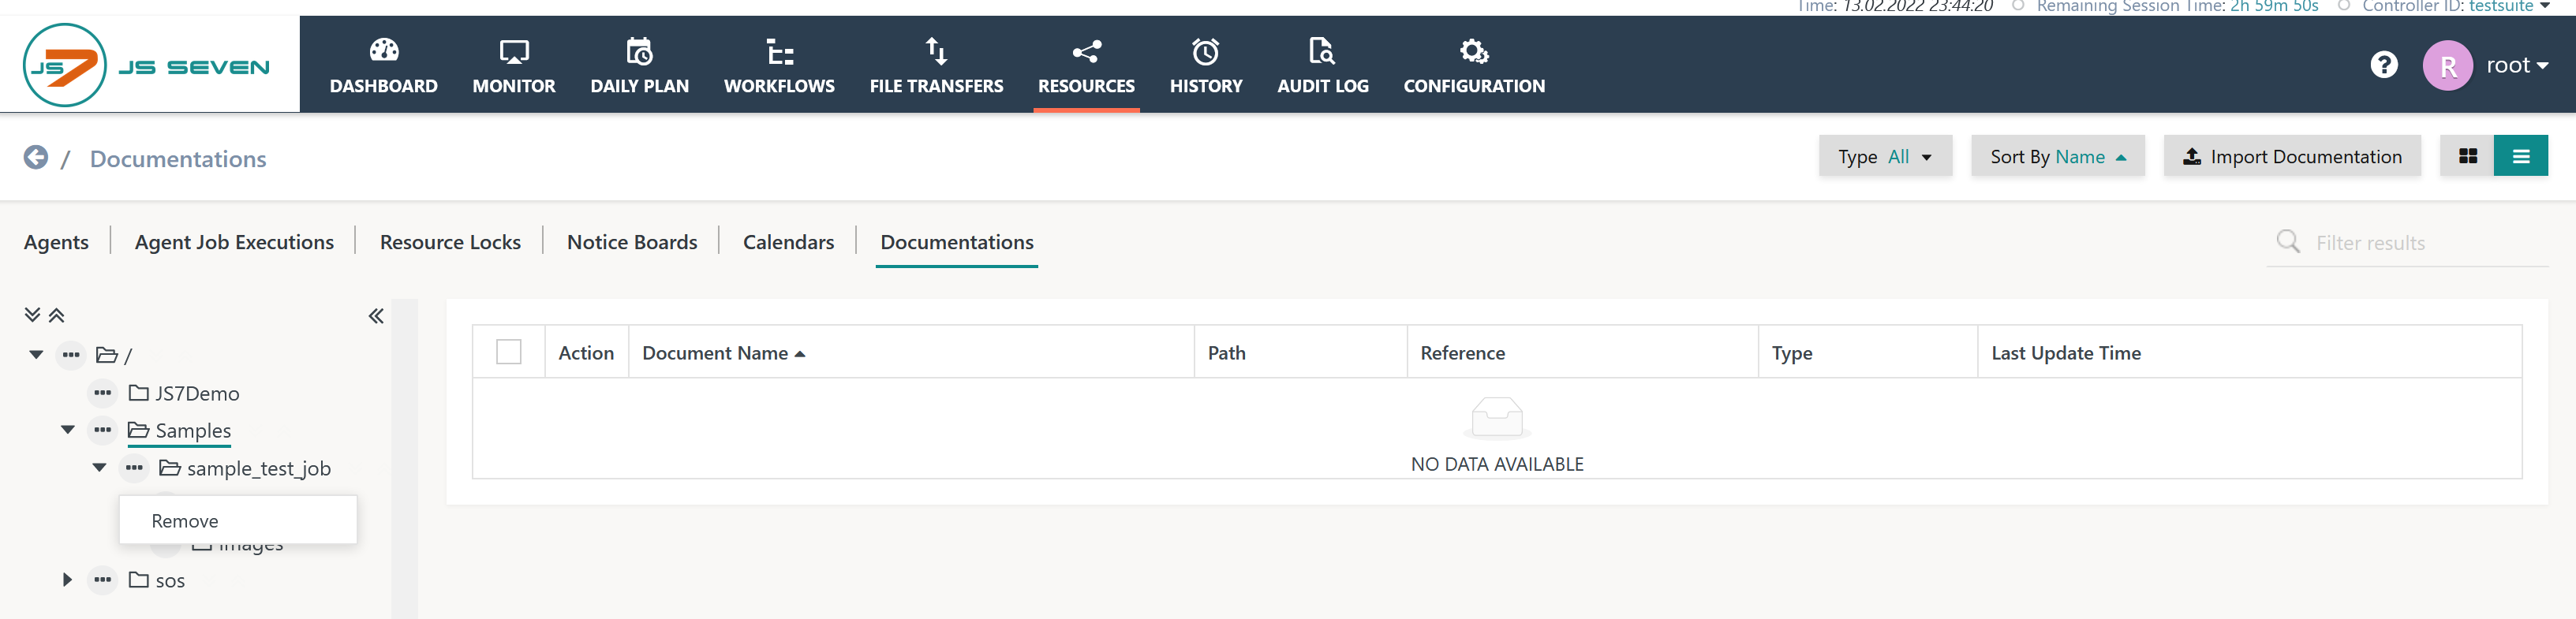
Documentation items are deleted if the folder containing the User Documentation is deleted. This operation is available from the folder's action menu like this:
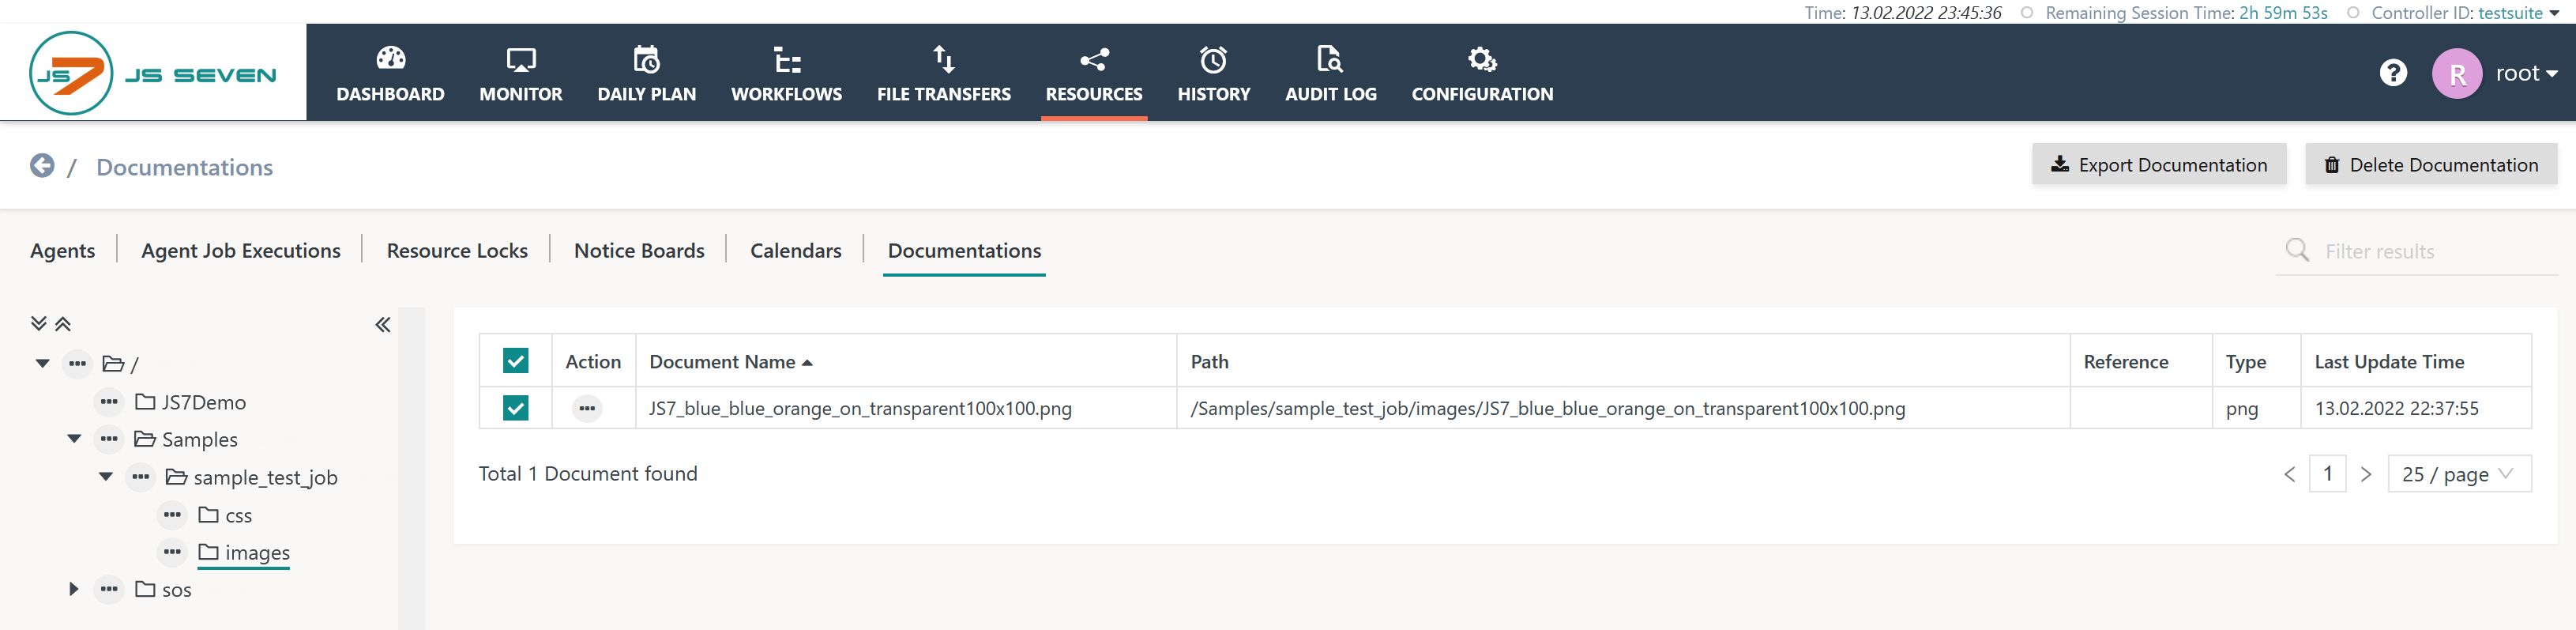
In addition, documentation items can be deleted individually. To this purpose the right panel offers to select documents available in a folder. If documents are selected then the Delete Documentation button is visible like this:
Exporting User Documentation
User Documentation assigned a scheduling object is not subject to JS7 - Rollout of Scheduling Objects.
Instead, User Documentation can be exported and imported into another JS7 environment.
The Export Documentation button is displayed after a documentation item has been selected like this:
The export file (.zip) then is offered for download.
Managing Documentation Items
For documentation items included with a User Documentation a number of operations are available from the documentation item's action menu like this:
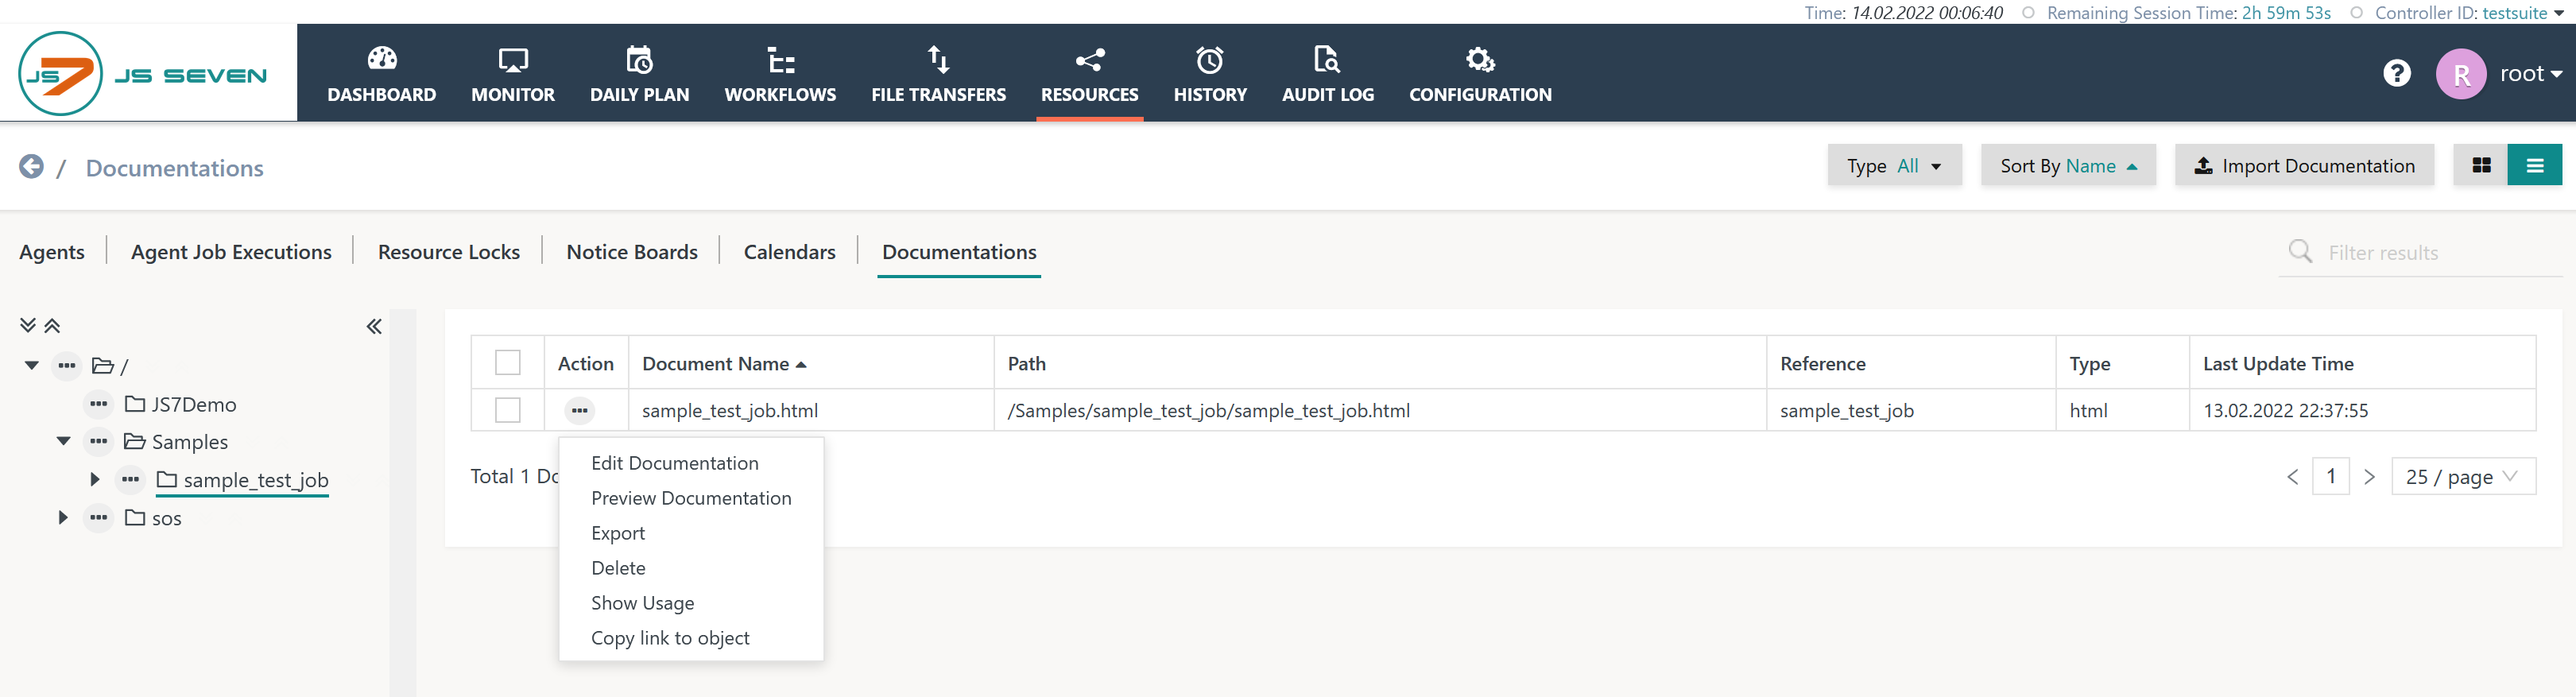
Explanation:
- Edit Documentation
- The operation brings up the following popup window:
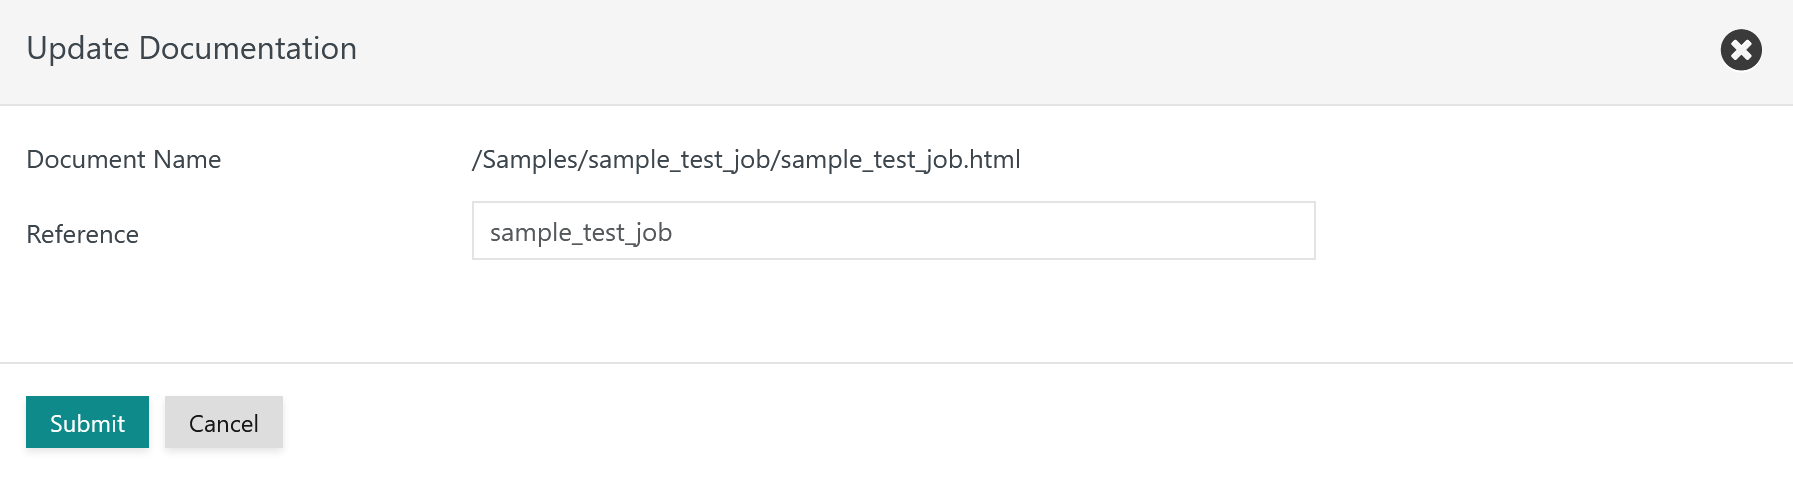
- The operation brings up the following popup window:
- Preview Documentation
- Opens the User Documentation in a new browser tab or new browser window.
- Export
- Delete
- Show Usage
- The operation brings forward a popup window that displays the list of scheduling objects that are assigned the User Documentation like this:
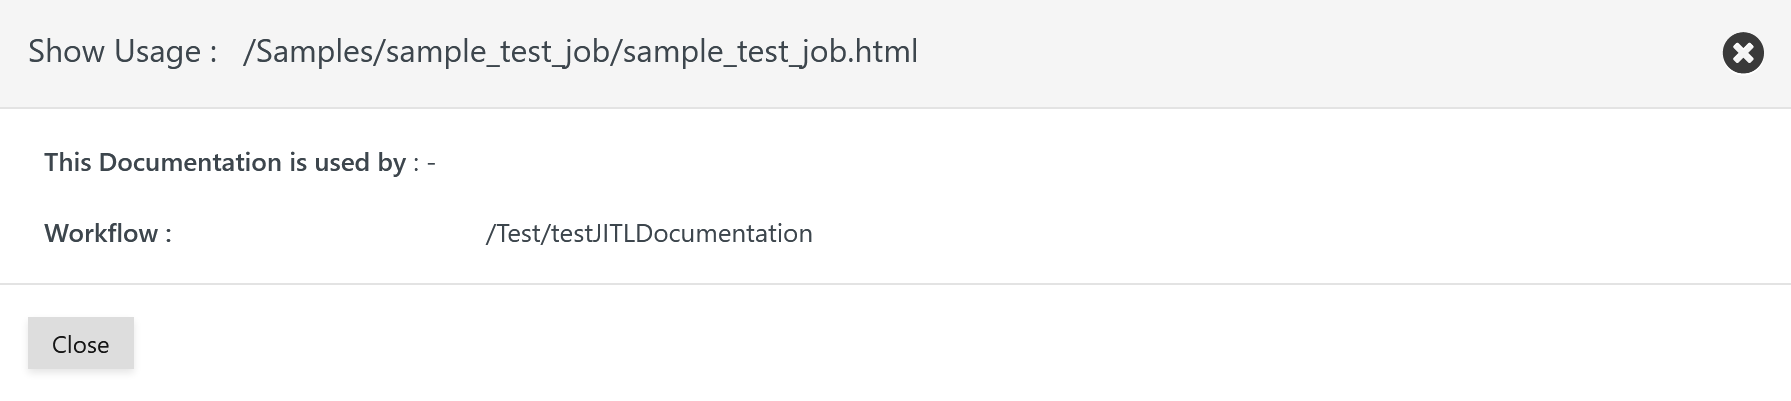
- The operation brings forward a popup window that displays the list of scheduling objects that are assigned the User Documentation like this:
Job Template Documentation
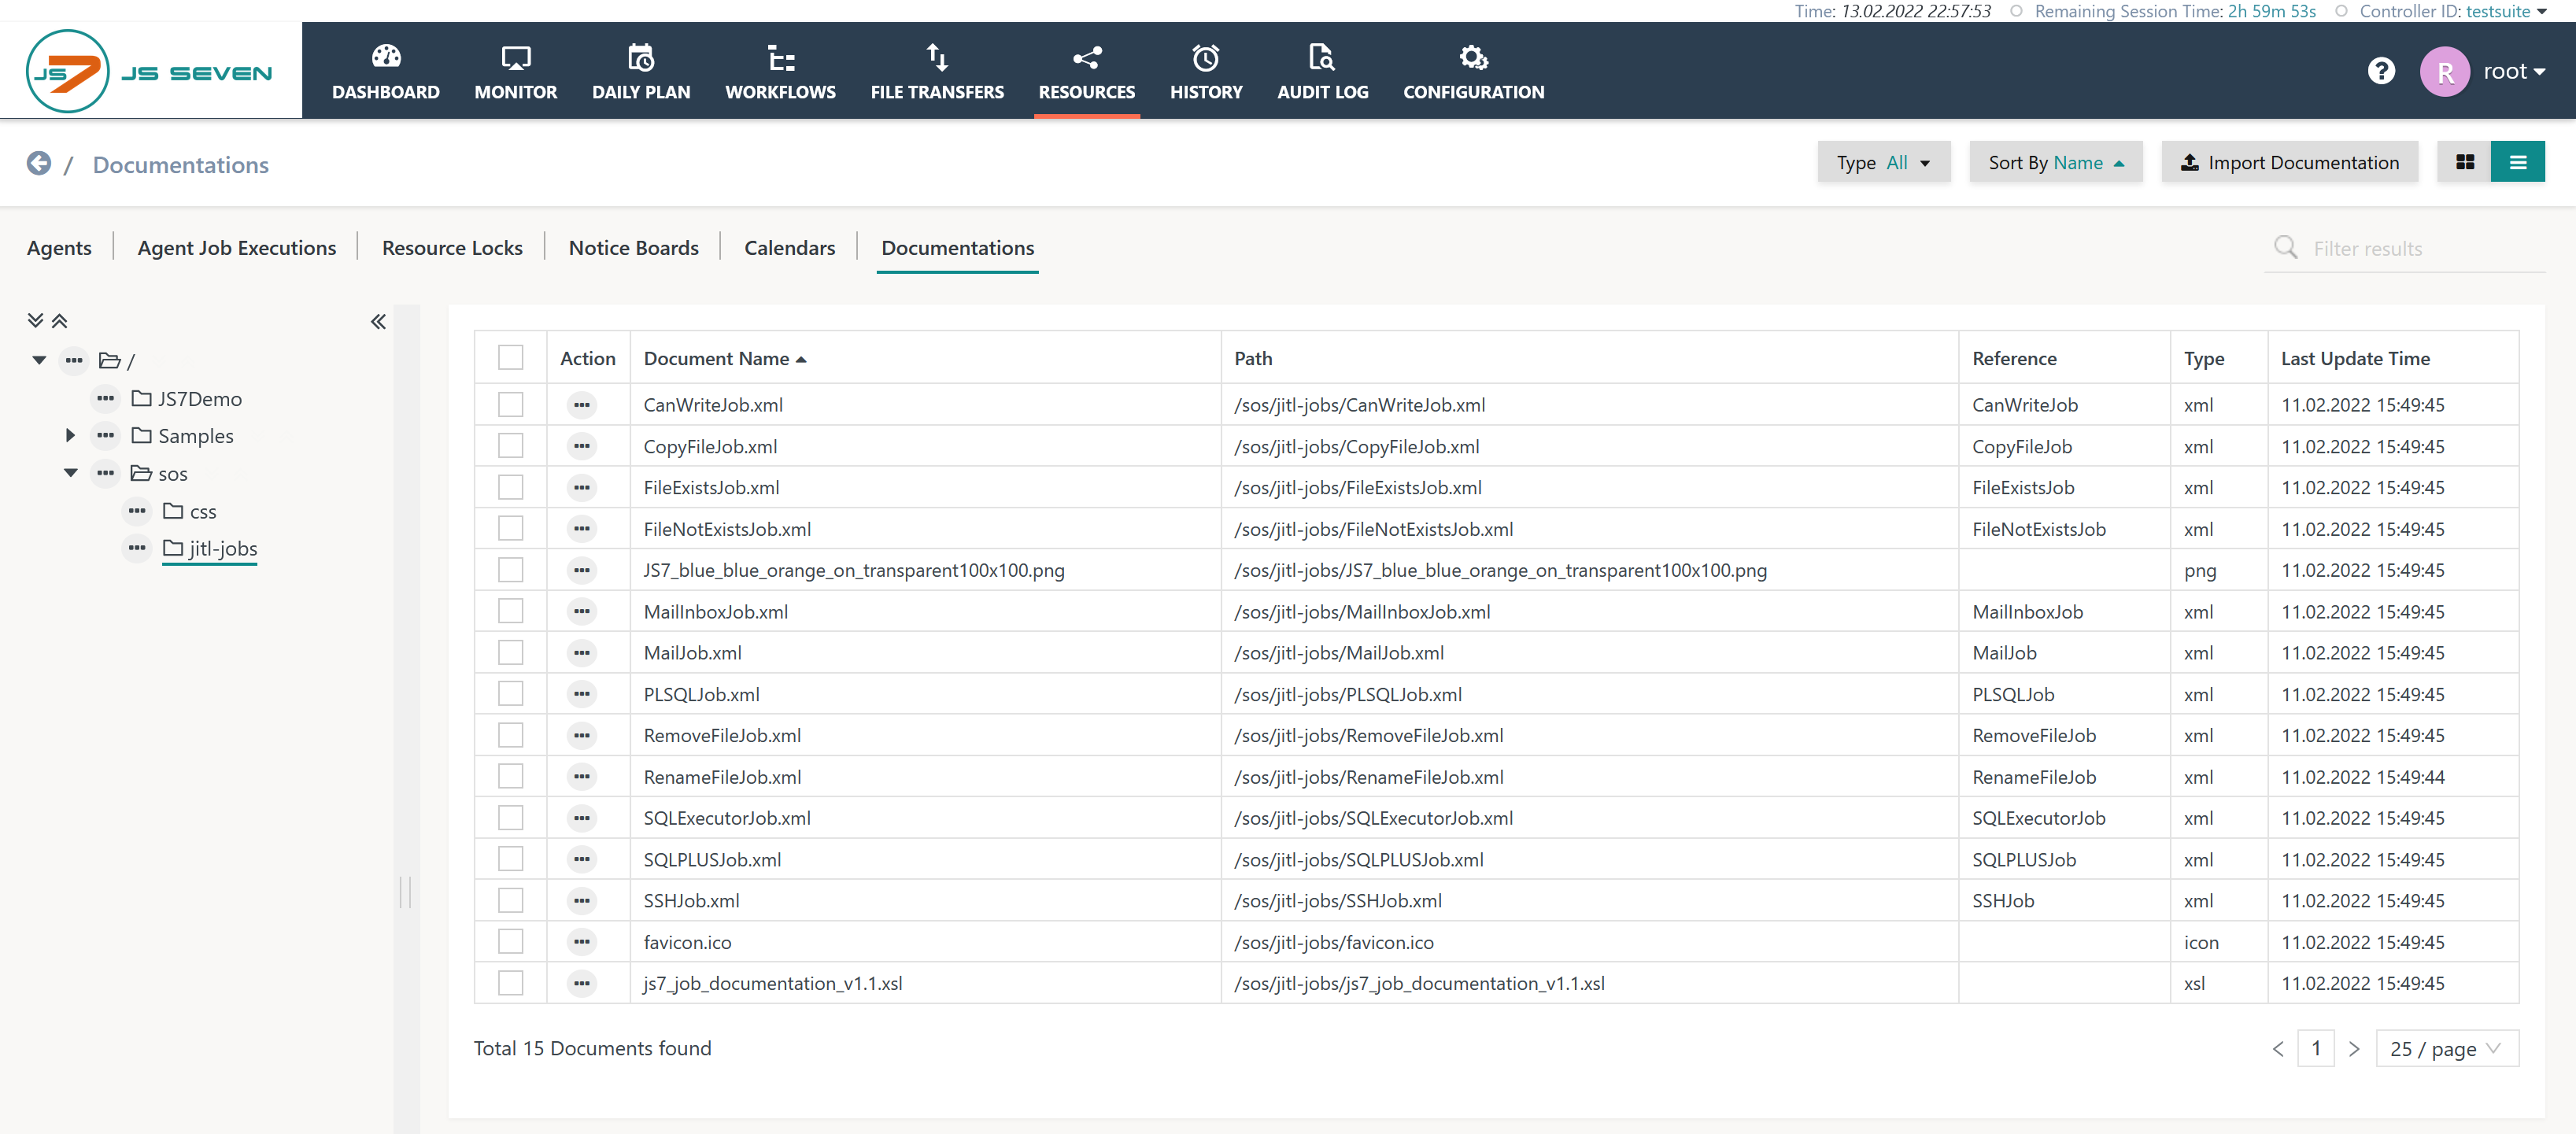
During setup of JOC Cockpit the User Documentation for the JS7 - Job Templates is automatically imported. The job documentation files are available with the Resources->Documentation view in the /sos/jitl-jobs folder like this:
In order to use a Job Template when creating a new job in the Configuration->Inventory sub-view users can chose the Wizard as follows:
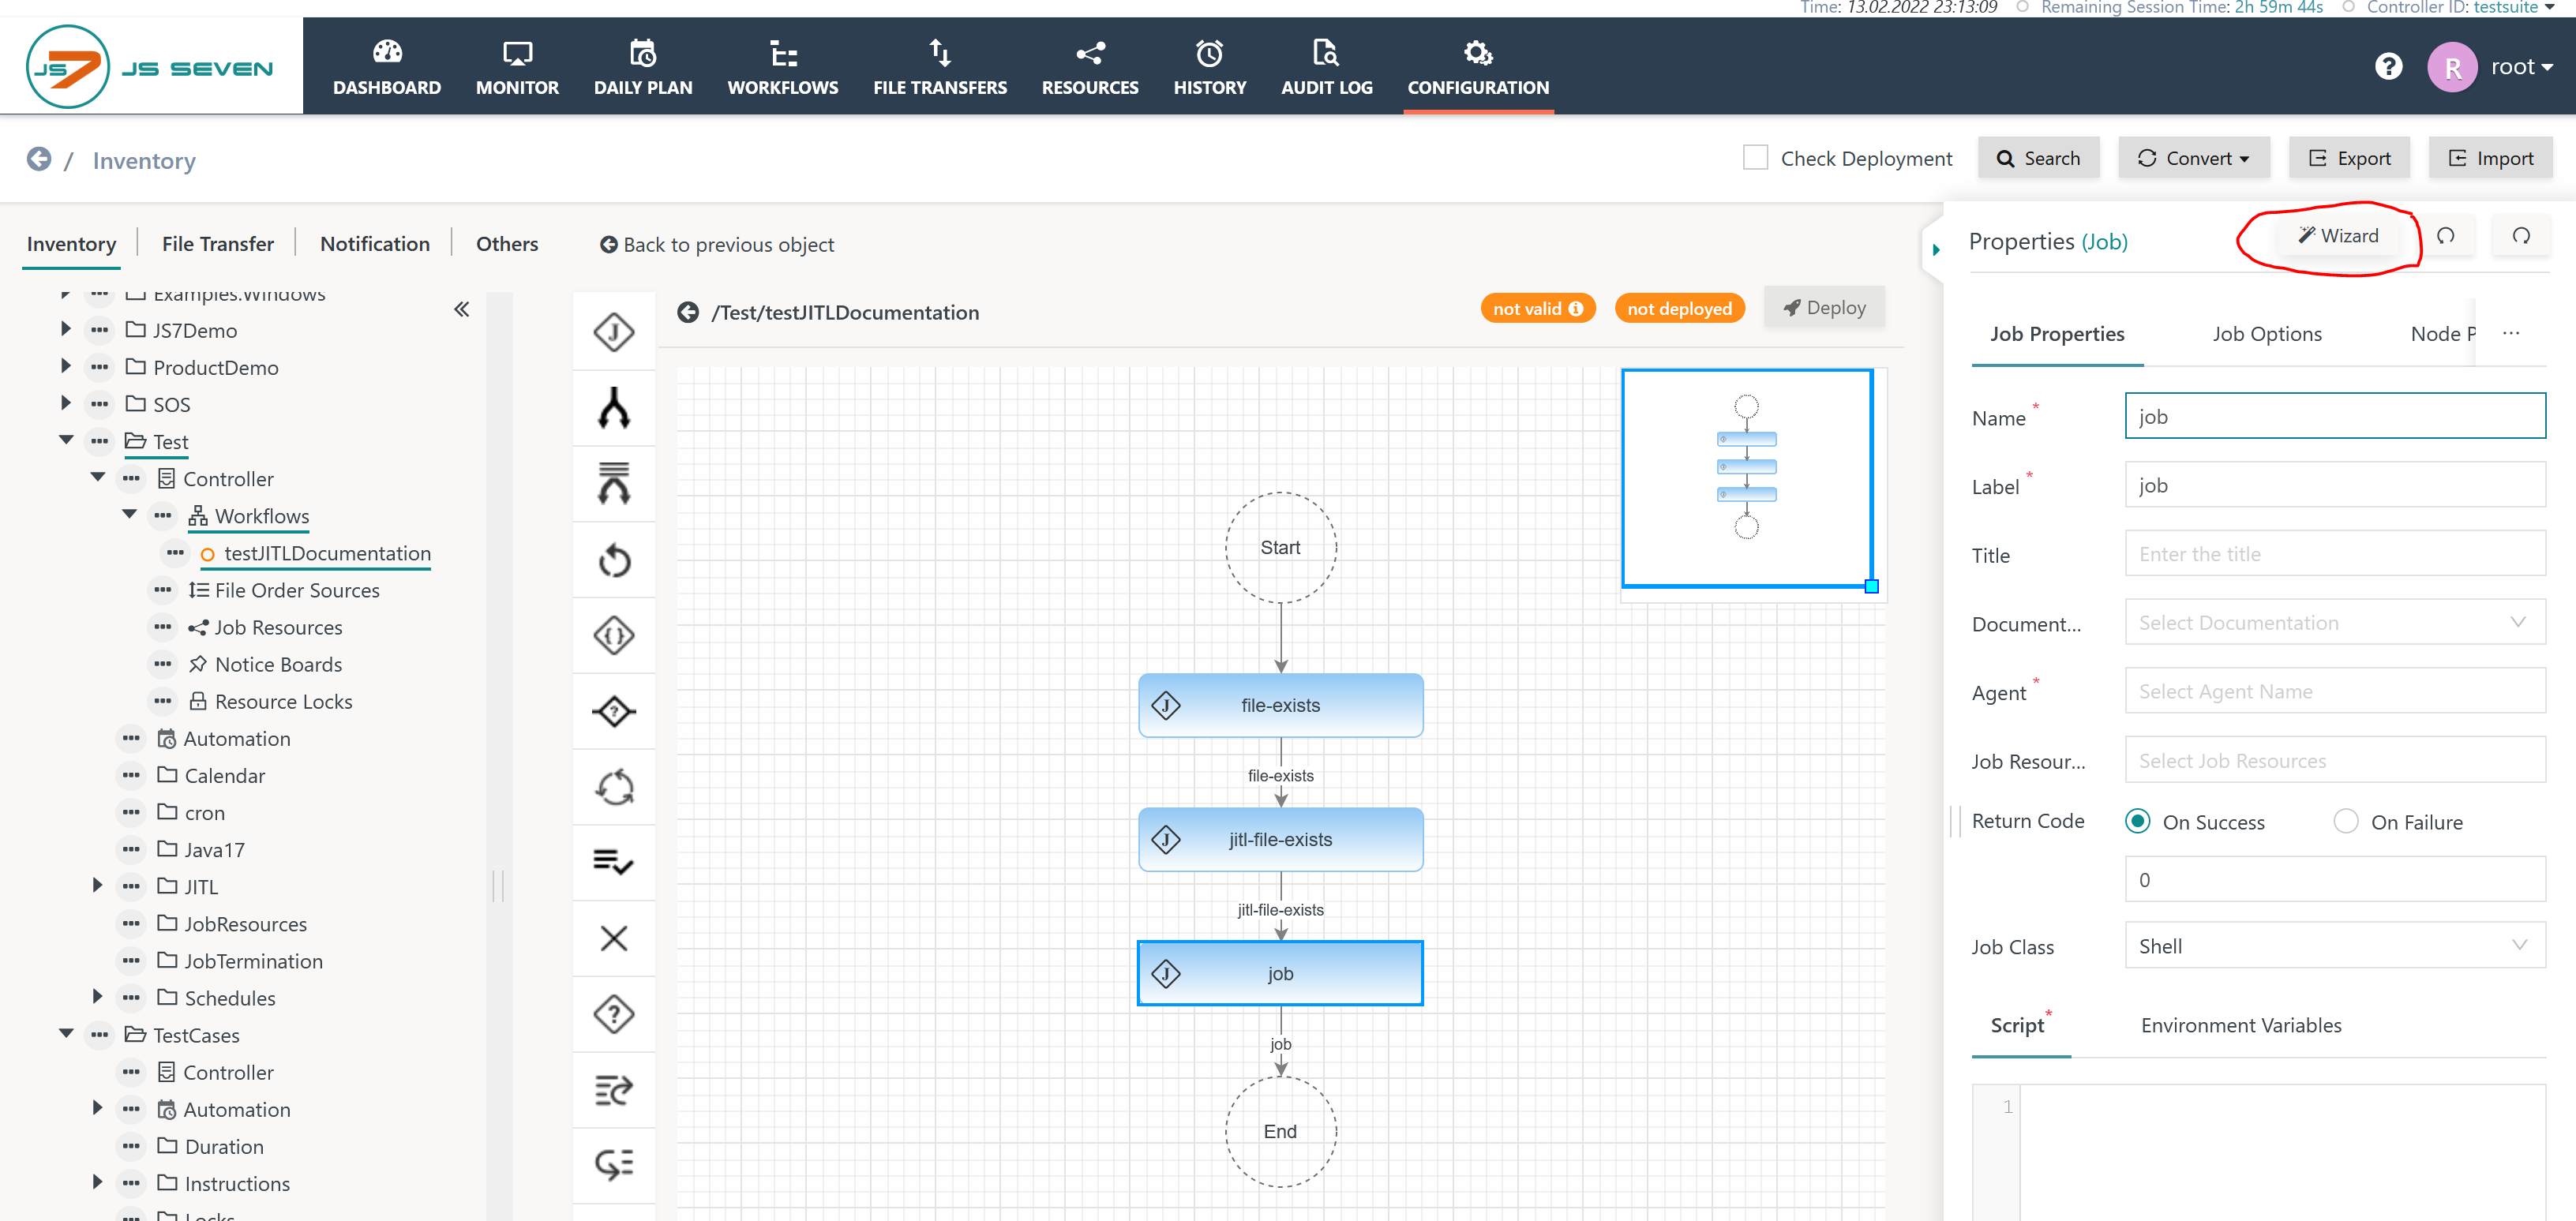
When invoking the Wizard then the following popup window opens:
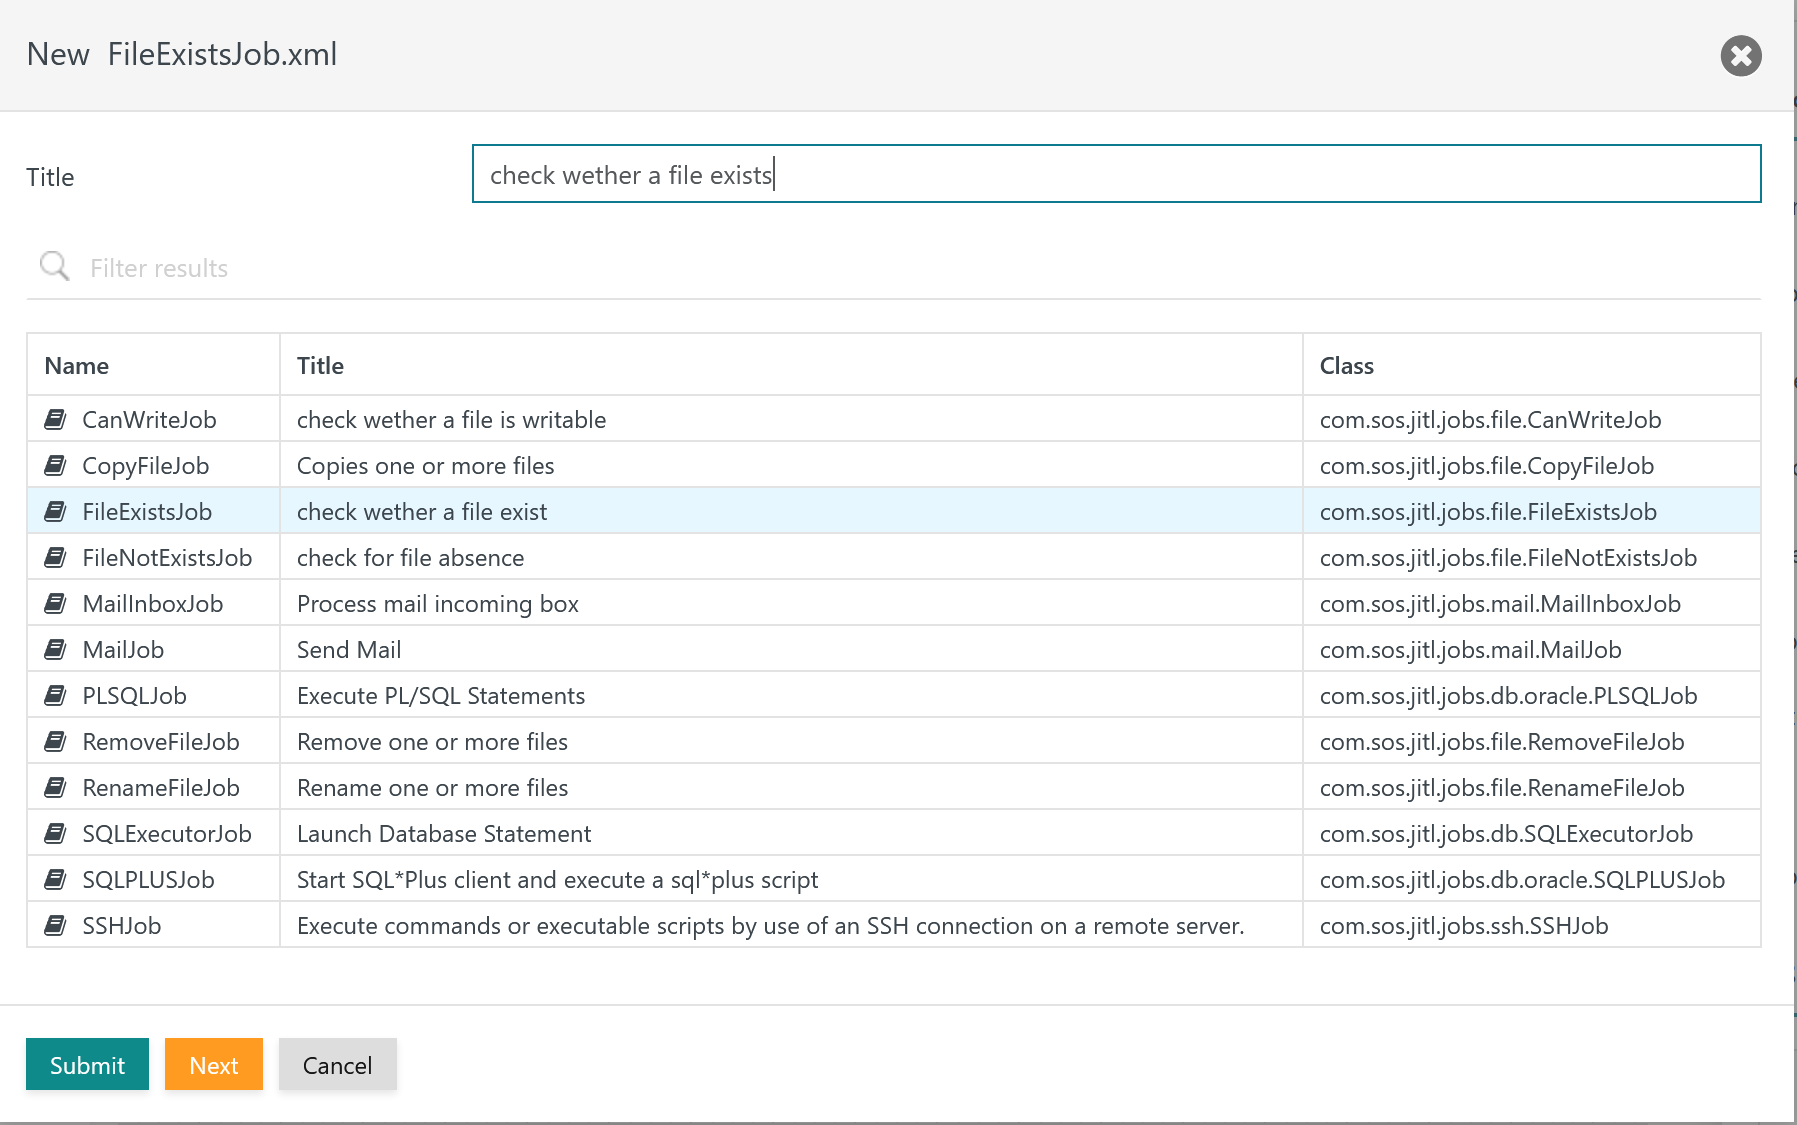
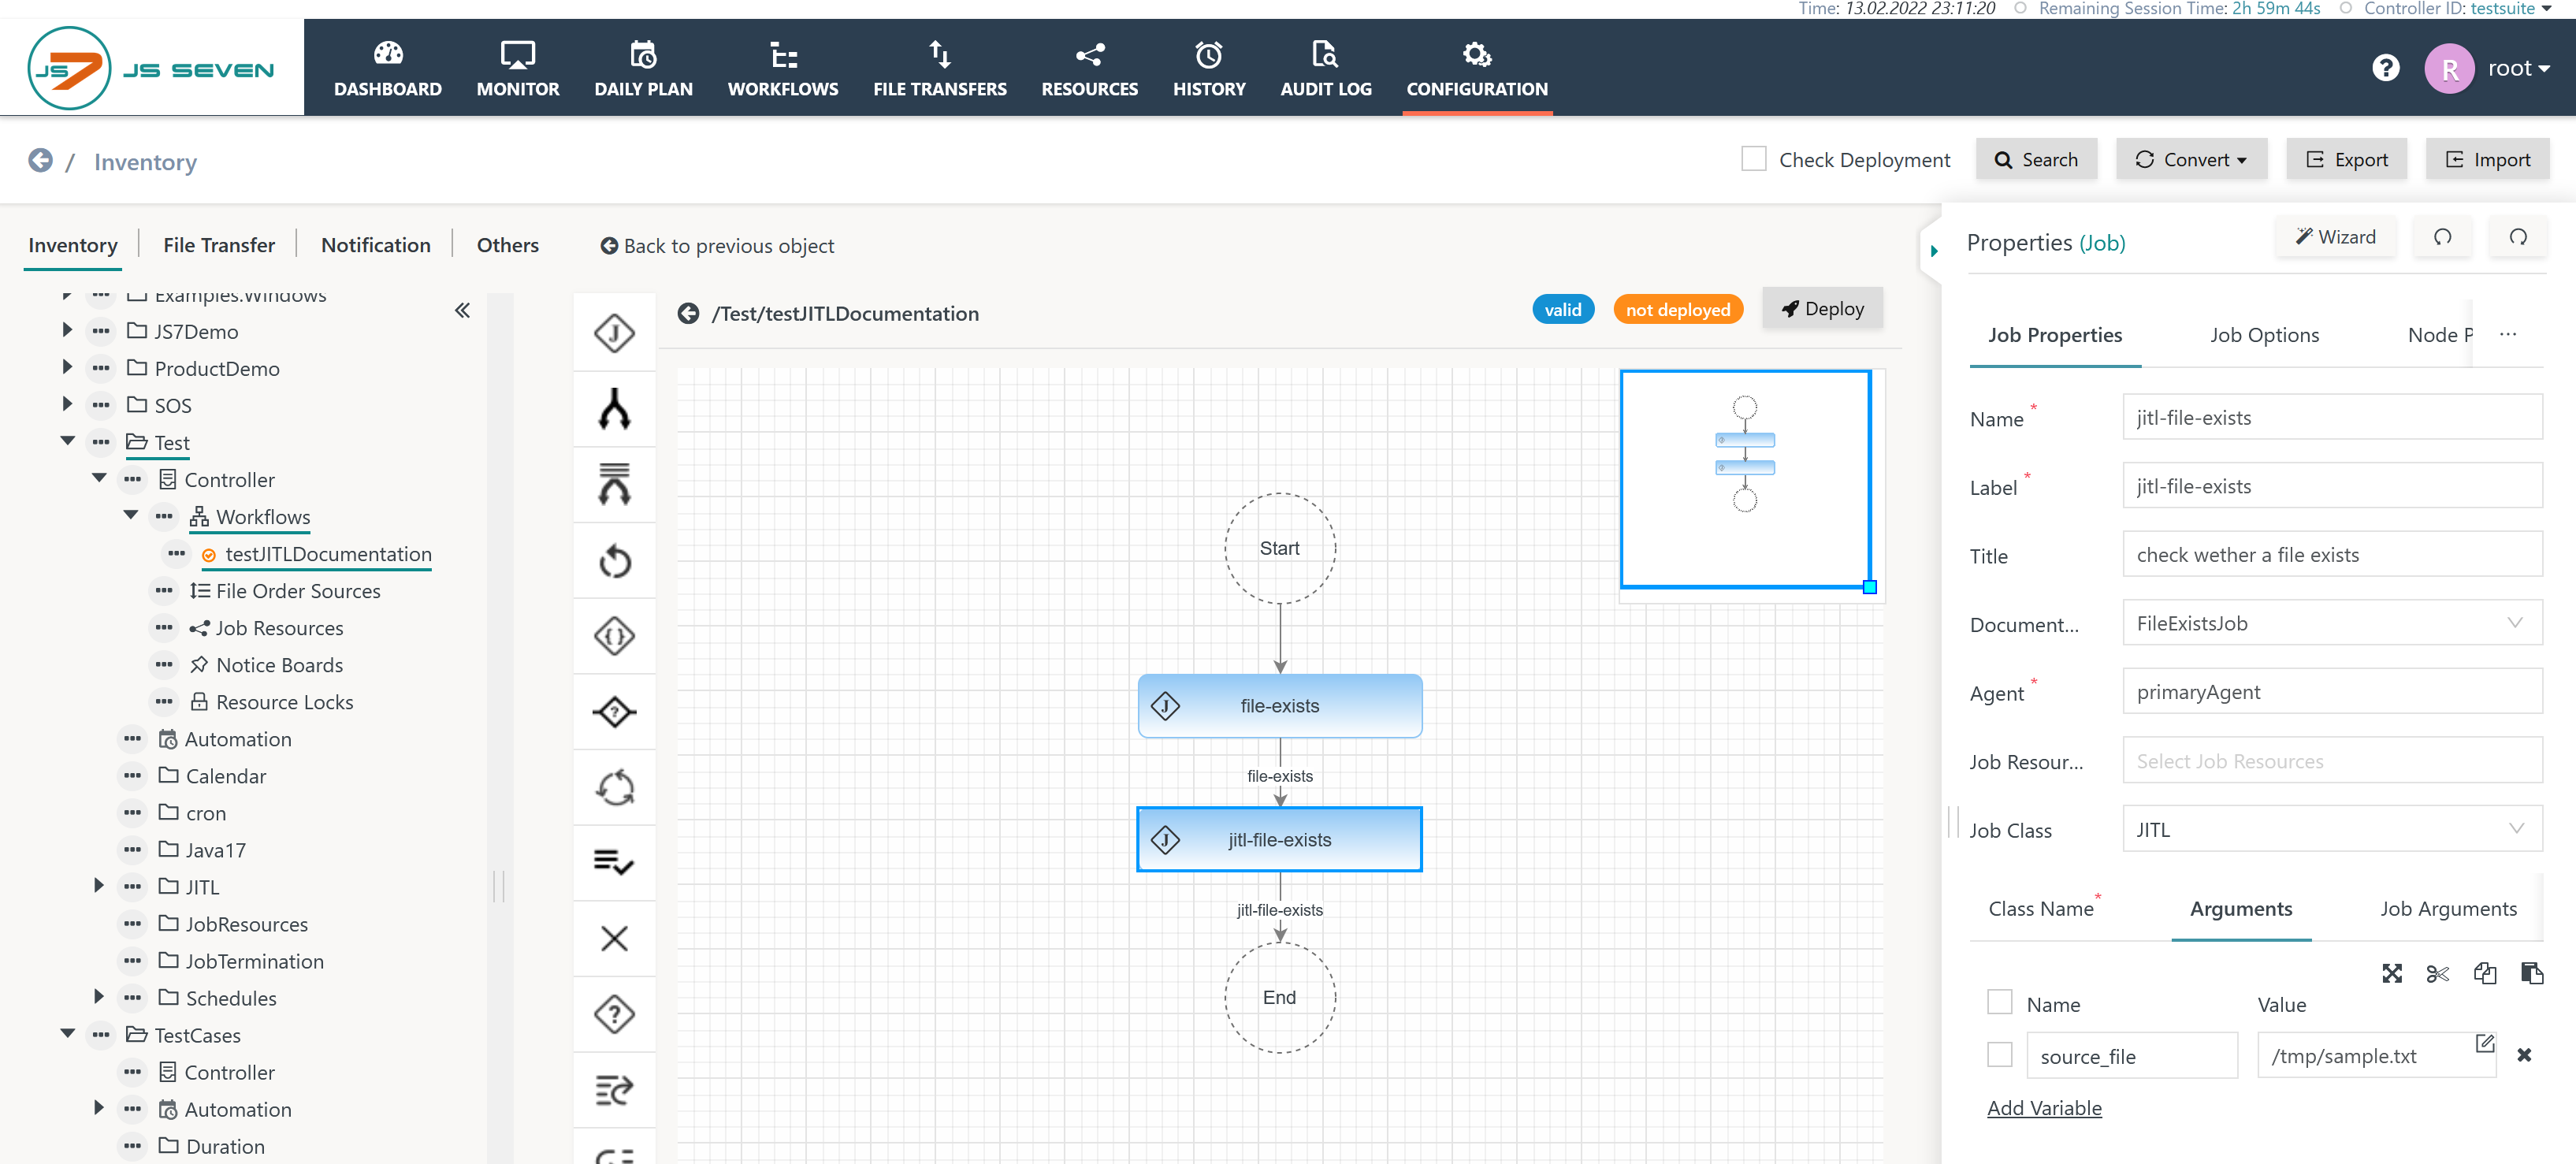
Having selected the Job Template the Documentation input field is automatically populated with the User Documentation entry like this:
With the User Documentation being assigned and the workflow being deployed the newly created job is visible from the Workflows view like this:
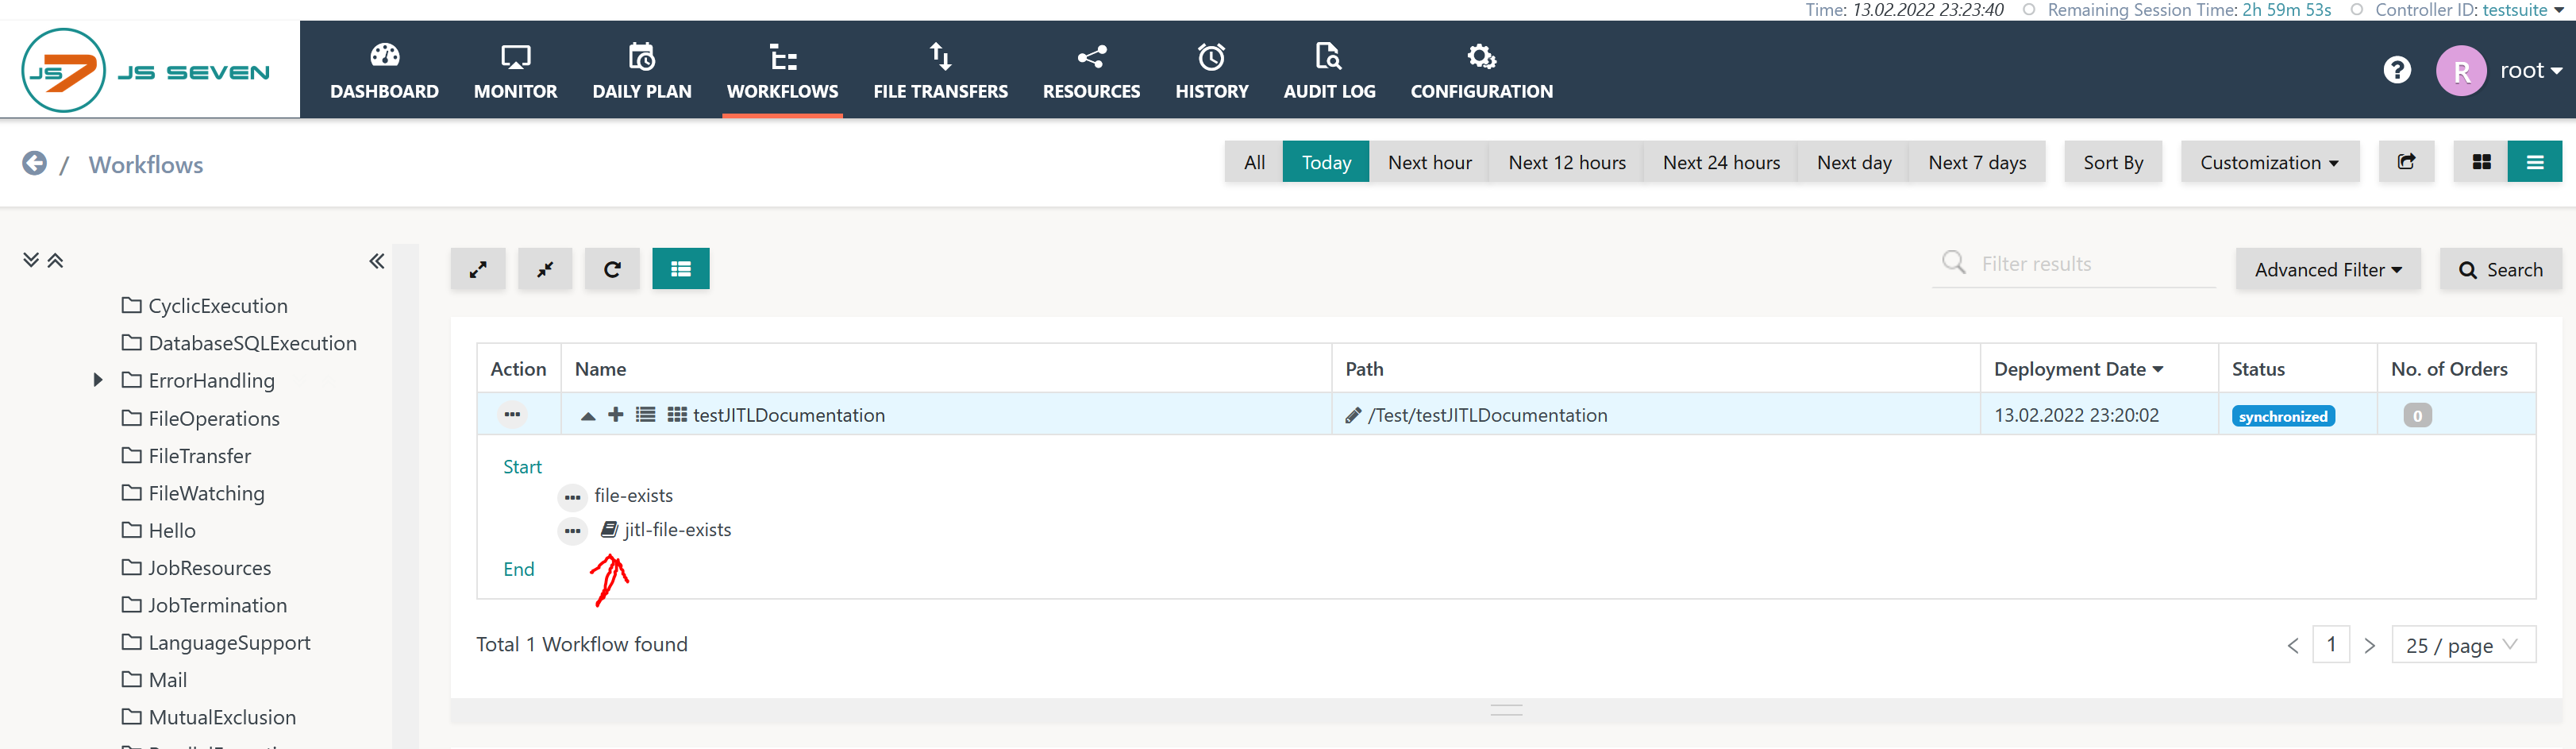
Consider the ![]() icon left to the job name that indicates availability of the job documentation.
icon left to the job name that indicates availability of the job documentation.
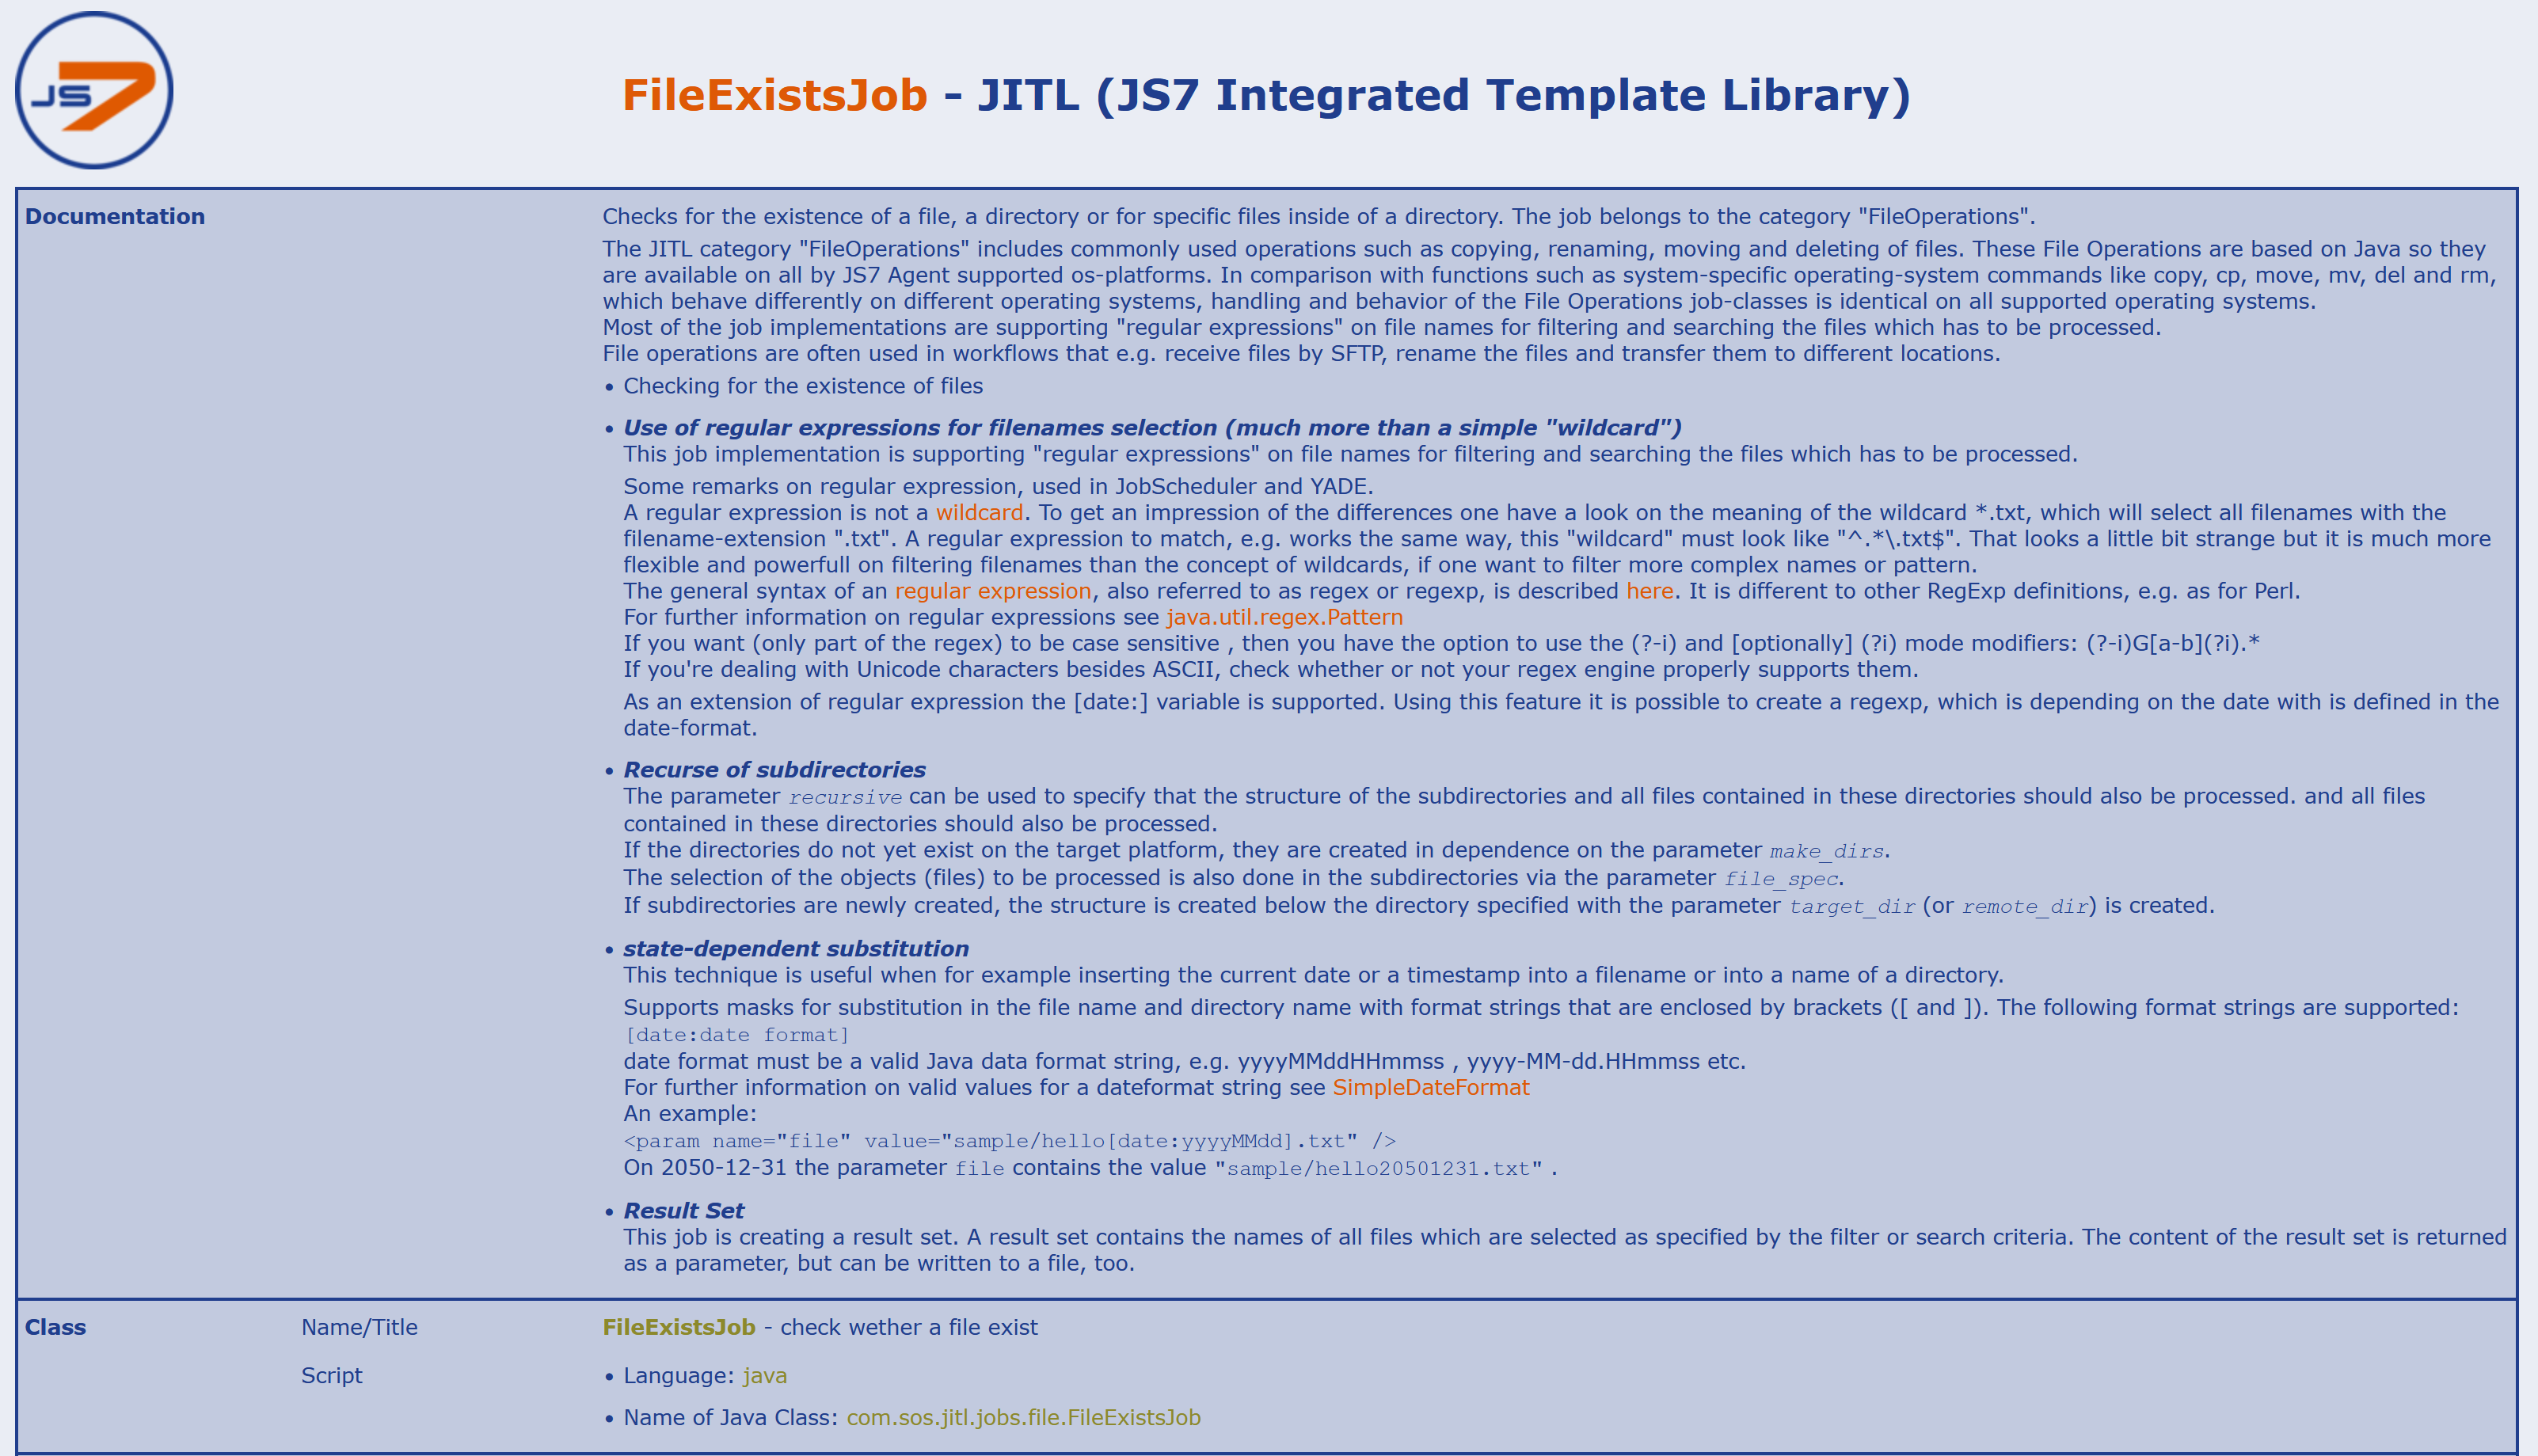
When clicking the icon then the job documentation is displayed like this:
Settings
Profile Settings
Users can specify if the User Documentation should be displayed from a new browser tab or from a new browser window. This is specified in the user account's JS7 - Profiles like this:
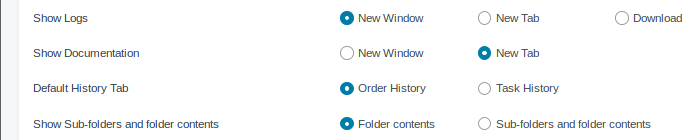
The default setting is to open User Documentation in a new browser tab.
Security Settings
Upload of documentation files can include security risks that can be mitigated as follows:
Users can apply an external sanitizer tool to check the validity and compliance of documentation files and to clean documents accordingly.
- Ideally, the tool in question will be a sanitizer that strips offending elements from documents, for example external links.
- However, if no sanitizer is available for a given document format then a checker will do. If the check fails, then the document will not be added to the user documentation.
JOC Cockpit will run the sanitizer command line tool for each documentation file that should be uploaded:
- The sanitizer tool must decide based on the file extension of the input file or other method which sanitizing method will be applied.
- The sanitizer tool signals success by exit code 0, any non-zero exit code is considered failure. Similarly, if any output is found in the stderr channel, then this is considered failure.
In case of success JOC Cockpit will import the destination file and will remove temporary source and destination files.
Configuration
- The JOC Cockpit's joc.properties configuration file is added the following setting:
- upload_file_sanitizer: holds the command line to execute an external sanitizer tool from a binary file or shell script (*.sh, *.cmd).
- The setting can make use of the following placeholders:
${source_file}: specifies the path to the source file.${destination_file}: specifies the path to the destination file resulting from successful sanitization.
Example
The following configuration assumes the sanitize.sh script being available:
Settings for joc.properties configuration file
upload_file_sanitizer = /home/sos/sanitize.sh -i="${source_file}" -o="${destination_file}"
The script makes use of pdftocairo to strip links from a PDF document and to deny other file types. pdftocairo is not a recommended sanitizing tool, it is used as an example for integration of tools. Users choose sanitizing tools on their own.
Overview
Content Tools