Introduction
The JS7 - Agent Cluster brings horizontal scalability and fail-over capabilities for Agents.
- A number of Subagents operated for different servers share the job execution load.
- Automated fail-over guarantees high availability and restart capabilities of a
- Metrics-based selection of Subagents allows to use Subagent for example running the least number of tasks, with least CPU load or memory consumption.
JS7 offers a number of clustering options:
- An Agent Cluster can be operated by a Standalone JOC Cockpit and a JS7 - JOC Cockpit Cluster.
- An Agent Cluster can be operated by a Standalone Controller and a JS7 - Controller Cluster.
Operation of an Agent Cluster is subject to the JS7 - License and is available to commercial license holders.
In this article you will find step-by-step instructions for setting up an Agent Cluster, for full explanations refer to the JS7 - Agent Management article.
Prerequisites
The following requirements have to be met before setting up an Agent Cluster:
- The JOC Cockpit should be up & running and accessible from your browser, see JS7 - Initial Operation for JOC Cockpit Cluster.
- The Controller should be up & running, see JS7 - Initial Operation for Controller Cluster.
- A JS7 License Key is required for the JOC Cockpit and for the Controller, independently of whether the components are operated standalone or in a cluster, see JS7 - How to apply a JS7 License Key.
Set up Agent Cluster
- Login to the JOC Cockpit and navigate to the Manage Controllers/Agents view from the
 Administration icon.
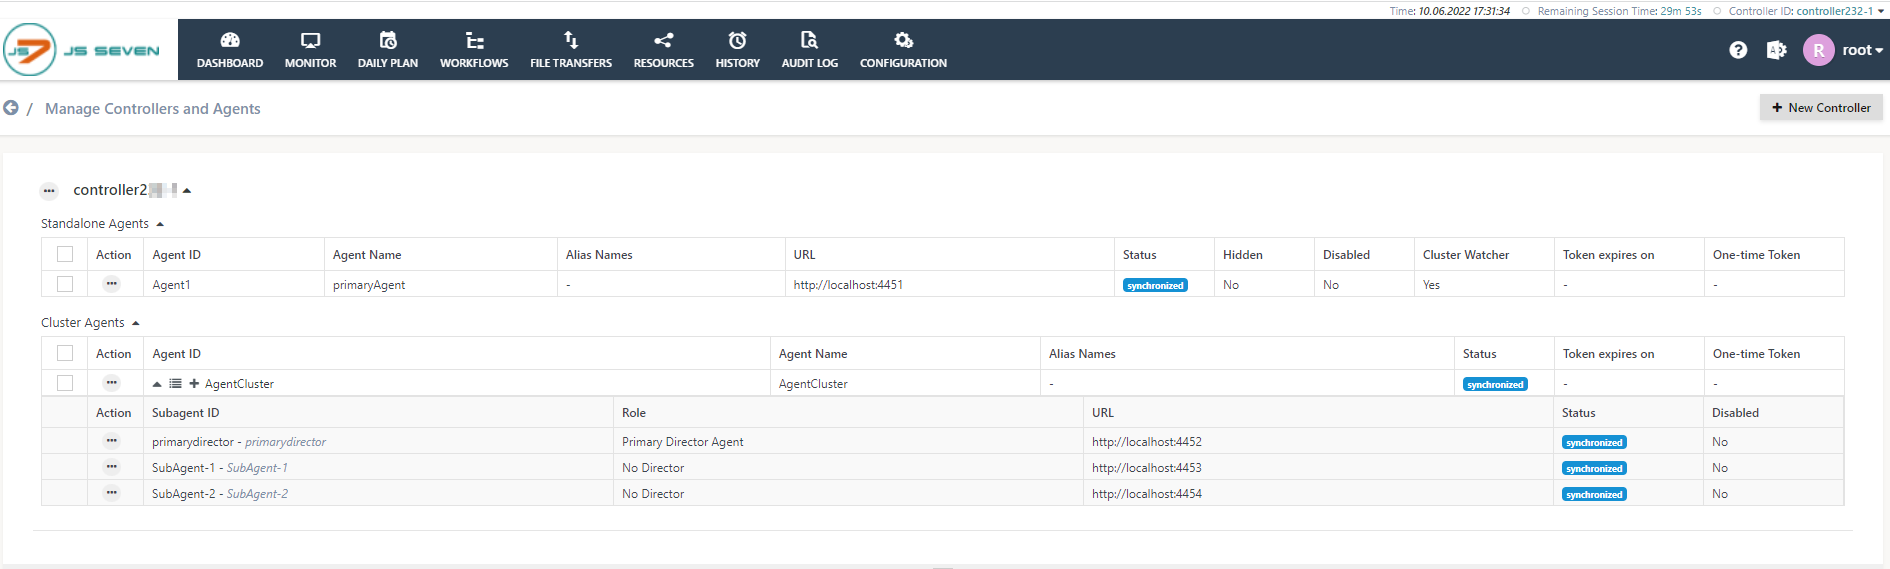
- The page displays existing Standalone Agents and Cluster Agents:
- To add a new Agent Cluster click the Controller's action menu and click the Add Agent Cluster menu item:

- A popup window will appear to add an Agent Cluster:
- Fill out mandatory input fields: Agent ID and Agent Name of the Agent Cluster.
- The Agent ID is a unique string that identifies the Agent Cluster and cannot be changed later on.
- The Agent Name is a unique string that identifies the Agent Cluster and can be changed later on.
- Add the Primary Director Agent with its Subagent ID and URL.
- The Primary Director Agent works as an interface between Controller and Subagents in a cluster.
- The Primary Director Agent manages the Agent Cluster and distributes orders to Subagents. Preferably it is not used for job execution.
- The Subagent ID is a unique string that identifies the Primary Director Agent and cannot be changed later on.
- The URL specifies the protocol, host and port for the Primary Director Agent.
- The Secondary Director Agent is used as a fallback if the Primary Director Agent is not available.
FEATURE AVAILABILITY STARTING FROM RELEASE 2.5.0
- Fill out mandatory input fields: Agent ID and Agent Name of the Agent Cluster.
Add Subagents
- After submitting the Agent Cluster add a number of Subagents. Click the action menu of the recently created Agent Cluster and click the Add Subagent menu item:

- A popup window will appear. Add the Subagent ID and the URL.
- The Subagent ID is a unique string that identifies the Subagent and cannot be changed later.
- The URL specifies the protocol, host, and port on which the Subagent is available.

- Repeat the above steps to more Subagents to the Agent Cluster.
- In this example, two Subagents are added to the Agent Cluster.

- Once all Subagents have been added, select the Agent Cluster action menu and click the Deploy menu item.
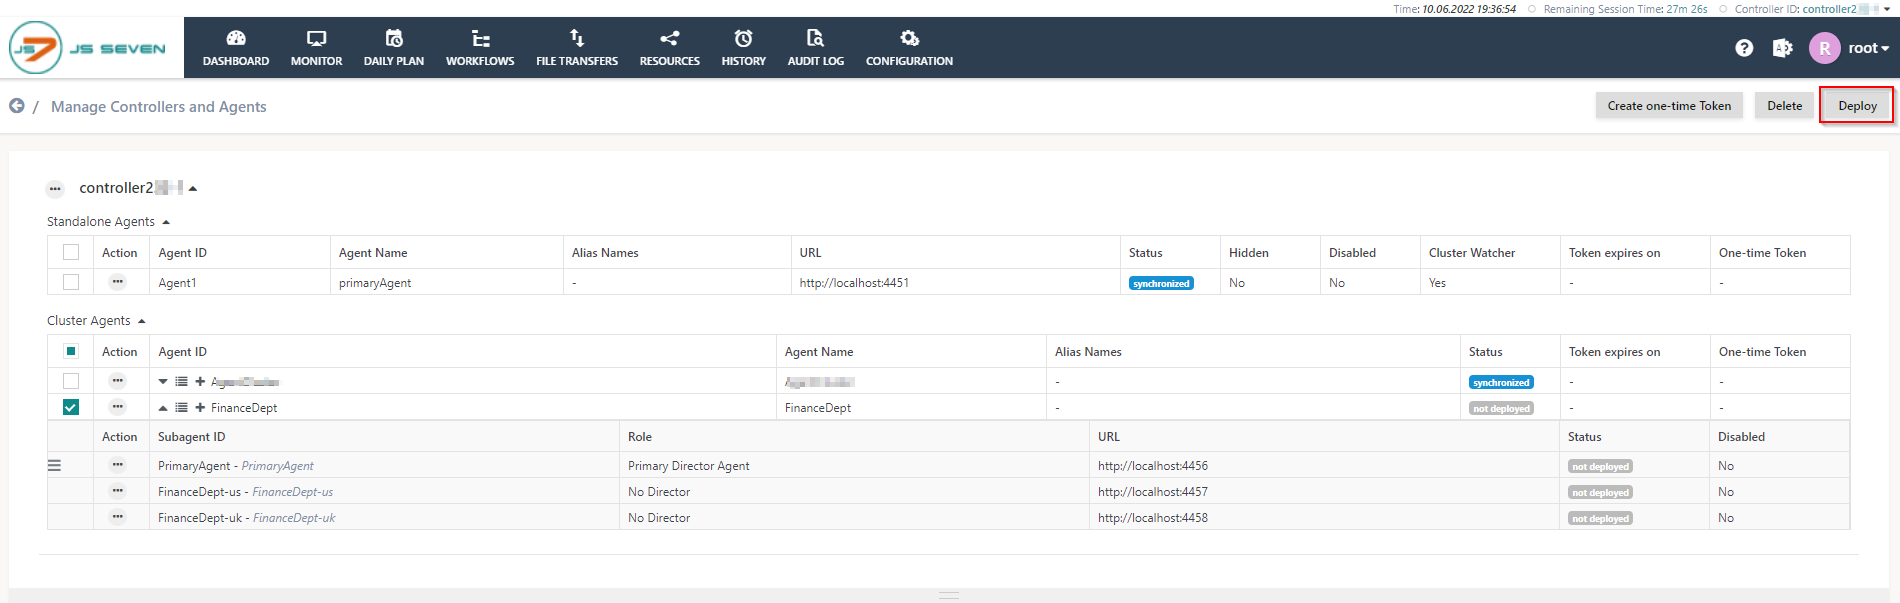
- After successfully deploying the cluster Agent the status will be changed to the synchronized state.

Add Subagent Cluster
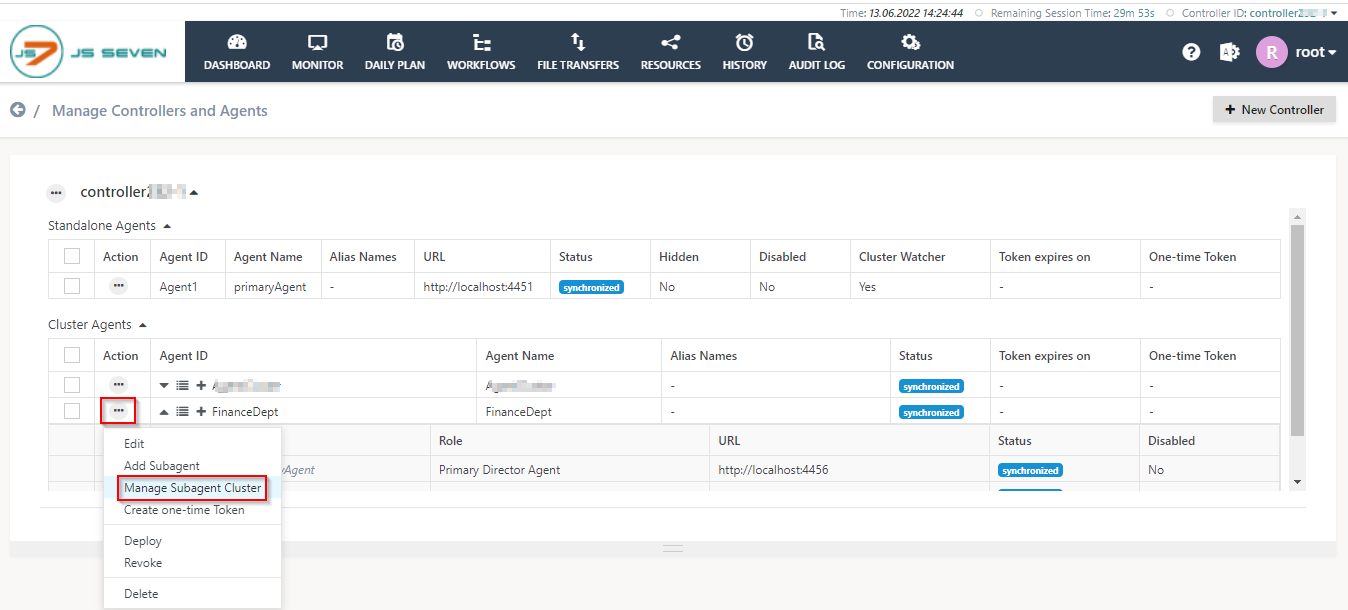
- To add a Subagent Cluster select the Agent Cluster action menu and click the Manage Subagent Cluster menu item.
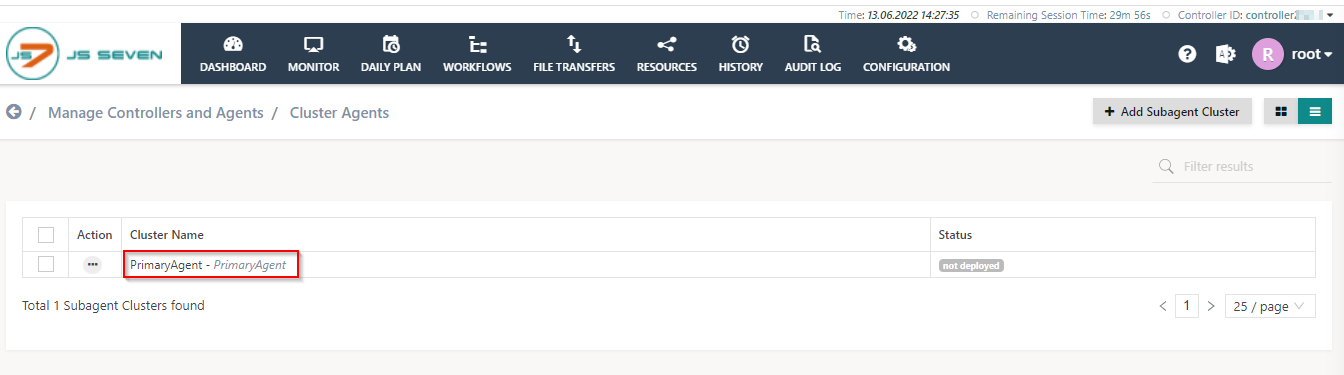
- A new window will appear with the list of Cluster Agents. Click any of the Cluster Agents.
- This brings up the following popup window:
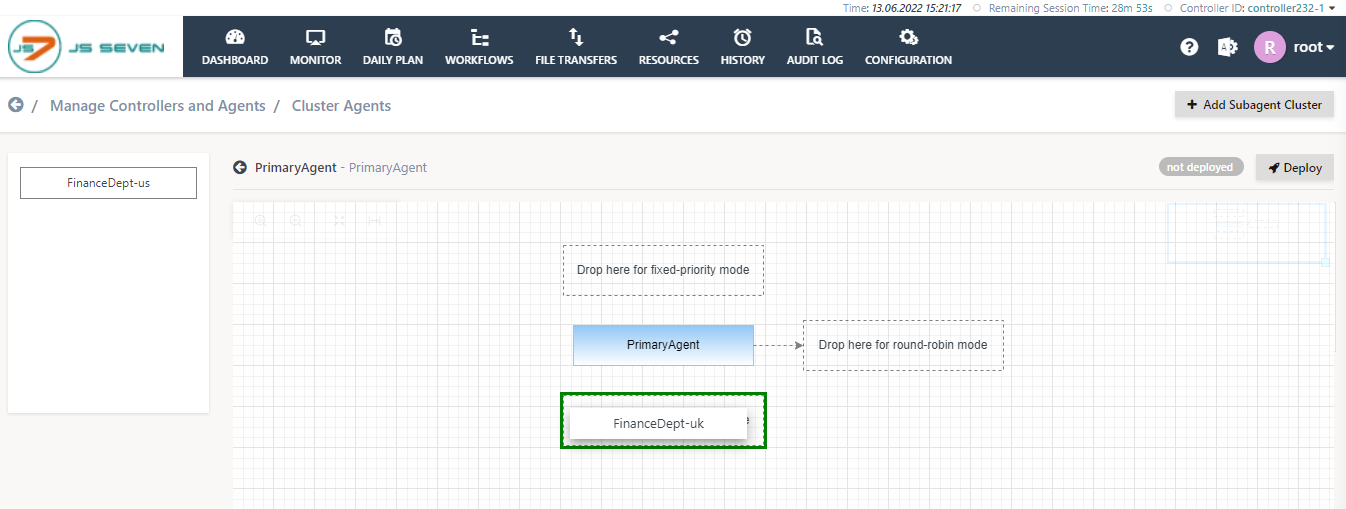
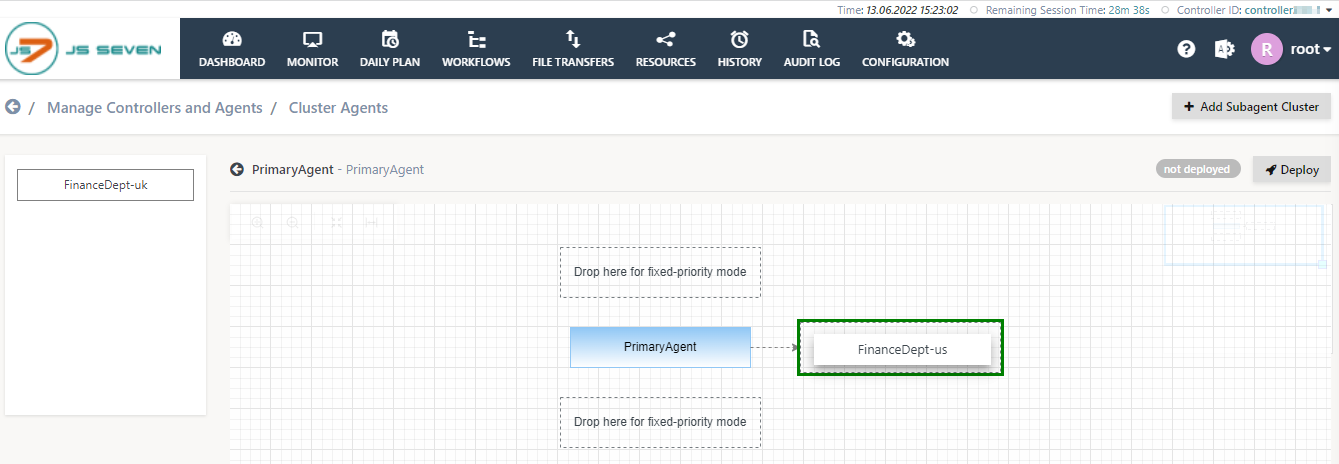
- In the left panel, the list of Subagents is available and can be dragged & dropped to the middle panel.
- The middle panel holds a drop area which a Subagent can be dragged & dropped to.
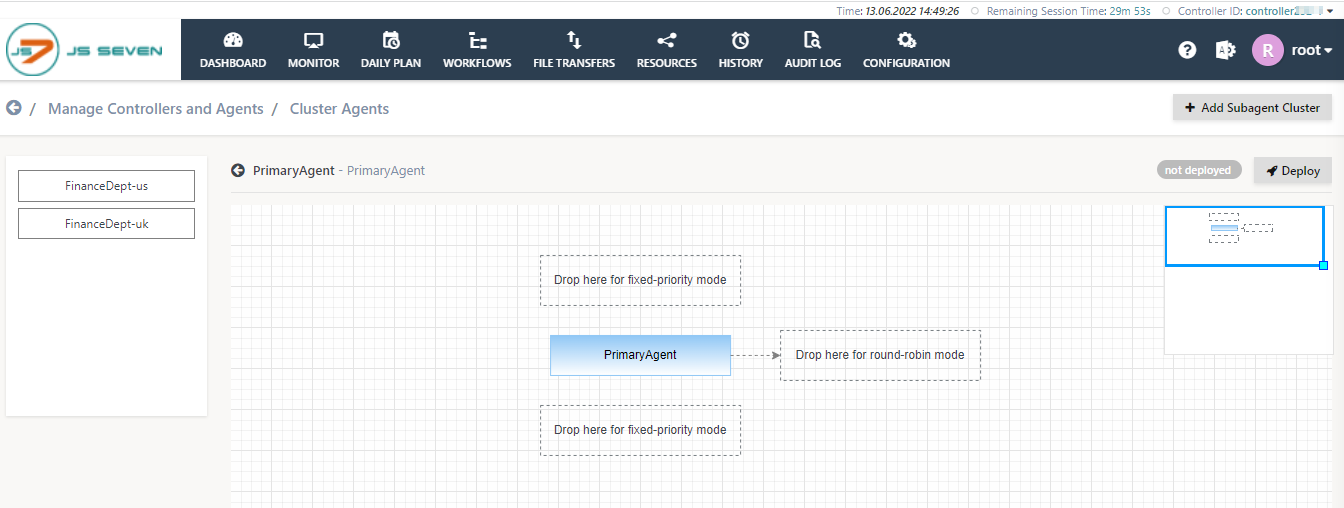
- The Primary Director Agent has already been added to the graphical view. To adding the first Subagent to the cluster, the middle panel offers additional drag & drop areas:
- The next Subagent can be dropped to the area above the existing Subagent to specify its role as the first Subagent used with the fixed-priority scheduling mode.
- In this mode, the first Subagent is preferably used. Only if it becomes unavailable will the next Subagent be used.
- In this mode, the first Subagent is preferably used. Only if it becomes unavailable will the next Subagent be used.
- The next Subagent can be dropped to the area below the existing Subagent to specify its role as the next Subagent used with the fixed-priority scheduling mode.
- In this mode, the next Subagent is used only if the first Subagent becomes unavailable.
- The next Subagent can be dropped to the area to the right of the existing Subagent to specify the use of the round-robin scheduling mode.
- In this mode, each next task is executed with the next Subagent.
- In this mode, each next task is executed with the next Subagent.
- The next Subagent can be dropped to the area above the existing Subagent to specify its role as the first Subagent used with the fixed-priority scheduling mode.
Once the configuration of a Subagent Cluster is completed the cluster can be deployed to its Controller.
- A Subagent Cluster can be used only after deployment to a Controller.
- Changes to a Subagent Cluster require to be deployed, for example, if a Subagent is added or removed from a cluster.
- Deployment of Subagent Clusters can be performed individually and from bulk operations, see chapter: Bulk Operations on Subagent Clusters.
- When deploying an Agent Cluster includes deploying any available Subagent Clusters, see chapter: Deploy Agent Cluster.
- To deploy the Agent Cluster to its Controller click the Deploy button from the upper right corner.

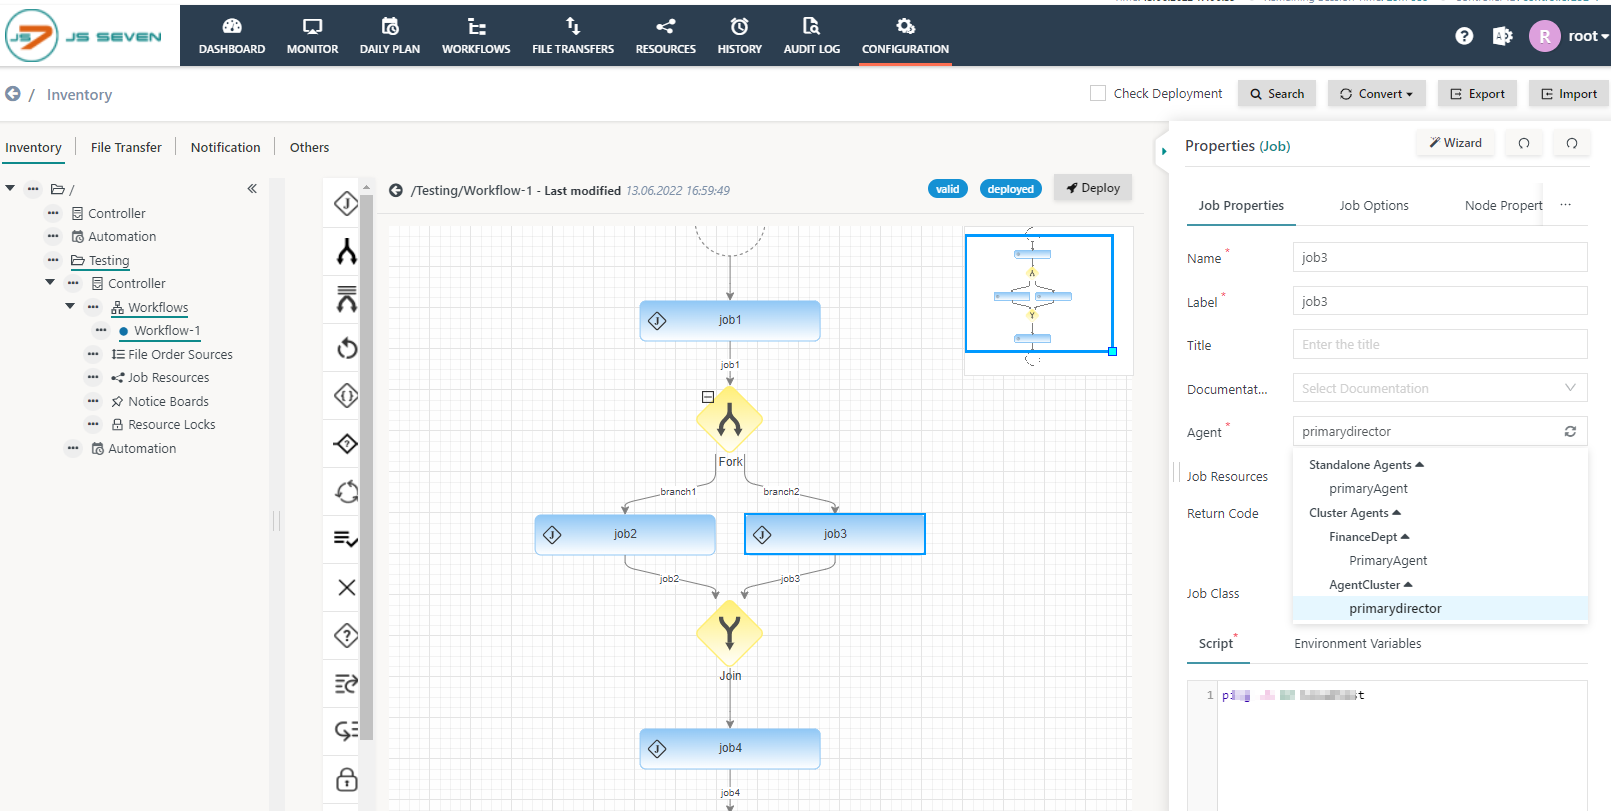
- After successful deployment of the Agent Cluster, each Subagent Cluster is individually assigned to a job.
- The property editor allows selection from the list of Agents that can be assigned a job.
- This includes Standalone Agents.
- This also includes Subagent Clusters that are grouped by Agent Cluster.
- Assignment of Subagent Clusters can look like this:
- The property editor allows selection from the list of Agents that can be assigned a job.
Overview
Content Tools