...
- To start the JOC Cockpit open a browser tab and call the JOC Cockpit using an address such as:
- Log into the JOC Cockpit using an authorized account name and password. The account name shown in the screenshot below is for one of the default accounts supplied configured with the JOC Cockpit. This account - the it_operator - has sufficient permissions for the purposes of these tutorials but has to be activated by a system administrator. See the Authentication and Authorization - Configuration article for more information.
- After logging in successfully the Dashboard view will be shown:
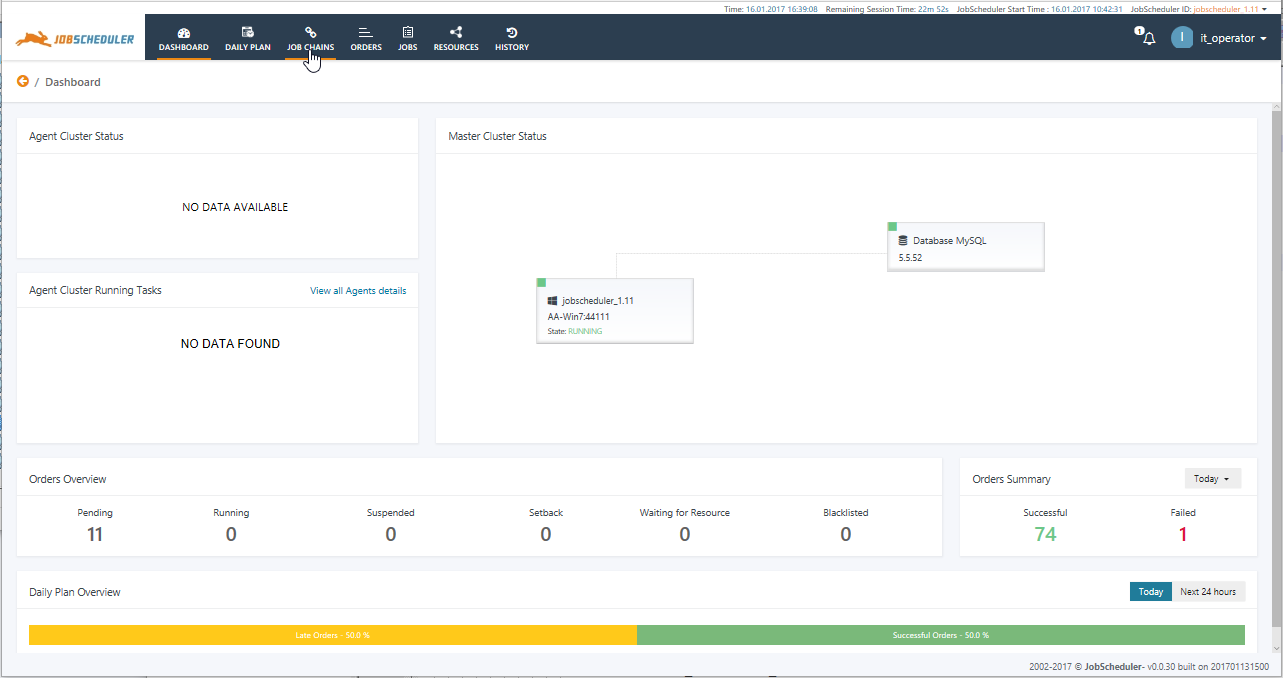
- Now open the Job Chains view by clicking on the Job Chains link in the grey menu bar near the top of the dashboard. This is the most useful view for starting and monitoring individual Orders being run on Job Chains and when first opened only shows the menu tree in the left hand view panel. This menu tree represents the folder structure in the JobScheduler's
livedirectory and is a major tool for navigating to individual Job Chains.- Click on the tutorials link in the menu tree as shown below to access the Hello World Job Chain:

- Click on the tutorials link in the menu tree as shown below to access the Hello World Job Chain:
- At this stage the Hello World Job Chain is the only Job Chain in the tutorials folder. It is shown in card form as can be seen in the next screen shot:
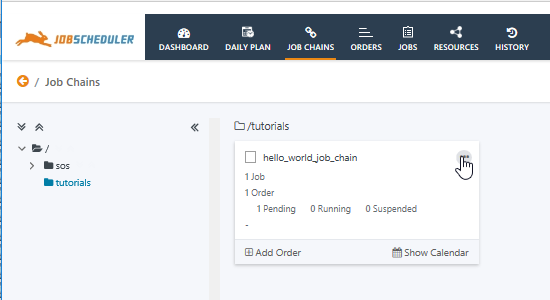
The card view provides two possible ways of generating an Order for the Job Chain:- the Add Order link at the bottom left of the Card and
- via the Additional Options (ellipsis) icon shown behind the pointer in the screen shot above. This will open a list of options for the Job Chain as shown in the next screenshot:
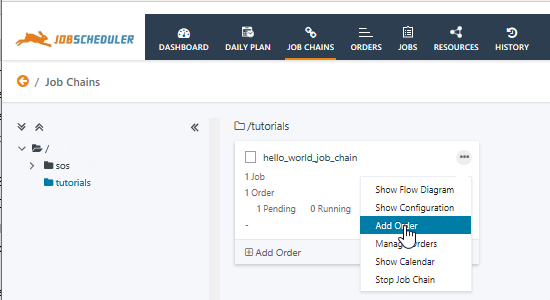
- Now select the Add Order option to open the form to configure how the order will be started. This form is shown in the next screenshot, where the Order can be seen to be configured by default to start Now and without any change to other parameters:
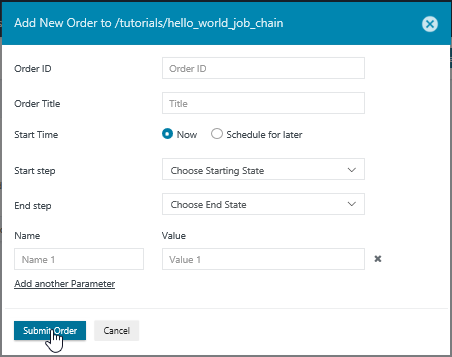
Click on the Submit Order button to start the order. - The Hello World Job Chain will be processed very quickly so you may not notice a change in the Job Chain card which will very briefly show:
- 2 Orders and
- 1 Pending 1 Running before the order is completed.
- The presentation form used for the Job Chain view now needs to be changed to access the History for the Hello World Job Chain.
Click on the Show List button in the View Header menu as shown in the next screenshot: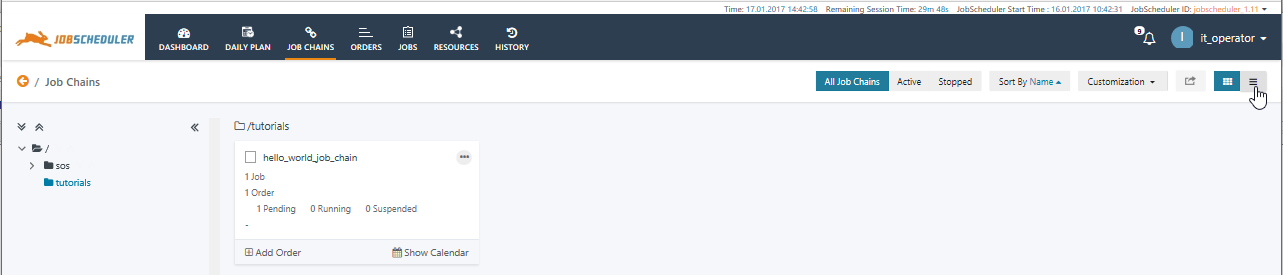
This will change the presentation of the job Chain to a list form, as shown in the next screen shot, and includes a link to show the Order History.
- Now click on the Hello World Job Chain link in the Job Chain list, which will open the History tab for the Job Chain as shown above.
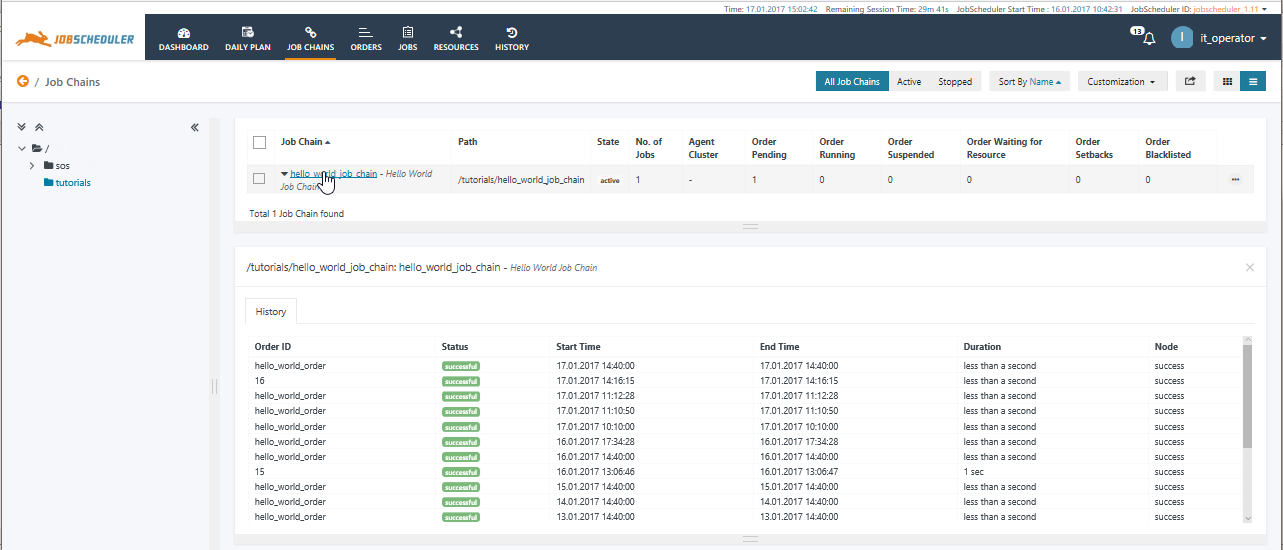
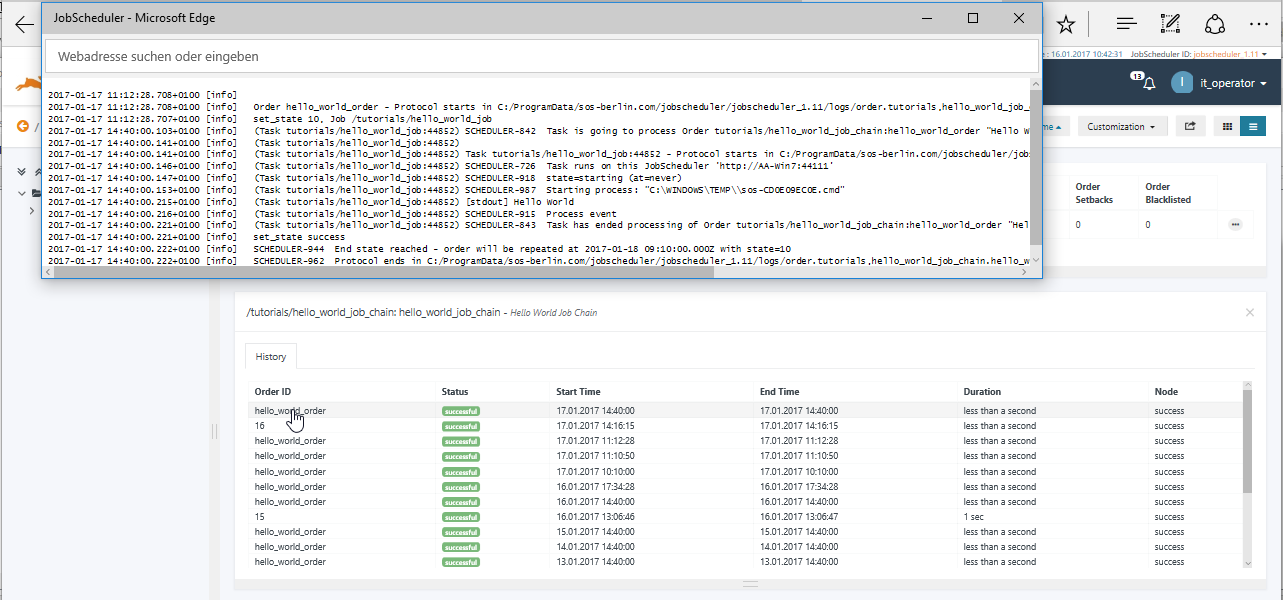
By default the History tab lists the 30 most current and recent Orders run on the Job Chain with their Status, Start and End date and time as well as the Current Node. (The Success Nodes listed for all Orders shown is an end node of the Job Chain when it runs without error and all the Orders shown have run to completion. End nodes will be introduced in the next tutorial.) - Clicking on any of the entries for an Order provides a direct route to opening the log file for the Order as shown in the screenshot below.
...