Page History
...
- First of all, you don't need to read all the parts of this article. For most situations it is sufficient to check the prerequisites, download the software and run the installer that will guide you.
- In this article you will find the details about available installer options, updates and rollbacks for interested parties.
- The JS7 Agent can be installed and operated on any Unix and Windows environments that meet the prerequisites.
- The JS7 Agent can be installed on Windows using the graphical installer - for headless installation see JS7 - Agent - Use of Linux/Windows Headless Installation.
Prerequisites
- A Java Runtime Environment 1.8 or newer is required. For details see the Which Java versions is JobScheduler available for? article.
- It is recommended that a time service is operated on the server that hosts the Agent in order to synchronize the system clock's time.
...
The installer can be run in graphical or in headless mode, see the JS7 - Agent - Headless Installation on Unix /and Windows article.
- The installer asks for elevated administrative privileges, so it will not be necessary to change the permissions in the
.\servicedirectory and the installer will set read/write permissions for the.\logsdirectory. - After the installation you will find:
- a Windows Service "
SOS JS7 Agent -port=<http-port>" - an executable file
.\service\js7_agent_<http-port>.exethat is started by the Windows Service.
- a Windows Service "
...
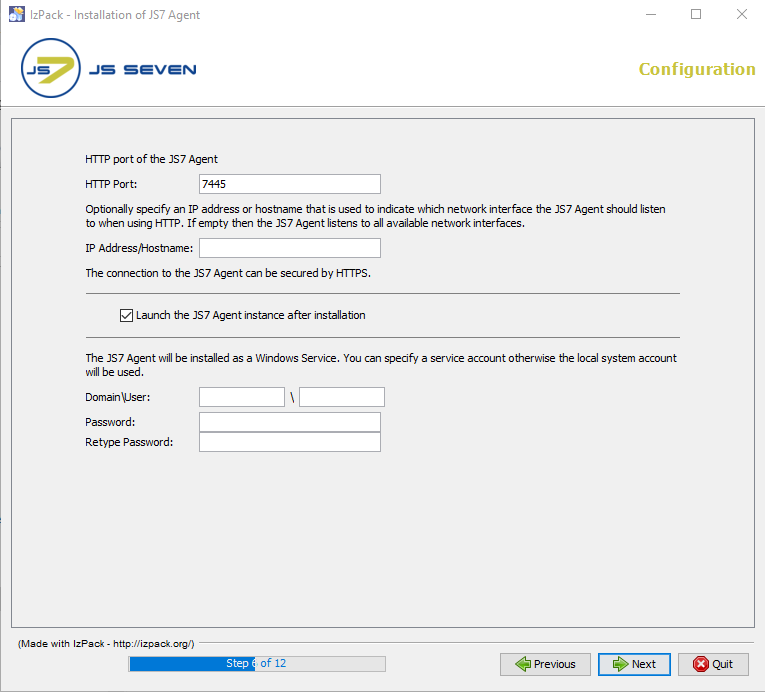
- Add the HTTP port that is to be used by the JS7 Agent. Make sure that the HTTP port is available and is not otherwise used. If you run other applications that use this port then choose a different port.
- If you specify a Windows Service account, make sure that this account has "Log on as service permissions". Note that the credentials that you enter in this window are stored in clear text with the installer response file. It is considered more secure not to add credentials with this step, but to add credentials directly with the Windows Service panel after installation.
...
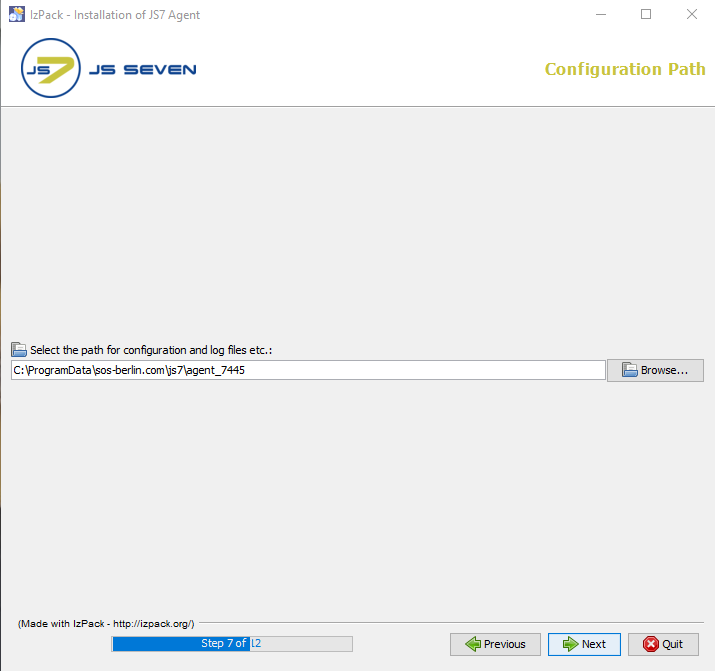
Data Directory for Configuration, Logs, Journals
- Choose the configuration data directory for the Agent which you want to use to store the Agent's configuration, log and journal files.
...
- The resulting directory structure after installation includes (only files and folders immediately relevant):
C:\Program Files\sos-berlin.com\js7\agent(installation directory).js7agentinstallinformation(binary installer information).version(release information)agent_install.xml(installer response file used from previous installation)license.gpl(copy of GPLv3 (General Public License) used for the Open Source JS7 - License)license.html(HTML format of license terms for the commercial JS7 - License)license.txt(plain text format of license terms for the commercial JS7 - License)ThirdParty.txt(list of 3rd party components and licenses used by JS7)var_<http-port>(symbolic link/junction to configuration data directory)binanonymize-logs.cmd(used to anonymize log files, see JS7 - Log Anonymization)agent.cmd(Start Script)agent_<http-port>.cmd (Instance Start Script)agent_credential_value.cmd(Script for access to a Credential Store)agent_watchdog.cmd(restarts the Agent if not operated as a Windows Service, called by Start Script)
lib(directory for Java libraries)log4j2.xml(used for based console logging to stdout, see JS7 - Logging)patches(used for JS7 - Patches for Agent, the directory is cleaned up when running the installer)user_lib (used for individual .jar files such as JDBC Drivers, see JS7 - Database)- (additional directories for Java libraries)
service(directory for operation as a Windows Service)install_agent_windows_service.cmd(used by installer)LICENSE.txt(copy of Apache License, Version 2.0)NOTICE.txt(Apache Commons Daemon license notice)RELEASE-NOTES.txt(Apache Commons Daemon release notes)uninstall_agent_windows_service.cmd(used by uninstaller)amd64managerx86
Uninstallerinstall.log(lists installed files)js7.ico(uninstaller icon)shortcut.vbs(creates shortcuts for the Windows start menu)uninstall.cmd(used by uninstaller)uninstall_prepare.cmd(used by uninstaller)uninstaller.jar(used by uninstaller)
yade(directory of the YADE file transfer client)
C:\ProgramData\sos-berlin.com\js7\agent(data directory)agent_home(junction to installation directory)config(directory for configuration files)agent.conf(general Agent configuration, see JS7 - Agent Configuration Items)private(directory for security related configuration files)private.conf-example(security related configuration, see JS7 - Agent Configuration Items)- For setting up JS7 - Agent HTTPS Connections
- For setting up authentication and digital signature checks
trusted-pgp-keys(empty directory, can be used to add individual PGP public keys for signing, see JS7 - Secure Deployment of Scheduling Objects)trusted-x509-keys(directory to hold X.509 certificates for signing, see JS7 - Secure Deployment of Scheduling Objects)sos.intermediate-ca.pem(default certificate of SOS to allow deployment with JOC Cockpit)
logs(directory for log files)state(directory for journal files)work(directory for temporary files)
...
- Stop any running JS7 Agent instances. Note that more than one Agent instance can be launched from a single Agent installation.
- Prepare to rollback in case the update of the JS7 Agent is not successful:
- Make a backup of the Agent's installation directory and configuration data directory, e.g. by creating a .zip archive.
- Installation Directory:
- The default installation directory for the Agent is
C:\Program Files\sos-berlin.com\js7\agent
- The default installation directory for the Agent is
- Configuration Data Directory
- The default configuration data directory for the Agent is
C:\ProgramData\sos-berlin.com\js7\agent_<http-port>
- The default configuration data directory for the Agent is
- Installation Directory:
- Make a backup of the Agent's installation directory and configuration data directory, e.g. by creating a .zip archive.
...
The installer creates a log file in the directory which is specified in the JS7_AGENT_LOGS environment variable or in the logs sub-directory of the Agent's configuration data directory.
- The default path of the
logsdirectory for the Agent is:C:\ProgramData\sos-berlin.com\js7\agent_<http-port>for Windows.
- Installation log files use names according to the pattern
Install_V<release>_<date-time>_....logwhere<release>is the release number and<date-time>refers to the point in time of installation. - For further information about logging see the JS7 - Logging article.
...
Further References
- Installation
- Operation
- Configuration
...
Overview
Content Tools