Introduction
The JS7 - If Instruction is used for conditional processing of orders. It can be used for example to evaluate the return value of a previous job and it can be used to check any order variables.
The If Instruction allows users to declare conditional processing at the configuration level and leverages the need to apply scripting that buries the conditional logic in the script code.
Workflow
In the jdConditionalResult workflow two If Instructions are used:
- The first If Instruction uses the expression
$return_value_job1.toNumber == 0. With this predicate, if the job'sreturn_valuevariable is equal to0then the If Instruction evaluates totrue. This If Instruction is used to either runjob2or to runjob3depending on the evaluation result. - The expression used in the second If Instruction
$return_value_job.toNumber > 0triggers if the predecessor job'sreturn_valuevariable is greater than0. In this case the If Instruction evaluates totrueand continues execution ofjob4in the workflow. - Find more details in the JS7 - Expressions for Variables article.
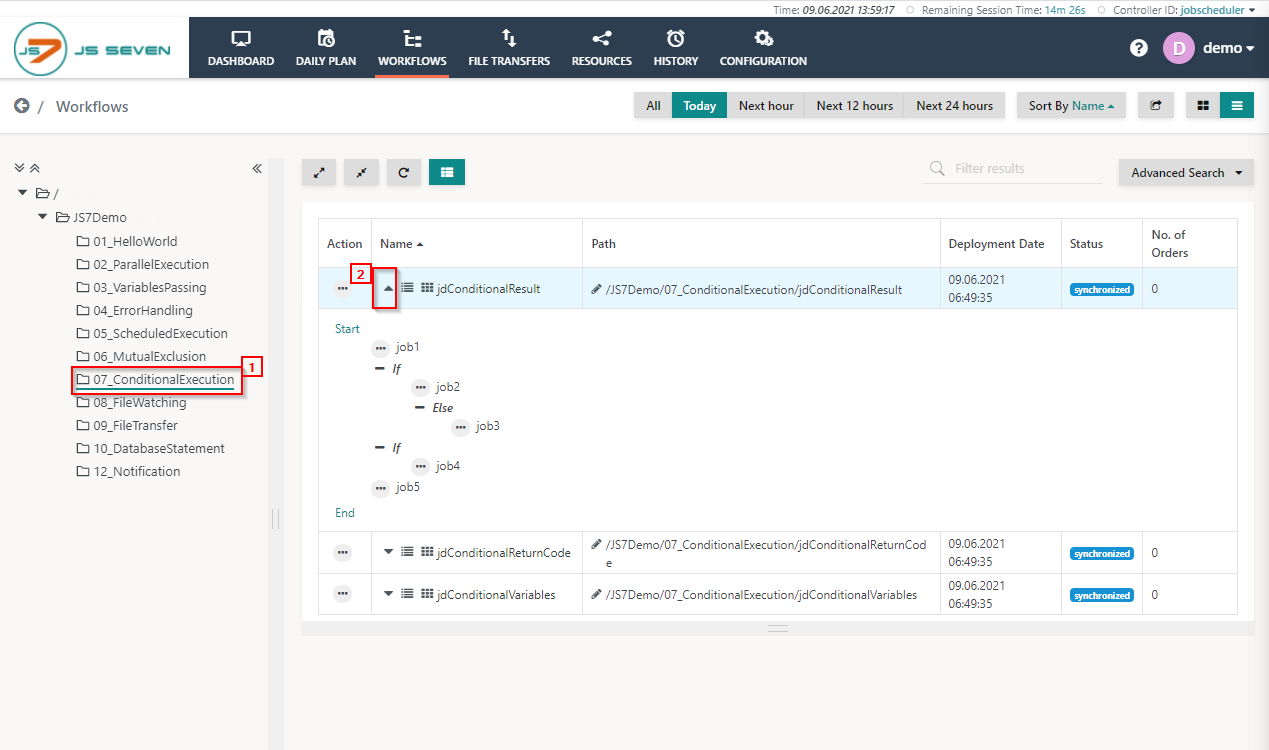
To execute the workflow from the folder 07_ConditionalExecution follow the steps described below:
- Click the folder 07_ConditionalExecution and expand the jdConditionalResult workflow.
- Click the workflow action menu and use the Add Order menu item from the drop-down menu to add an order to the workflow.
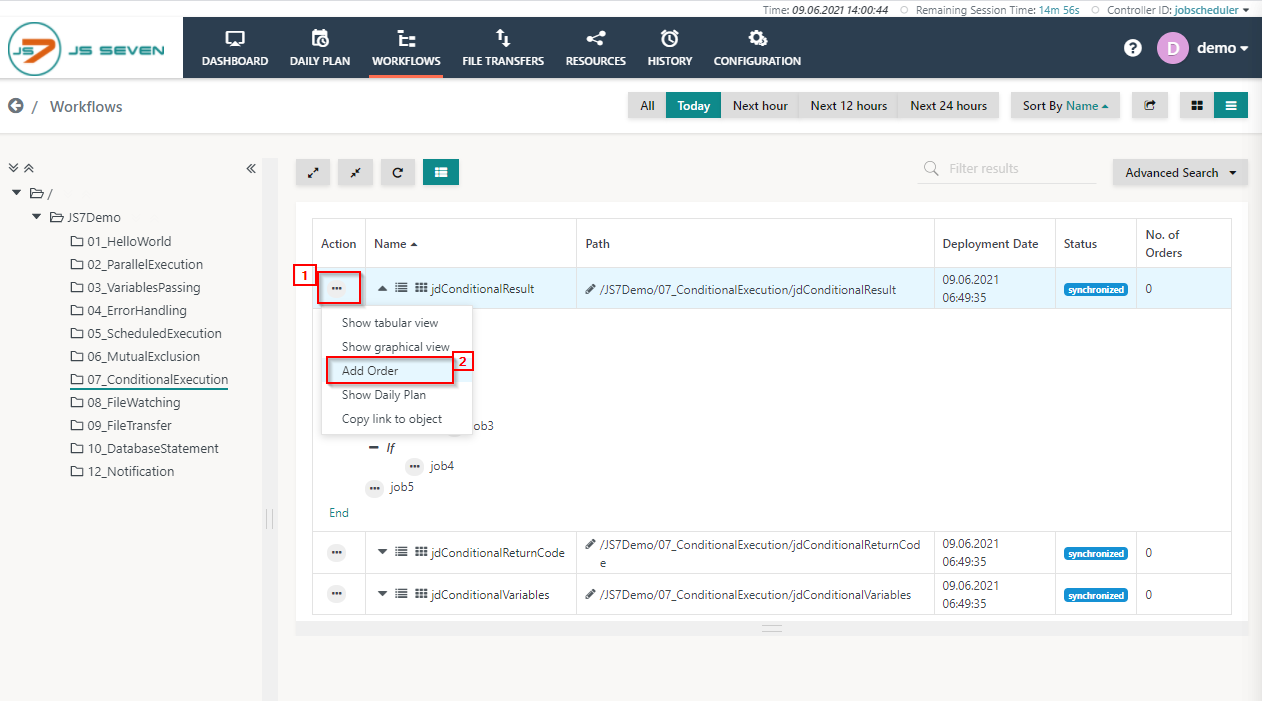
- When clicking Add Order a popup window will appear.
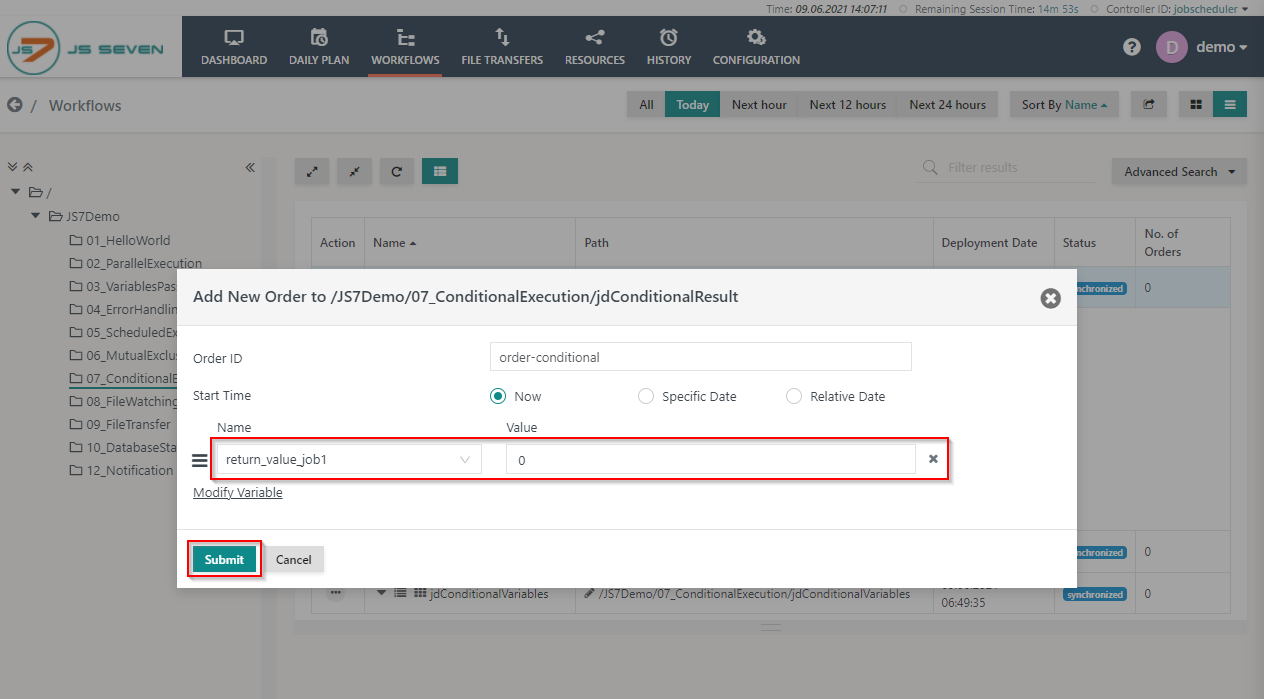
- You can add an Order ID or leave the Order ID value empty, it will then use a default Order ID. Click the Submit button.
- With the Modify Variable link you can edit the value of variables assigned the workflow.

- Click the Modify Variable link and select the name of the variable that you want to modify from the drop-down menu. In the screenshot below, the return_value_job1 variable has been selected and the default value is 0. The variable is declared with the workflow definition, you can modify its value and click the Submit button to add the order to the workflow.
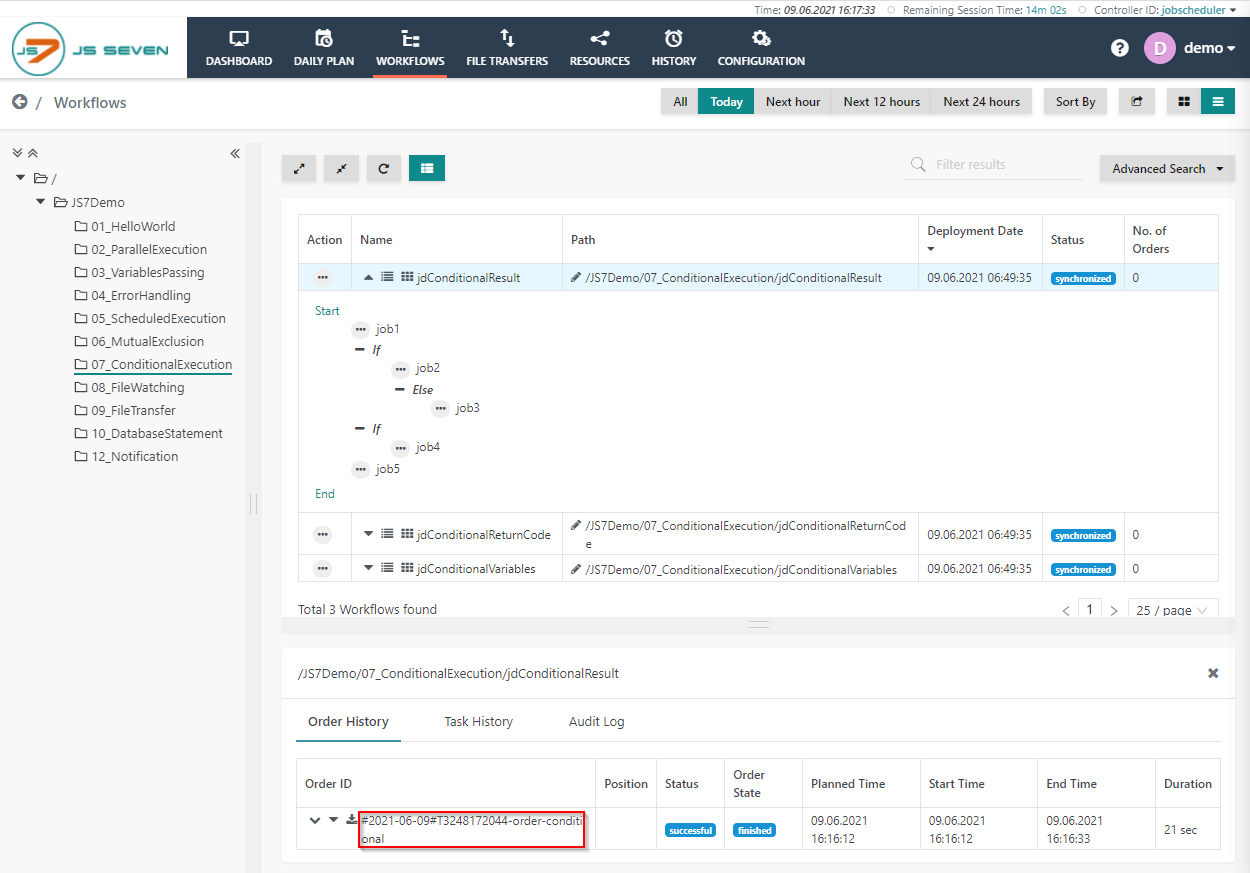
- To check the status of the order click the name of the workflow to make the Order History panel appear.
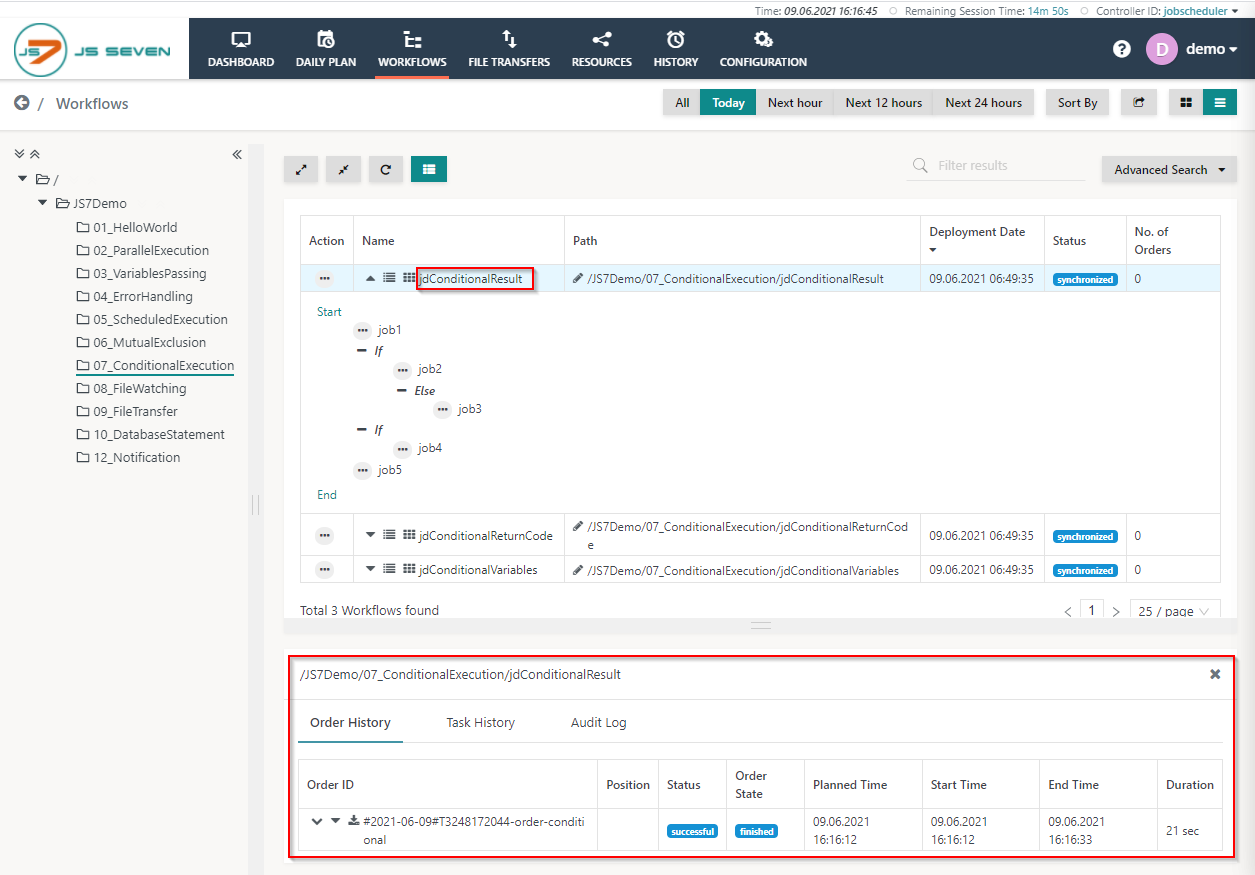
- From the Order History panel, you can verify if the order is successful and has finished. Click the Order ID to see log output created by the jobs executed for this order.
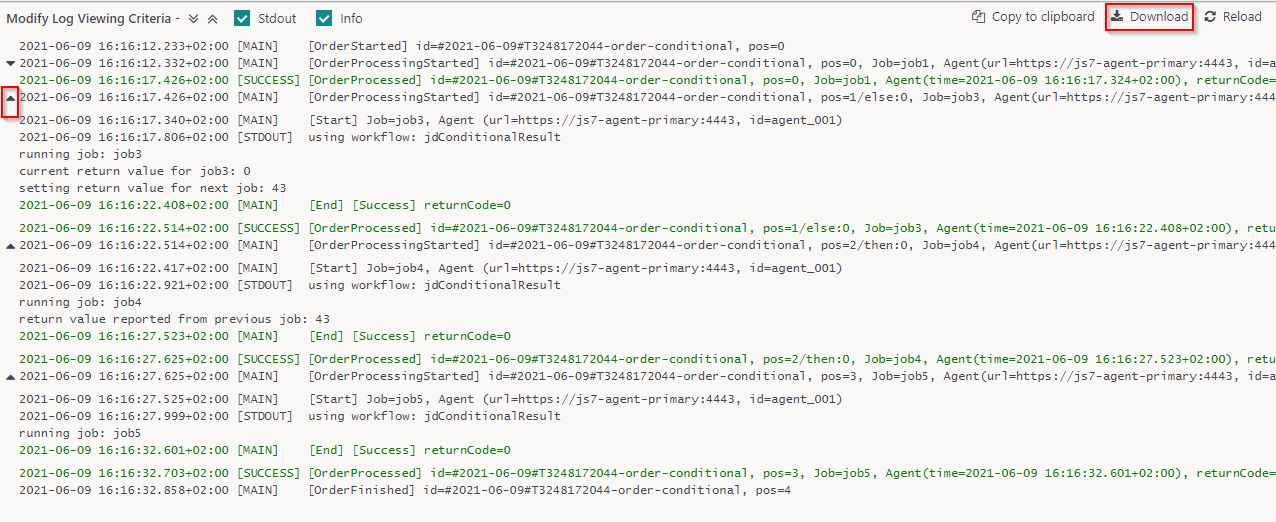
- A log window will open and the order log will be displayed. The order log contains output to stdout/stderr from all jobs executed by the order.
- You can download the log file by clicking the Download button in the upper right-hand corner of the log view window. Also, you can expand and collapse all job output using the chevron icons in the upper left-hand corner of the log view window.
Overview
Content Tools