Introduction
This second tutorial shows how to use JOE - JobScheduler Object Editor to modify the simple "Hello World" Order Job that was described in the first tutorial of this series.
A second job with a simple shell script will be added to the Job Chain in this tutorial. The scripts in both Jobs will be set to carry out a trivial task that takes a few seconds to complete (pinging the localhost) and thereby allow the progress of the order along the job chain to be better observed in the JOC Cockpit.
Note that the other tutorials in this series are:
- JobScheduler - Tutorials - Introduction and Requirements
- JobScheduler - Tutorial 1 - Running a simple job using the JOC Cockpit
- JobScheduler - Tutorial 2 - Editing a Simple Job with JOE
- JobScheduler - Tutorial 3 - Running an Order Using the Run Time Parameter
- JobScheduler - Tutorial 4 - Configuring and Running a JITL Job
- JobScheduler - Tutorial 5 - The YADE JITL Job - Configuring and running file transfer jobs
- JobScheduler - Tutorial 6 - Configuring and Running Standalone Jobs
Open the 'Getting Started' JobScheduler Objects in JOE, the JobScheduler Object Editor
- If you have not already done so for Tutorial 1, download the and find instructions for copying the files to the JobScheduler's
./config/livefolder in the JobScheduler - Tutorials - Introduction and Requirements article.
You will find three files in thelivefolder:- The Job object:
hello_world_job.job.xml - The Job Chain object:
hello_world_job_chain.job_chain.xml - The Order object:
hello_world_job_chain,hello_world_order.order.xml
- The Job object:
- Start JOE:
- On Windows systems you will find a link to start JOE in the Start Menu under:
- Start / SOS JobScheduler / JOE (JobScheduler Object Editor)
- JOE can also be opened using a command line script.:
jobeditor.cmdon Windows systemsjobeditor.shon Unix systems- You will find this script in the
binsub-directory of the JobScheduler installation directory as described in the JobScheduler - Tutorials - Introduction and Requirements article.
- On Windows systems you will find a link to start JOE in the Start Menu under:
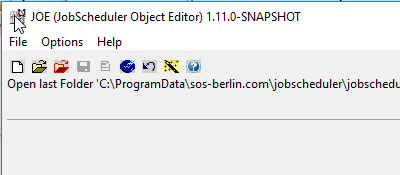
- The JOE interface will be largely empty when first opened apart from the small menus shown below and possibly an Open last folder link if the interface has already used:
- Open the Tutorial live folder in JOE:
- Use the File > Open Live Folder menu (or Ctrl + D or click on the red Open HotFolder icon), navigate to the
live\tutorialsfolder. As mentioned in Point 1 above, you will find information about the location of thelive\tutorialsfolder in the JobScheduler - Tutorials - Introduction and Requirements article. Click OK.
- Use the File > Open Live Folder menu (or Ctrl + D or click on the red Open HotFolder icon), navigate to the
Inspect the JobScheduler Objects
- Now, in JOE's left-hand Scheduler Elements pane (see the screenshot below), open the Jobs, Job Chains and Job Chain Orders objects by clicking on the chevrons (>) to the left of the object names.
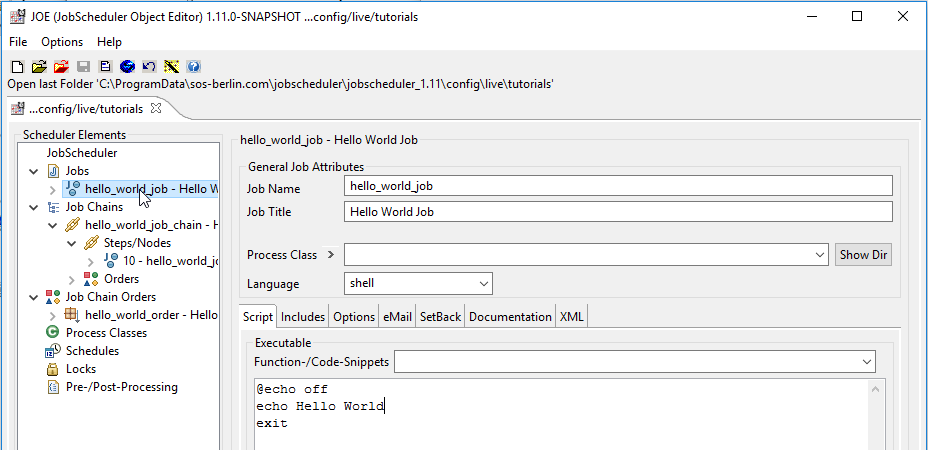
The most important configuration information for each object (at least for this example) is shown in the following screen shots:- The General Job Attributes of the hello_world_job Job together with the shell script that writes Hello World in the log file:
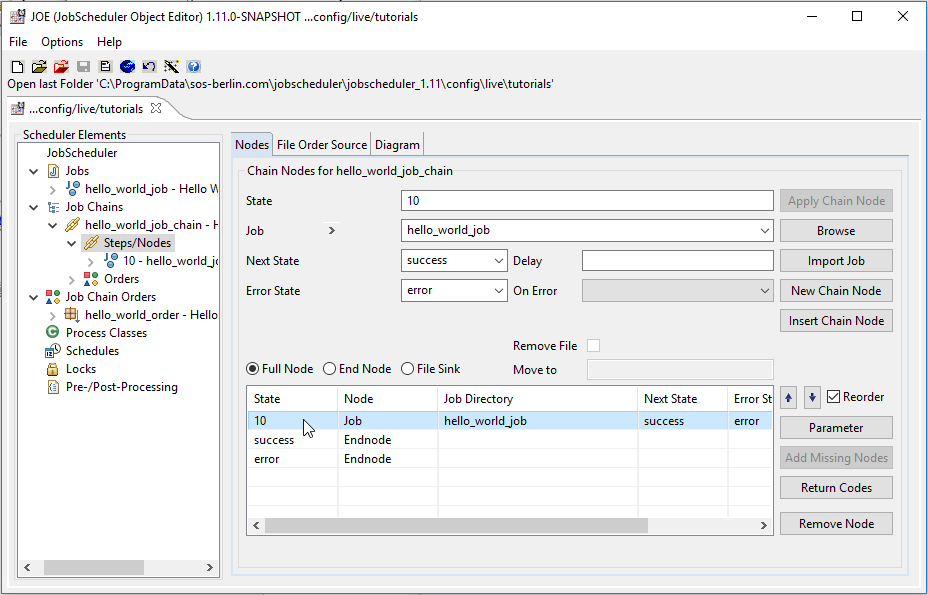
- The Steps/Nodes view of the hello_world_job_chain Job Chain, which includes the hello_world_job at the node with state 10.
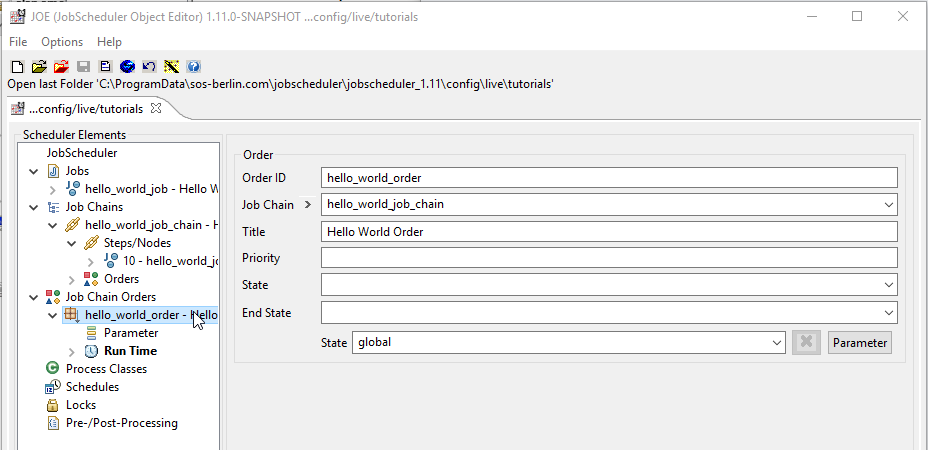
- The hello_world_order Order, which is configured for the hello_world_job_chain and at this stage has neither Parameters or a Run Time set.
- The General Job Attributes of the hello_world_job Job together with the shell script that writes Hello World in the log file:
Create the new Job
Like the first job, the new job will only contain a simple shell script.
- Click on the Jobs object in the Scheduler Elements pane which will open the main Jobs pane.
- Click on the New Order Job button at the right of the Jobs pane to add a new job to the jobs list.
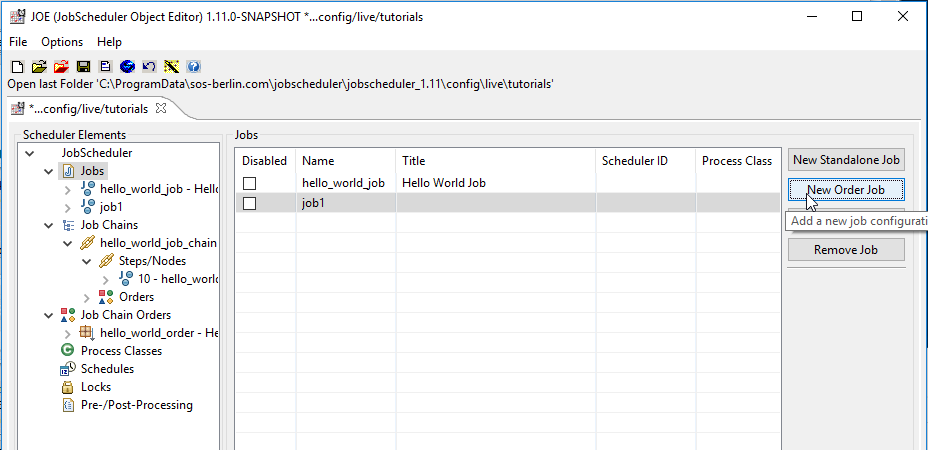
- Either click on the new job (job1) row in the Jobs list or on the job1 element in the Scheduler Elements pane to open the fields for entering basic job information.
- Enter the Job Name, Job Title and Script information as show in the image below.
Note that only the job Name is mandatory.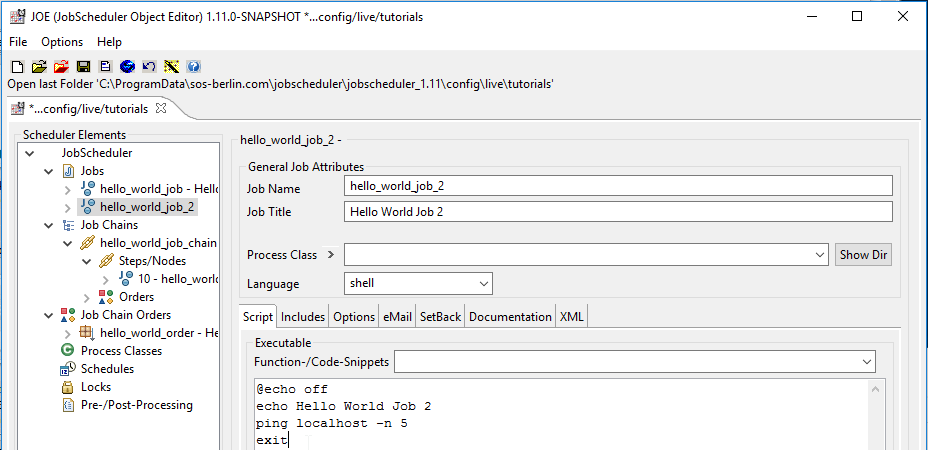
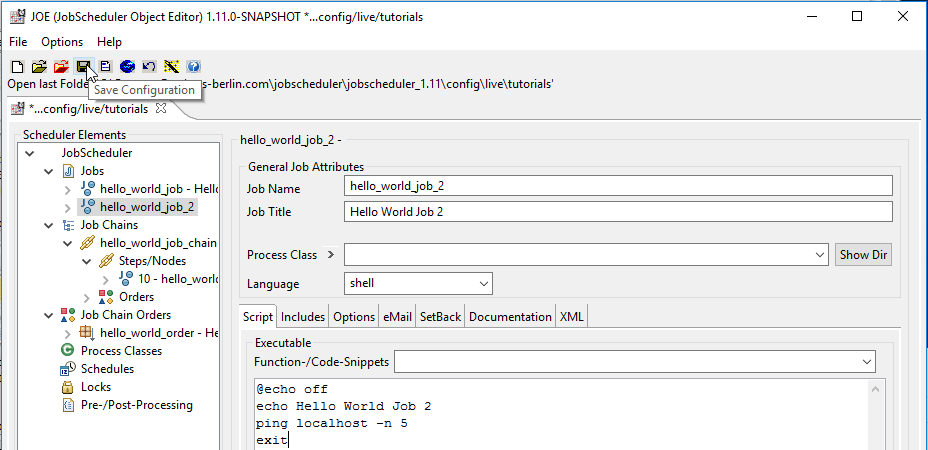
Save the New Job configuration by clicking the Save Configuration icon as shown in the screenshot:
Add the new job to the job chain
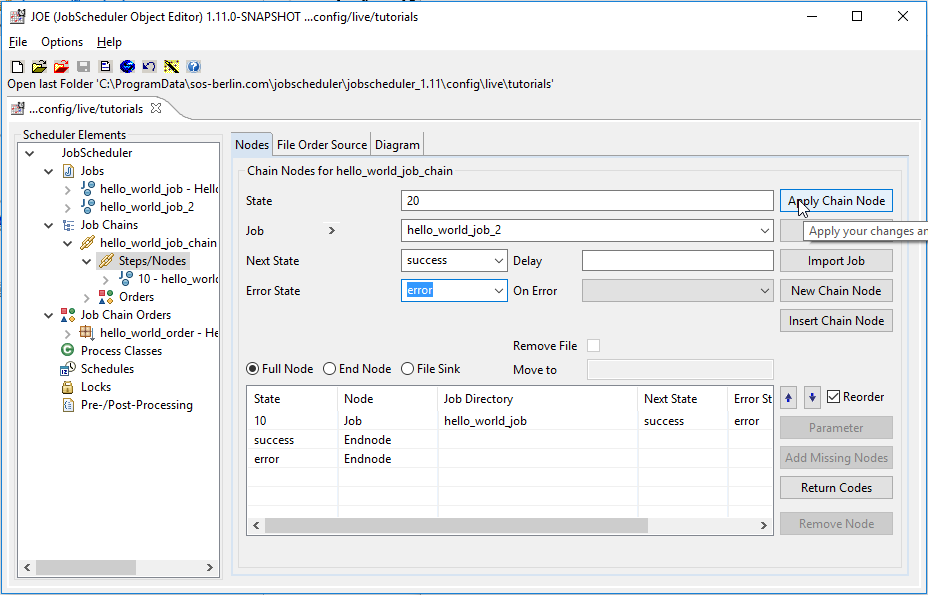
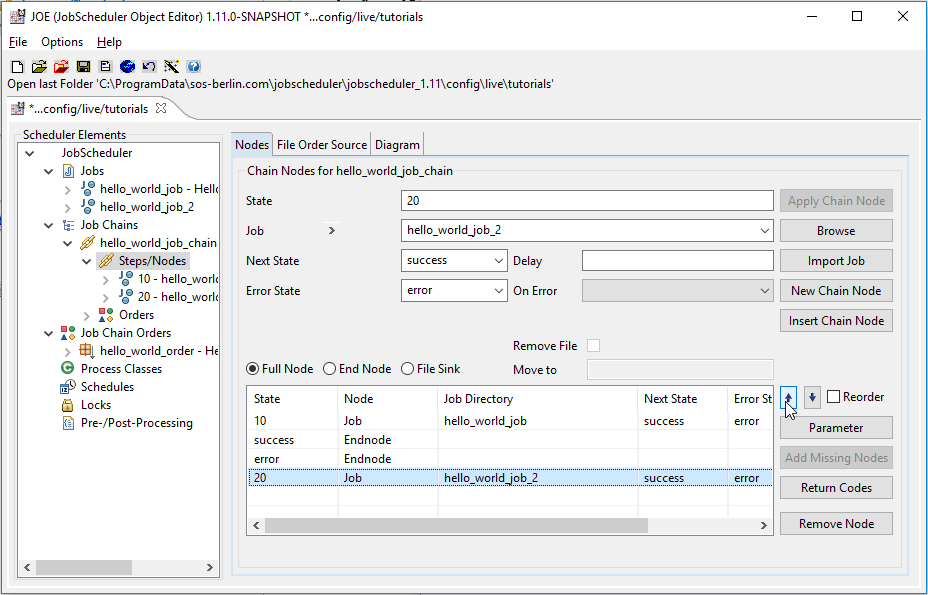
- Select the Chain Nodes for hallo_world_job_chain by clicking on the Job Chains Steps/Nodes Element.
- Click on the New Chain Node button at the right
- Enter the information shown in the screenshot below and the click on the Apply Chain Node button:
- Now deselect the Reorder checkbox (at the right, under the Insert Chain Node button).
- Select the hello_world_job_2 and then move it up to its correct position in the job chain by clicking as required on the Moves the selected data up one row arrow as shown:
- Lastly, change the Next State for the hello_world_job from success to 20 using the Next State select box as shown in the diagram below:
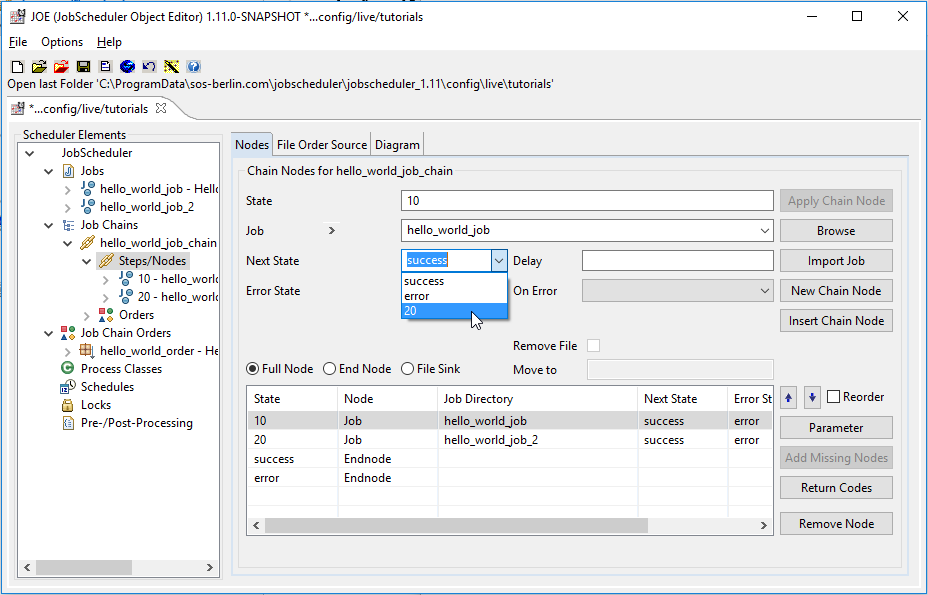
Don't forget to apply this change by clicking the Apply Chain Node button. - Save your updated configuration to the file system by clicking on the "Save Configuration" icon as already described above.
- Then click on the (unlabeled) grey icon with the arrow to update the Scheduler Elements pane view, answering yes to the Do you want to reload ..." info. box.
You will now see both jobs listed in the Scheduler Elements pane - under the Jobs element and under the Job Chains Steps/Nodes Element.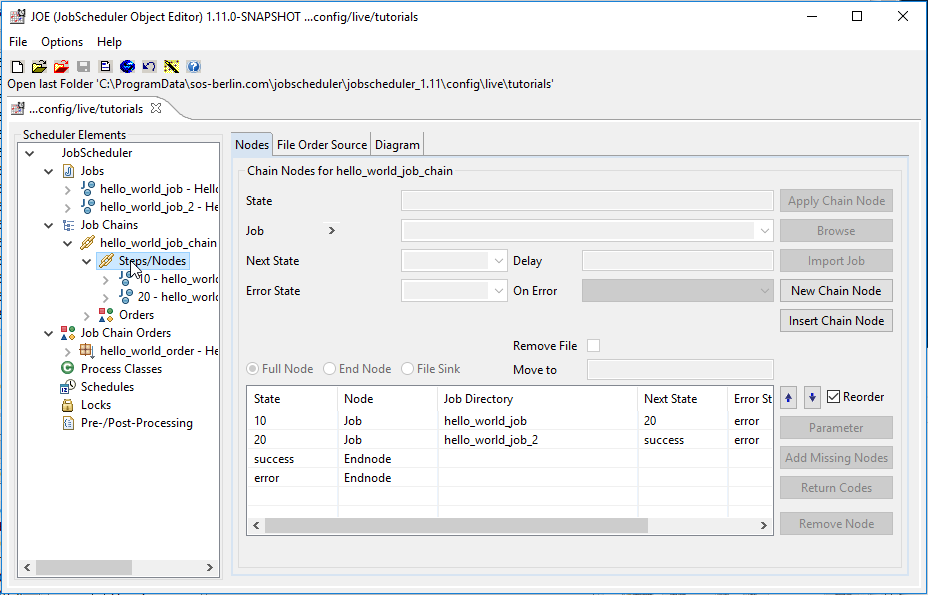
- The job chain could now be run using the JOC Cockpit's Start order immediately function as was done in the first tutorial. Instead, the next tutorial will demonstrate the use of JobScheduler's Run Time parameters and the use of the JOC Cockpit's Start Order Now and On-The-Fly Run-Time functions.
Summary
In the next tutorial you will see how a run time can be set using the order's Run Time property, a first step in learning to use JobScheduler's Schedule functions.