Introduction
The Job documentation feature allows job developers to write their own documentation in a number of formats and to import this information to the scheduling environment. Once imported, the documentation can be assigned - i.e. linked - to Jobs and other JobScheduler objects such as Job Chains, Process Classes and Locks. Developers can not only integrate documentation describing how jobs and other objects are to be configured but also documentation describing how objects are used in a scheduling environment.
In addition, an export function allows documentation, together with a list of the objects individual documentation items have been assigned to, to be readily moved, for example, from a development to a production environment
FEATURE AVAILABILITY STARTING FROM RELEASE 1.12.8
See the How to link jobs to custom documentation sources article for information about how to link to documentation with JobScheduler versions up to and including 1.12.7.
Importing Documentation
Permissions
In the default configuration users with either the root or the application manager roles are able to import documentation items.
Formats Supported
The documentation function is intended for use with documents that users have created outside the scheduling environment with tools such as JSDoc and which are then imported and saved in the Reporting database. The following formats are supported:
- HTML (not all 'component' file types - e.g.
.eotfont files - are supported) - XML
- markdown (must have the file extension 'md' or 'markdown')
- Zip (for both Windows and Linux OSs, tar.gz is not supported)
- The following file formats are also allowed, since they can be relatively addressed as external files:
- XSL (XML with the file extension 'xsl' or 'xslt')
- images (GIF, JPEG, PNG)
- javaScript
- CSS
- If an html file contains links with a relative address then the linked file has to be imported too or an HTTP address should be used.
- Additional file formats which are used as embedded objects in an HTML file such as audio files can be displayed but need an HTTP address instead of a relative address.
- Markdown files are converted to HTML when they are to be displayed and:
- They have to match the syntax of John Gruber.
- During the conversion, a default css file ("/sos/css/default-markdown.css") is used and the title of the page is the name of the markdown file.
- The markdown can start with reference-style links which are invisible.
- These links can be used as header information for title and css file
- [css]: http://myHost/my.css or relative [css]: my.css
- [title]: myTitle
The Import Procedure
The following example uses a simple HTML documentation item: a single HTML file with CSS and image files in sub-folders. The files making up the example are zipped to preserve dependencies on both Windows and Linux systems.
The screenshot below shows the Import button in JOC Cockpit's Resources.Documentation tab containing only the JITL Job documentation, which is imported per default, as described in the JITL Job Documentation section below:

Clicking the Import Documentation button opens the following modal window:
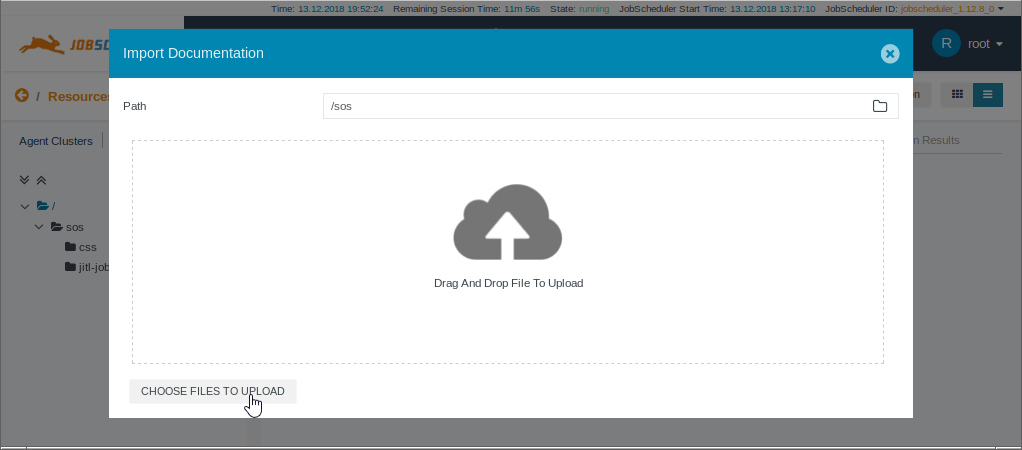
In the above screenshot:
- The Drag and Drop File area and Choose Files to Upload button are used to select the files to be imported.
- The Path field is used to define in which virtual directory the documentation files are to be saved in. A path specified here does not have to reflect the file structure of any JobScheduler objects that are to be documented and can be used to create a documentation-specific structure if required. Note that while the folder symbol at the right of the Path field can be used to open a dialog to navigate through the Documentation virtual file structure, it will only show folders that already contain documentation. Folders corresponding with any existing but undocumented folder structure in the JobScheduler "live" folder must be entered manually.
The next screenshot shows the start of one possible approach to structuring documentation files:
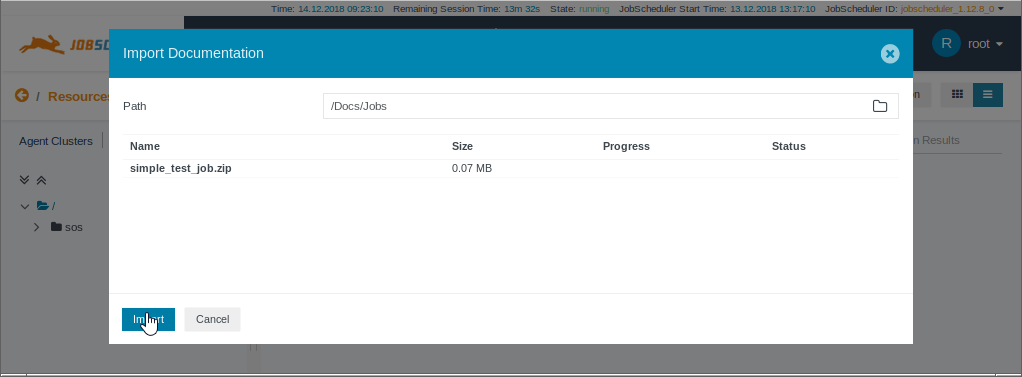
The virtual Path specified in the screenshot above reflects the organization of documentation items according to object type, with a folder for Jobs, one for Orders, etc. Such a 'centralized' approach to the organization of Documentation fits in well the the concept of reusing JobScheduler objects.
Note that the name chosen for the zip file is not included in the virtual path.
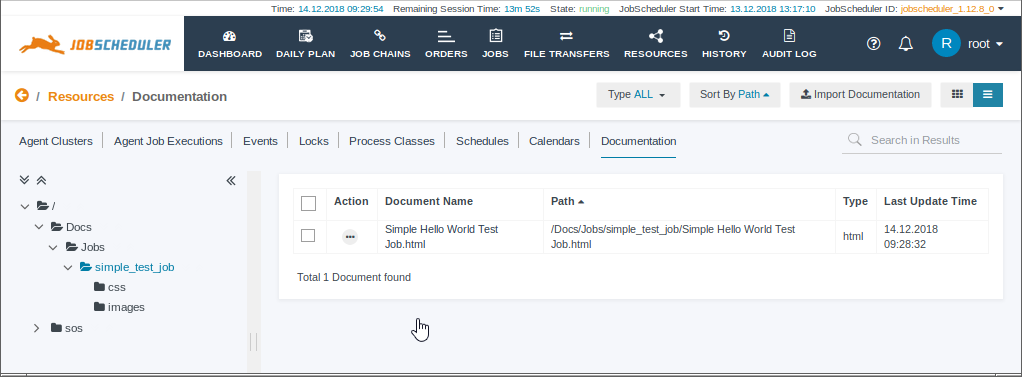
The next screenshot shows the folder structure of the imported documentation item and the 'main' HTML file. The files from the CSS and images files can be accessed if required.
JITL Job Documentation
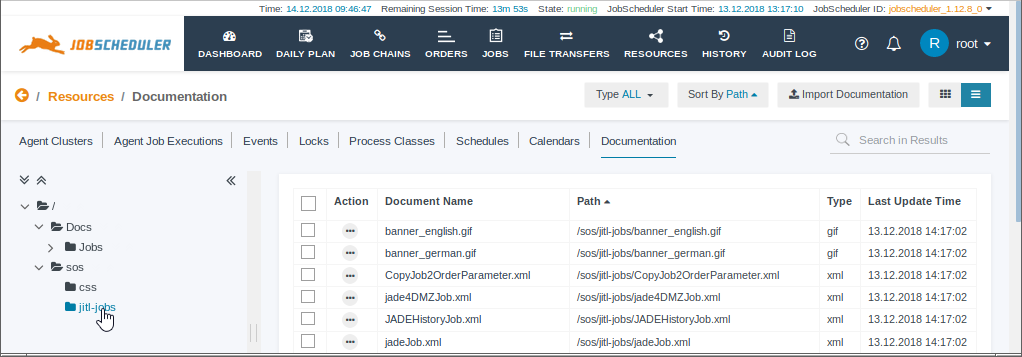
Documentation for all the JITL Jobs which are delivered with the JobScheduler is automatically imported from the ${SCHEDULER_DATA}/jobs folder to the JobScheduler's Reporting database when the JobScheduler Master is installed. The JITL documentation files are then shown in the JOC Cockpit's Resources->Documentation view in the ./sos/jitl-jobs virtual folder tree.
The next screenshot shows the top part of the JITL jobs documentation items:
Assigning Documentation
Permissions
While all of the default roles except the administrator have permission to view documentation, only the root and application manager roles have permission to assign documentation to scheduling objects.
The Assign Procedure
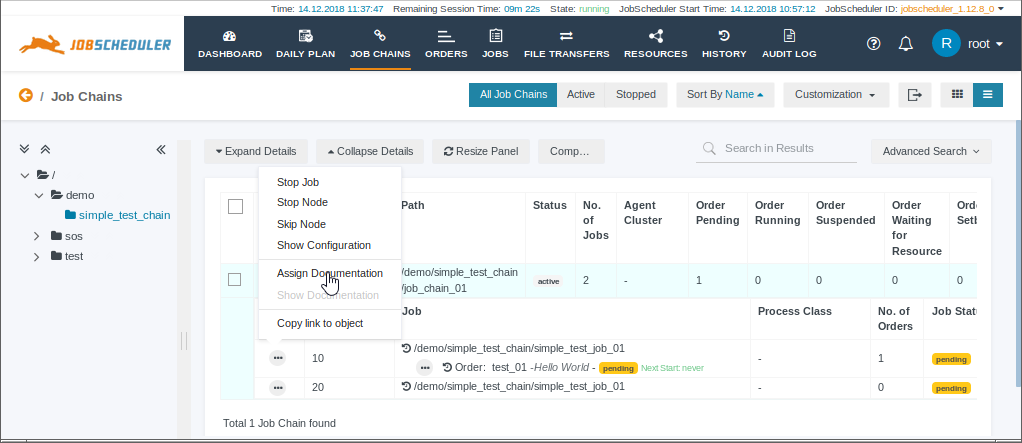
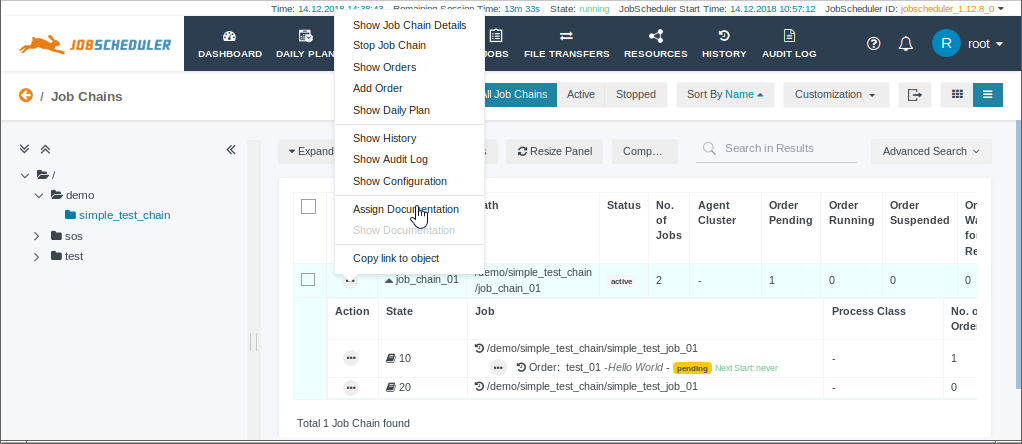
Documentation is assigned to a JobScheduler object using the Additional Options menu as shown in the screenshot below:
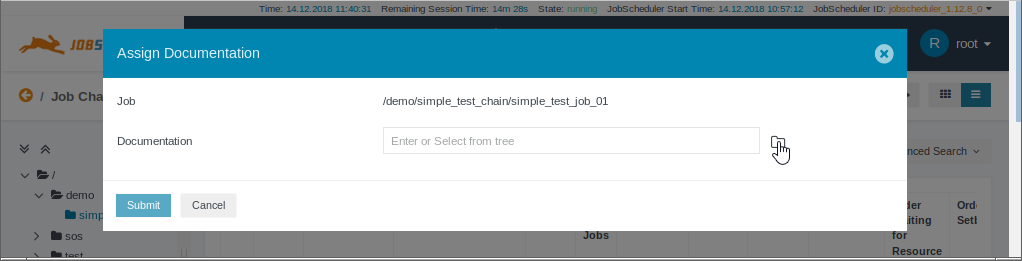
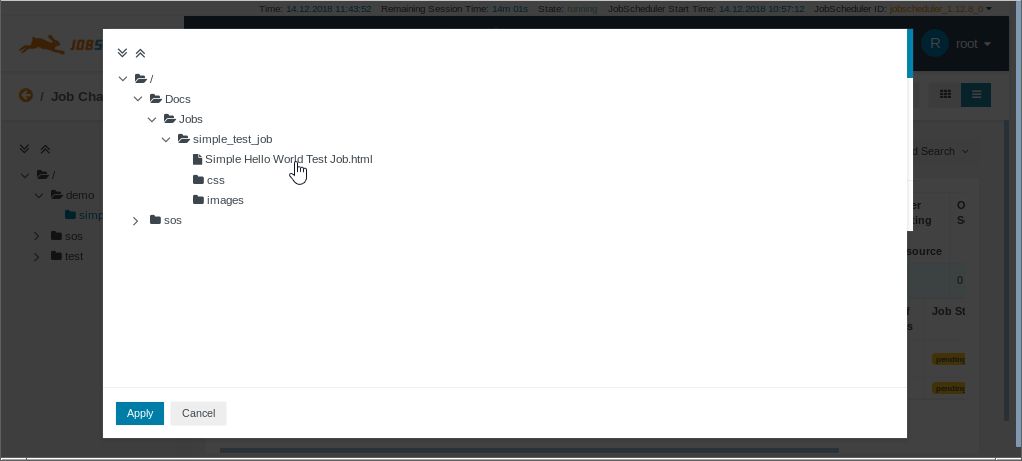
The Select from Tree folder symbol shown in the above screenshot opens a view of the Documentation virtual tree, which is shown below.
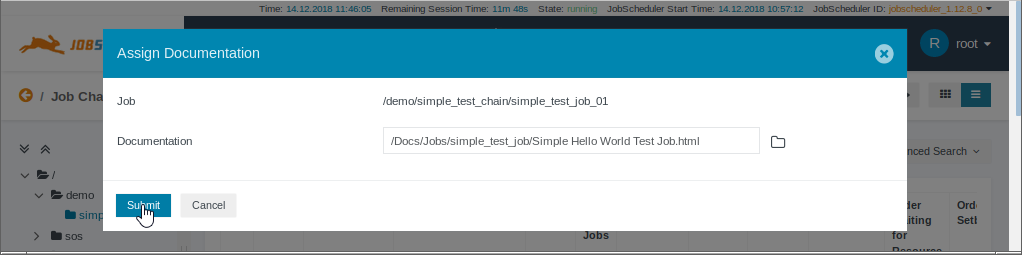
The Submit button is used to complete the assigning procedure after the documentation has been selected. This is shown in the screenshot below.
Once the documentation has been assigned to a JobScheduler object a documentation symbol is shown alongside the Job Chain node state as shown in the screenshot below. Note that a few seconds after this screenshot was made the JOC Cockpit added the documentation alongside the second node of the JobChain, as this node uses the same simple_test_job_01 Job as the first.
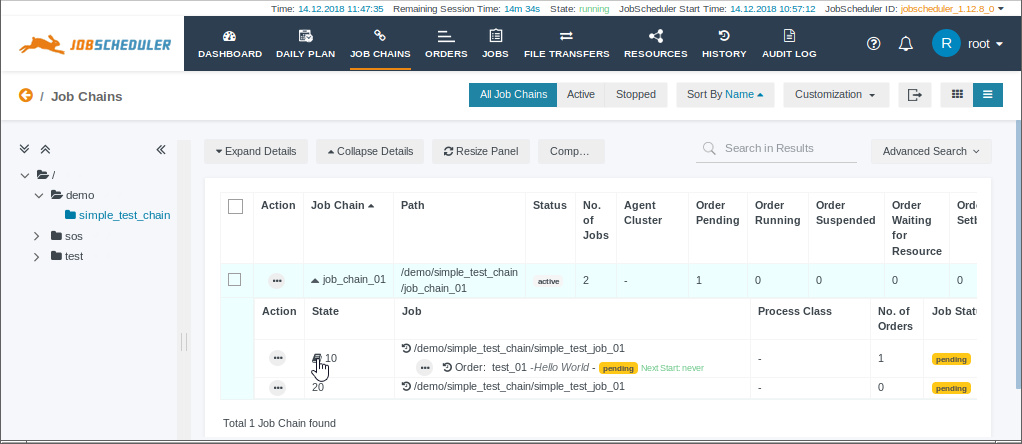
Clicking on the documentation symbol will cause the documentation to be opened in either a new browser tab or window, depending on the configuration in the user's profile described in the next section.
Assigning to Other Objects - Job Chains
The procedure described above can also be used to assign documentation to a job chain as shown in the next screenshot.
Updating Documentation
The import procedure described above can be used to update documentation files in the reporting database after changes. There is no provision for in-situ editing of files.
The updated version of a documentation file will be immediately available for all the objects the documentation has been assigned to. It is not necessary to reassign updated files.
Configuration
Users can specify whether a documentation item can be viewed by opening a new browser tab or a new browser window. This is specified in the User Profile as shown in the next screenshot:
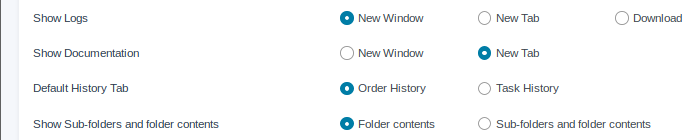
The default setting is that documentation items are opened in a new browser tab.
Deleting Documentation Items
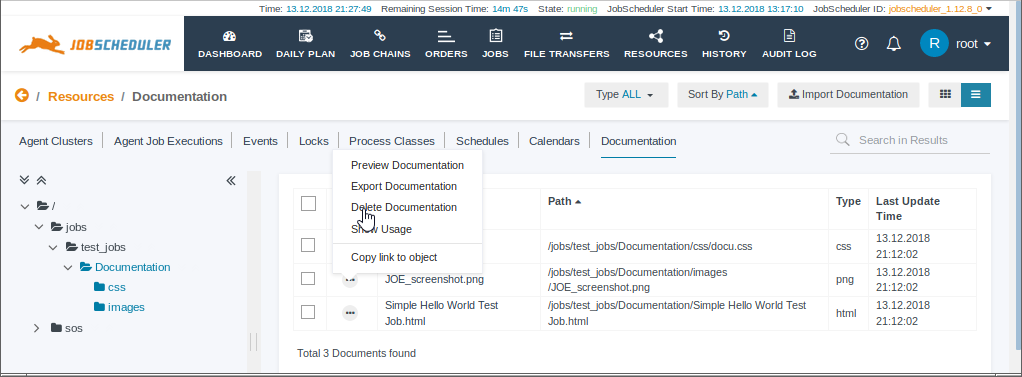
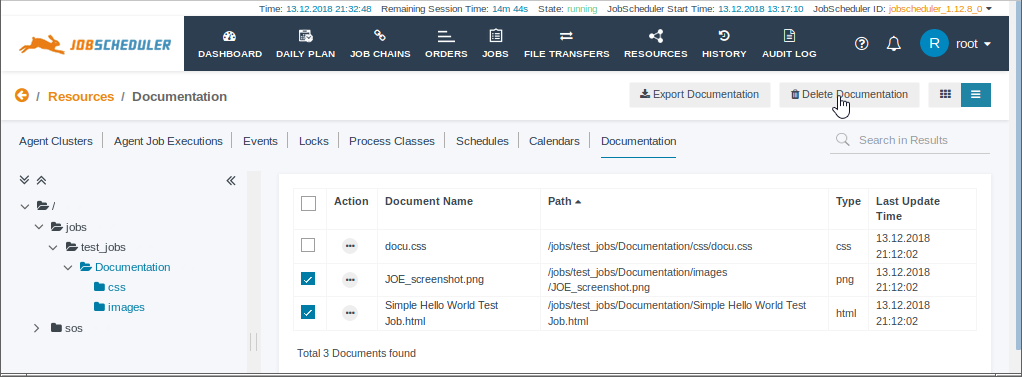
Documentation items can either be deleted individually, by using the Additional Options (ellipsis symbol) menu for each object as shown in the first screenshot below or by opening all the items within a virtual folder, selecting the ones to be deleted and using the "Delete Documentation" button as shown in the second screenshot below.
Once a virtual folder is empty it will automatically be removed from the virtual file tree, when the file tree is reloaded. This is best achieved by the user logging out from the JOC Cockpit and then logging in again.
Deployment: e.g. from Development to Production
Information about any documentation assigned to a Job us not added to the Job itself. This information is stored in the reporting database and requires to be exported when a scheduling environment is deployed, for example, from dev. to prod.
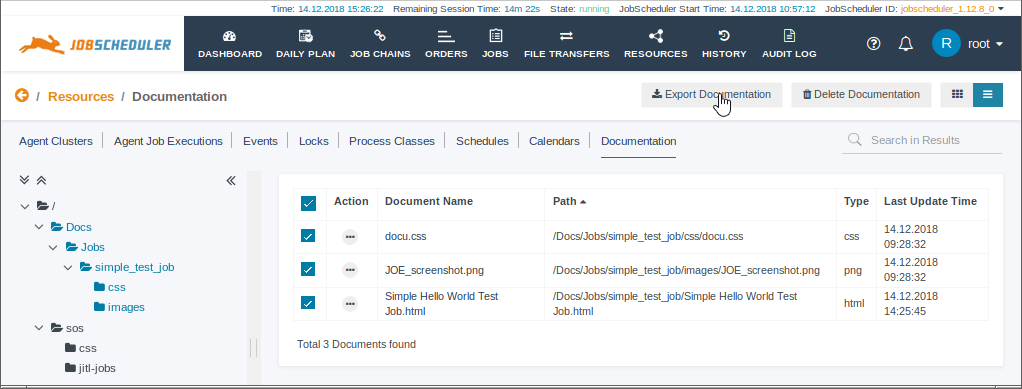
The Export documentation button is only displayed after documentation to be deployed has been selected as shown in the next screenshot.
The exported file is first saved to the local file system as a .zip file containing the assigned documentation information. This information is in JSON format and can then imported to the target system in the same manner as the documentation files and folders themselves. The order in which the documentation files and folders, and the assigned documentation information are important is not significant.
The following code block shows the assigned documentation information for the simple_test_job example already described in this article.
{
  "jobschedulerId" : "jobscheduler_1.12.8_0",
  "documentations" : [ {
    "documentation" : "/Docs/Jobs/simple_test_job/Simple Hello World Test Job.html",
    "objects" : [ {
      "type" : "JOB",
      "path" : "/demo/simple_test_chain/simple_test_job_01"
    } ]
  } ]
}