Introduction
This tutorial describes how to configure a JADE Command Line Client (CLC) to transfer files to a target server via a second JADE CLC that has been installed on a jump host.
This is a relatively complex example but it has been deliberately selected to demonstrate how simply real life use cases can be configured using JADE and the XML Editor.
This tutorial describes the use of the SOS XML Editor to generate the necessary transfer configuration file. The use of the Editor is intended to simplify and speed up the configuration process, particularly for complex file transfer situations, and reduce the occurrence of configuration errors. The Editor uses an XSD schema to generate and validate the JADE configuration. In addition, the Editor is able to generate the the new XML format that will be introduced with release 1.11 of JADE. A comparison between the new XML format and the current (i.e. used in releases up to and including 1.10) is available in the JADE user manual Configuring and Running File Transfers section.
JADE Tutorials List
This tutorial is part of a series describing how to get started with using the JADE Client via its Command Line Interface and configuring simple file management tasks.
JADE Client Command Line Interface
- Getting Started and Downloading files
- Simple File Selection
- More Advanced File Selection
- Checking files for completeness
- Public / Private Key Authentication
- Transfer via a Jump Host / DMZ
JADE Background Service
See the Using the tutorials with the JADE Client Command Line Interface article for information about setting-up and running the tutorial examples.
Background Information:
- Jump Host Architecture - describes the principles behind the use of a jump host
- JADE User Manual - Jump Host File Transfer - describes the configuration of a jump host operation in a little more detail.
Use Case
Consider the situation in an organization where security restrictions prohibit direct file transfer both between parts of the organization network and the Internet and between different organization locations.
In particular, consider the case where a user wishes to transfer files from their desktop computer over the Internet to a server, Japan, and where:
- The user can only reach the Internet via a proxy server (in this example, Homer).
The Japan server can only be reached via a jump host on a server UK, which is installed in a so-called demilitarized zone (DMZ).
The jump host already has a JADE command line client installed to enable file transfer across the DMZ. - Direct connections between the user's computer (localhost) and the Internet and from the Homer proxy server to the Japan target server are blocked.
Configuration
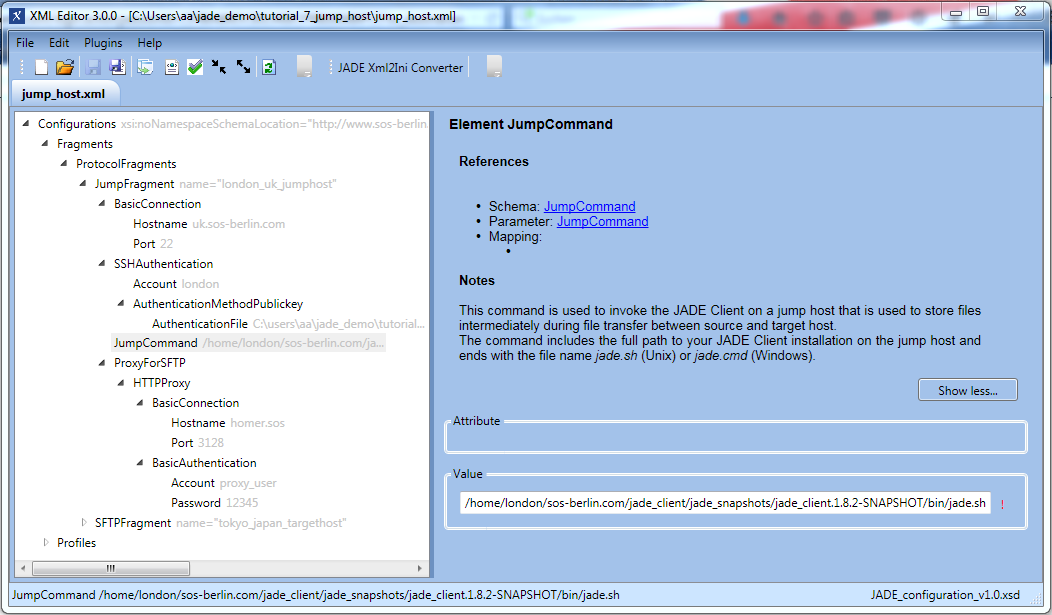
The jump fragment
The first step is to configure the jump protocol fragment for the London server, as shown in the next screenshot.
This configuration fragment is identified by the name attribute of the JumpFragment parameter and as can be seen in the screenshot has three main components:a BasicConnection element,
an SSHAuthentication element and
the ProxyForSFTP element. Detailed descriptions of all these elements can be found in the relevant Parameter Reference sections, which are linked behind the parameter names.
Note that:
The JumpCommand parameter specifies the operation that is to be carried out by the JADE Client on the jump server.
The AuthenticationFile element specifies the path to the RSA key file on the user's local file system that is used to authenticate the user on the jump host.
The target fragment
- The second step is to configure the target protocol fragment for the London server, as shown in the next screenshot.
- This element specifies the parameters required so that the JADE Client on the jump host can access the target server.
- As can be seen from the screenshot the fragment is protocol-specific and contains a JumpFragmentRef parameter which specifies the name of the JumpFragment element to be used to access the target server.
This means that it is only necessary to specify the target server and the jump host will be automatically added once the JumpFragment has been configured and referenced for the target.
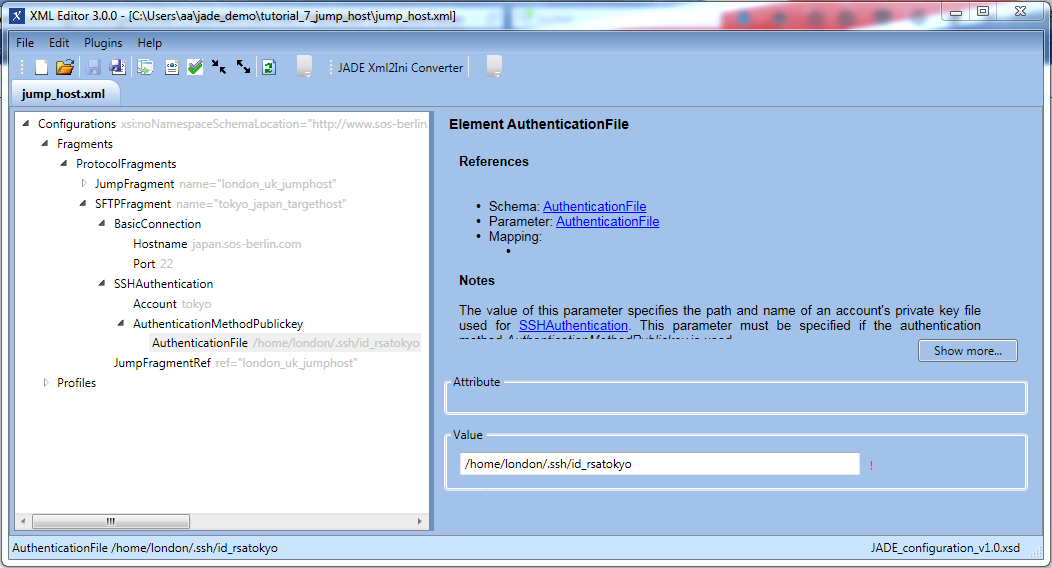
- The second step is to configure the target protocol fragment for the London server, as shown in the next screenshot.
The transfer profiles
Transfer to the Internet
The next screenshot shows the transfer profile specifying the operation to be carried out (copy), the operation source (local) and target (the Japan server accessed using the Tokyo account via the UK jump server, specified using the SFTPFragmentRef parameter)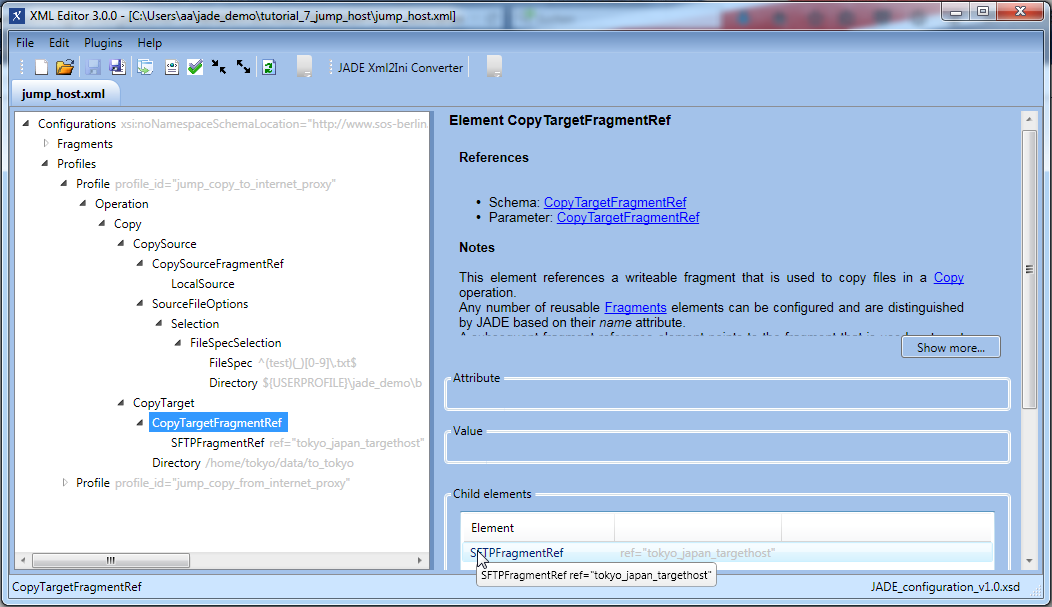
Transfer from the Internet
The next screenshot shows the profile configuration that would be required to carry out a similar transfer operation from the Japan server to the user's local file system via the jump host and proxy server.
This profile can be seen to be very similar to the jump_copy_to_internet profile shown above and illustrates how relatively simple configuration elements can be generated.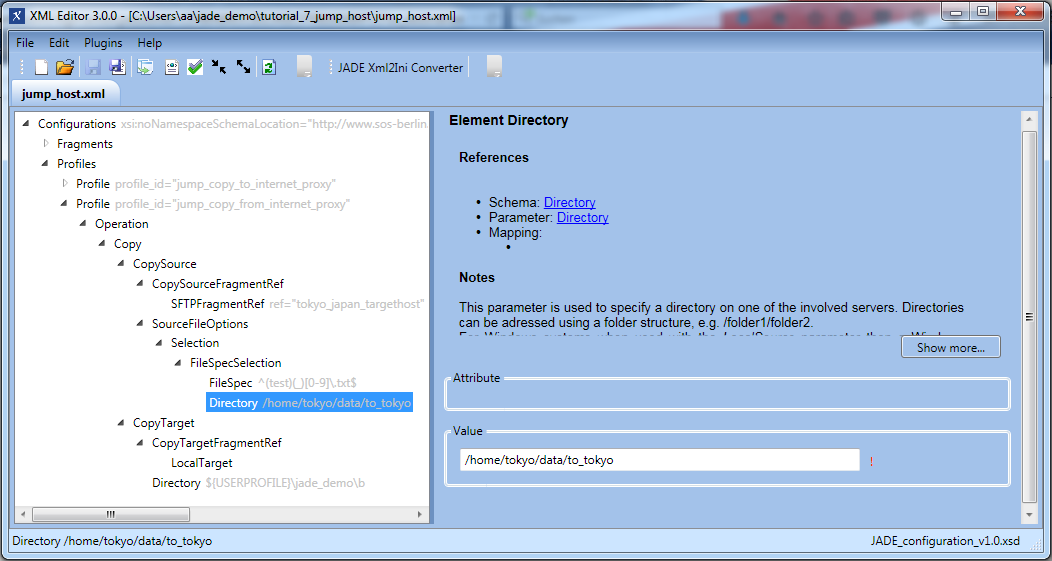
Generation of the settings.ini configuration file
- The XML Editor can save configurations in XML format using the standard Save or Save as buttons shown in the editor task bar. This file is compatible with the JADE version 1.11 described ...
The JADE Xml2ini Converter Button in the task bar causes the Editor to generate asettings.inifile that is compatible with earlier JADE releases. - For more information about using the Editor see the XML Editor Usage for compatible .ini and .xml configuration files article.
Calling the transfer operation (JADE Releases 1.10 and earlier)
A jump host file transfer operation is called from the command line in a similar manner to a 'standard' file transfer operation - i.e. by calling the configuration settings file and the relevant profile where the settings file has the name jump_host.ini.
However note that the jade4DMZ.cmd script is called instead of the standard jade.cmd script.
The call for a Windows system would be:
jade4dmz.cmd -settings="%USERPROFILE%\jade_demo\tutorial_7_jump_host\jump_host.ini" -profile="jump_copy_to_internet_proxy"
and on a Unix system:
./jade4dmz.sh -settings="${HOME}/jade_demo/tutorial_7_jump_host/jump_host.ini" -profile="jump_copy_to_internet_proxy"
File Transfer Details
- Whilst any protocol can be used for the transfer stage from the jump host to the target, transfer from the source to the jump host must be carried out using SFTP.
- Atomic transfer is the default mode for both stages of a jump host transfer operation. This means that if a file transfer error occurs in either stage of the operation, none of the files that would otherwise have been selected will be transferred. Files already transferred to either the jump host or the target server will be deleted.
Download Configuration Files
- The XML and ini configuration files used for the example shown in this tutorial can be downloaded using the following link:
- Note that in contrast to the other JADE tutorials we have not opened the servers used to make this tutorial for public use.
Users wishing to test out this configuration will have to first of all have to set up their own test servers.
Integration with the JADE Background Service
- The JADE Background Service is not able to directly access the JADE Client on the jump server. This means while the Background Service can access the transfer history and log files of the local JADE client it is not able to access log or file transfer information from the JADE Client on the jump host.
However the originating JADE Client (i.e. the current example, the client on the source server) receives feedback from the client on the jump host containing information about whether transfer from the jump host to the target server was successful.