...
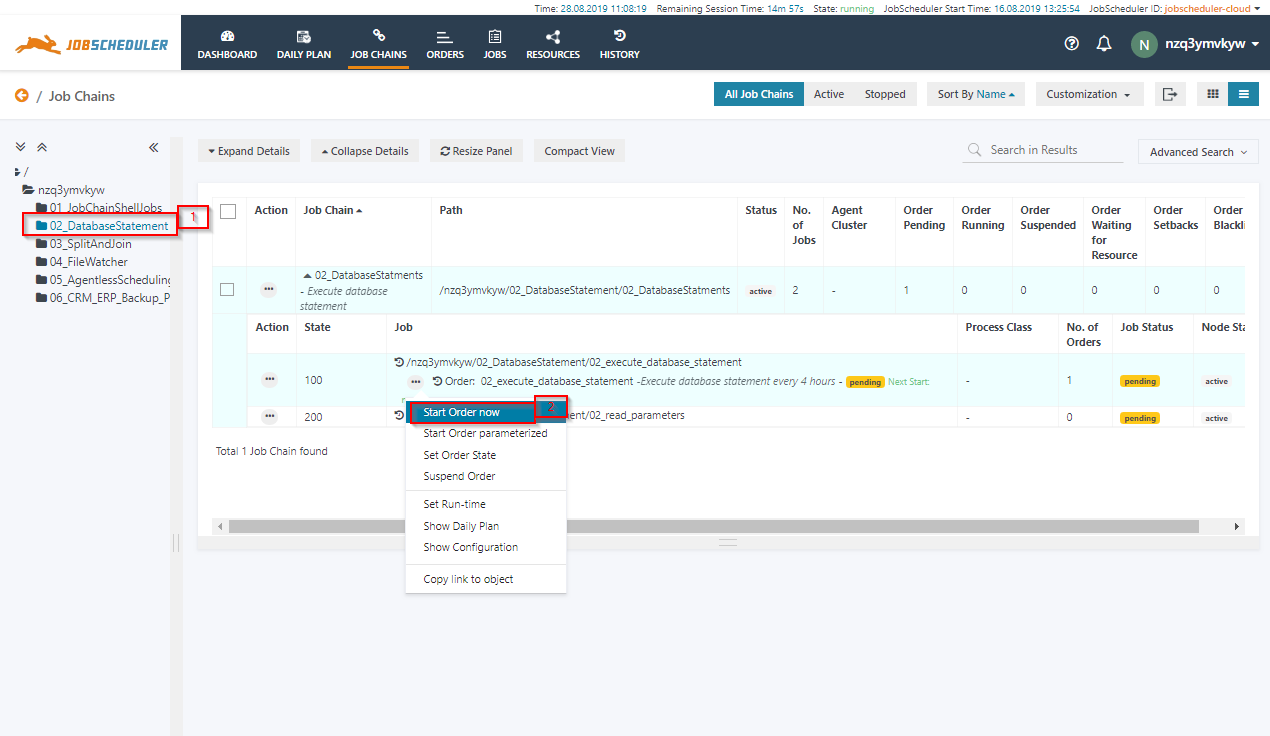
To run the job chain
- click on the job chain name 02_DatabaseStatement to expand the job chain details, a single order 02_execute_database_statement should be displayed:

- click on the job chain name 02_DatabaseStatement to expand the job chain details, a single order 02_execute_database_statement should be displayed:
To run the order.
- click on the action menu of the order. A drop-down menu will appear.
- click on Start Order now option to run the order immediately.
- To check the status of the order
- click Click on the job chain name 02_DatabaseStatements,
- the Order History panel will open to show the past and current executions of the job chain.

- From the log output, you will see that the SQL statement was executed for the database and the results were transferred to the next job as order parameters.
Split & Sync Using Job Stream
The JobScheduler feature Job Streams is used to implement dependencies with jobs. It provides backward dependencies using conditions. The jobs support In Conditions and Out Conditions. The In Conditions are evaluated before the job execution, whereas the Out Conditions are evaluated after the job execution.
In this example, you are executing a nested split and join processing use case using Job Streams. The jobs have dependencies implemented by the In Conditions and Out Conditions. A job will starts only if it's In Conditions expression evaluates to true. The job's Out Condition creates the events for the job in the system which is used as In Conditions for other jobs to continue the job execution.
- To run the Job Streams
- Switch to the Job Streams tab.
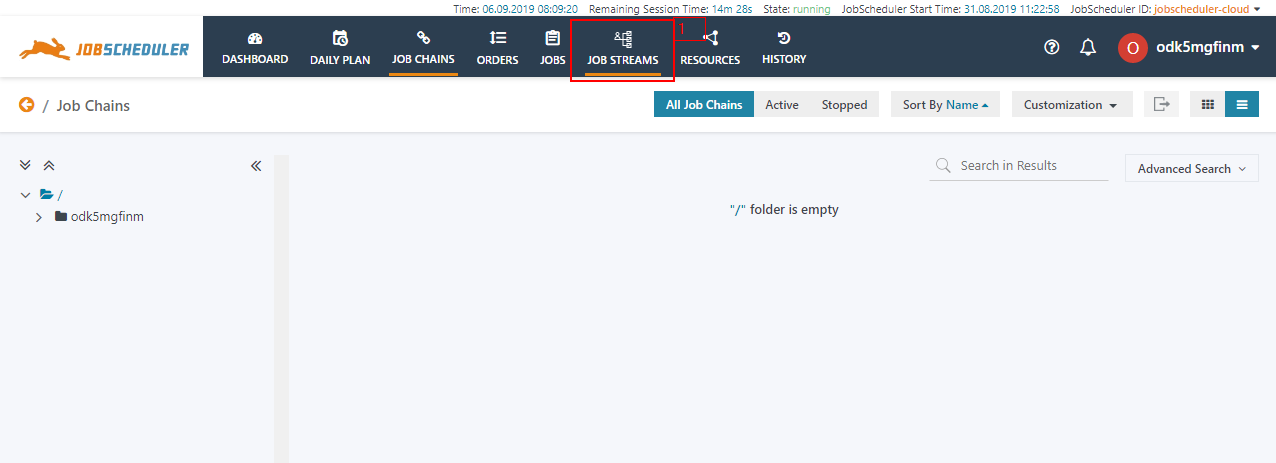
- Select the folder 03_JobStreams from the left tree structure. The collapsed view of the Job Stream will be displayed.

The following expressions are used as In Conditions and Out Conditions for the jobs.
S.No. Job Name Condition Expression Command / Event List 1.
job1
In Condition
-
-
Out Condition
rc:0
username_job1
2.
job2
In Condition
username_job1
startjob: now
Out Condition
rc:0
username_job2
3.
job3
In Condition
username_job1
startjob: now
Out Condition
rc:0
username_job3
4.
job4
In Condition
username_job3
startjob: now
Out Condition
rc:0
username_job4
5.
job5
In Condition
username_job3
startjob: now
Out Condition
rc:0
username_job5
6.
job6
In Condition
username_job4 and username_job5
startjob: now
Out Condition
rc:0
username_job6
7.
job7
In Condition
username_job2
startjob: now
Out Condition
rc:0
username_job7
8.
job8
In Condition
username_job6 and username_job7
startjob: now
Out Condition
-
-
Click on Expand details to display the Job Stream with it's In Condition and Out Conditions.

- Select the Start Task Now from the action menu of job1.
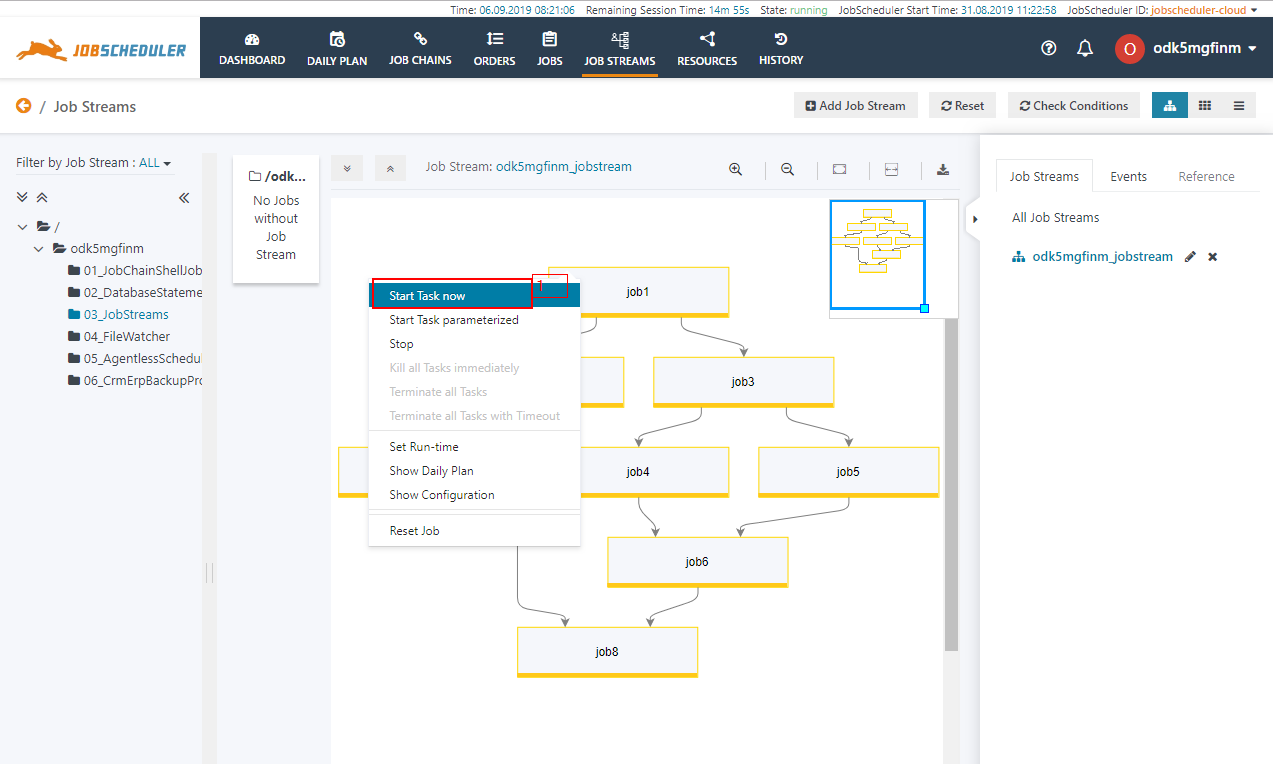
- The Job Streams starts its execution and the further jobs will be executed depending on the result of their In Conditions.
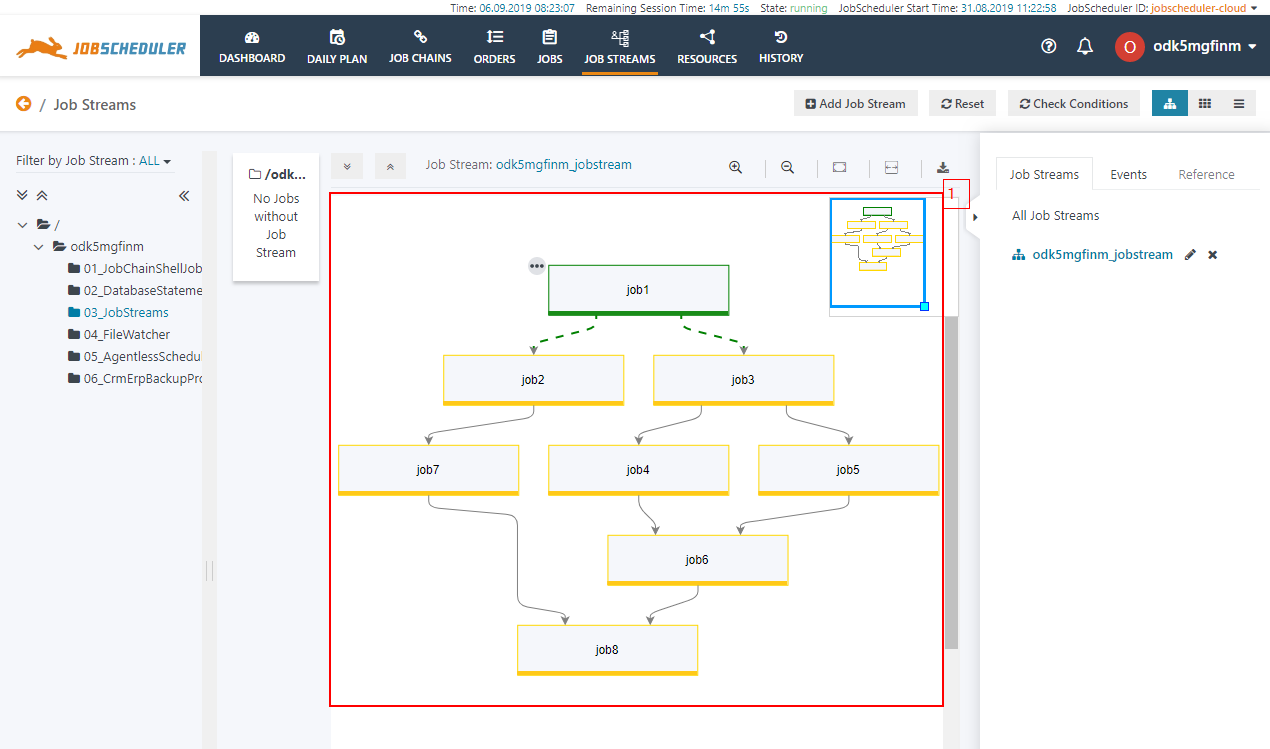
- Switch to the Job Streams tab.
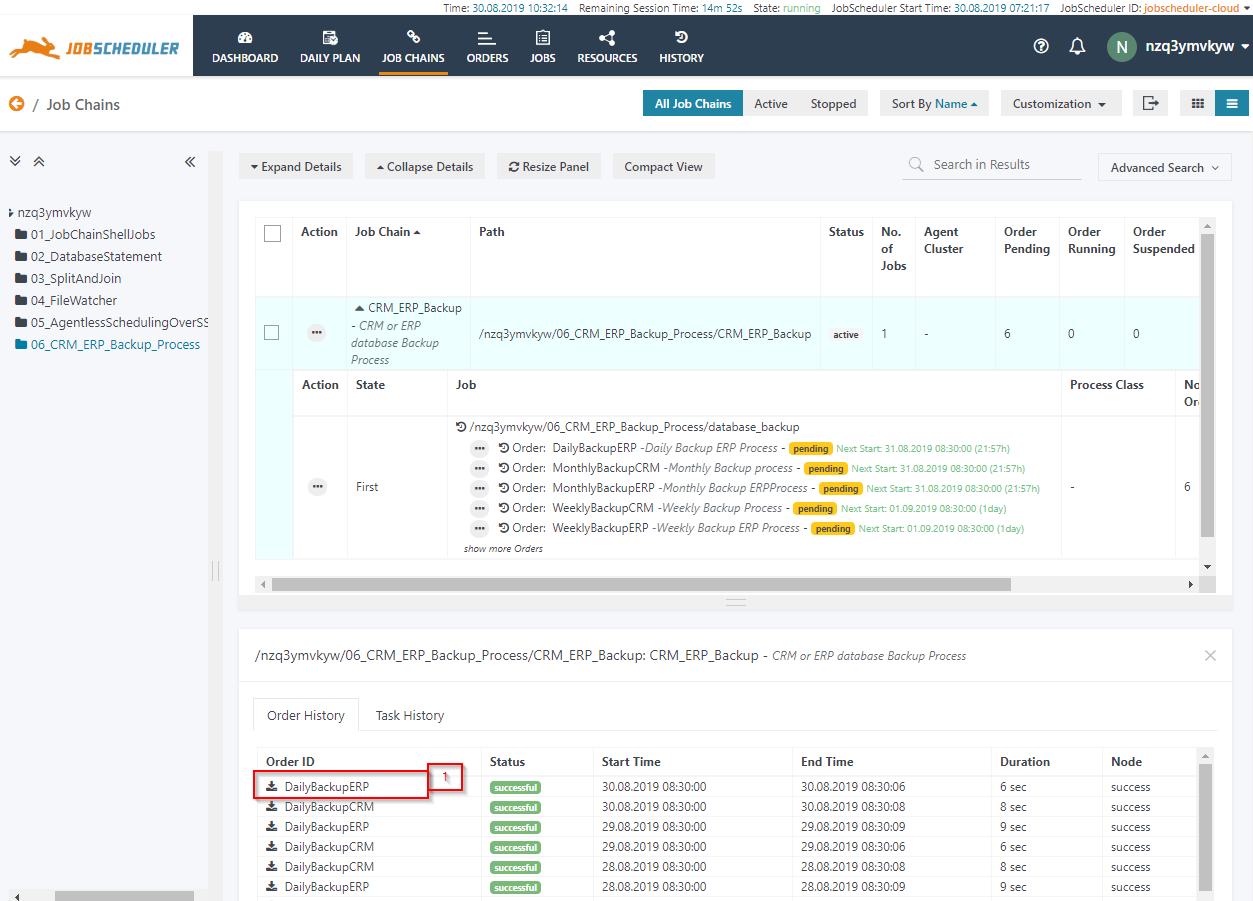
File Watching
JobScheduler comes with the built-in File Watching feature that allows to automate automating business processes based on the arrival of files. The file watching job chain starts automatically as soon as a file arrives in a specific folder. Once the job chain is triggered by the file, the complete file path will be available to the job as an environment variable which can be passed to the application or script called by the job.
...
- Click on the DailyBackupERP order to open the log from the Order History tab.
- The log window will open and the order log will be displayed.
Managing Calendars for Run-time
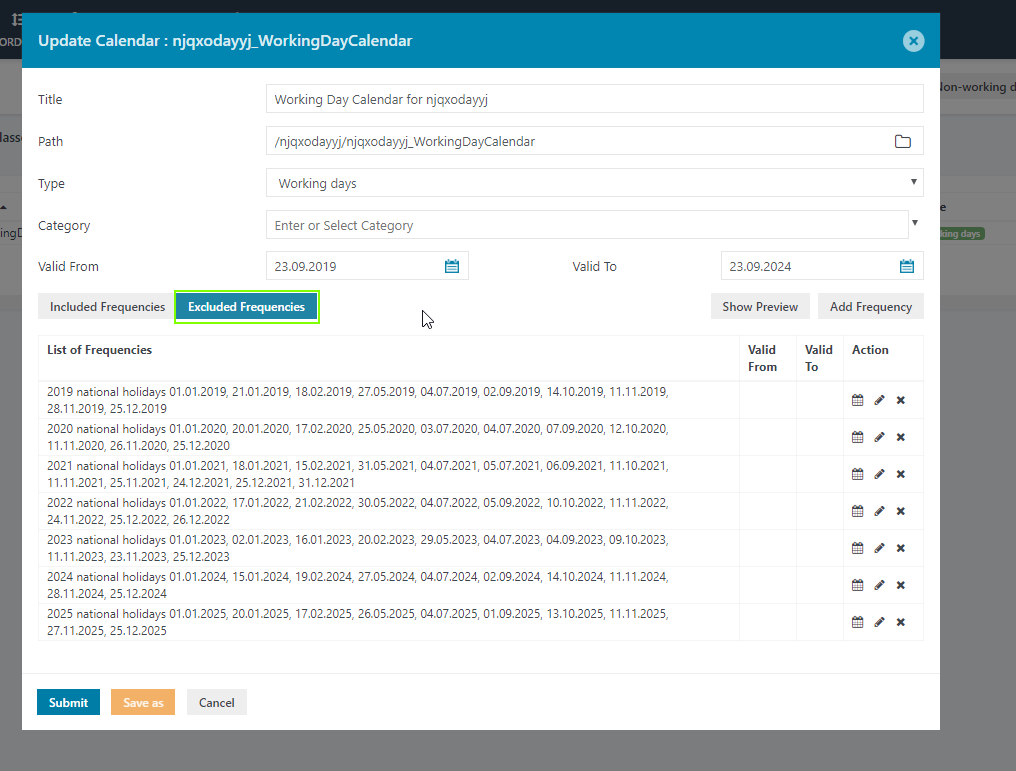
JobScheduler Calendars is the method to specify on what days order has to execute. Calendars can be of two types Working Day Calendar and Non-Working Day Calendar. A Working Day Calendar specifies business dates for which job execution is targeted, where Non-Working Days Calendar includes days for which job should not be executed. The handling of days in a Calendar is simplified using Frequencies. Frequencies can be of two types inclusive and exclusive. The inclusive includes the date on which the job is to be triggered and exclusive includes the dates on which job should not be triggered.
A working day calendar is created with the validity of 5 years. The frequencies assigned to the calendar are:
- Included Frequencies: The calendar includes frequency from Monday to Friday.

- Excluded Frequencies - The days which are excluded from the calendar are the national holiday of USA.
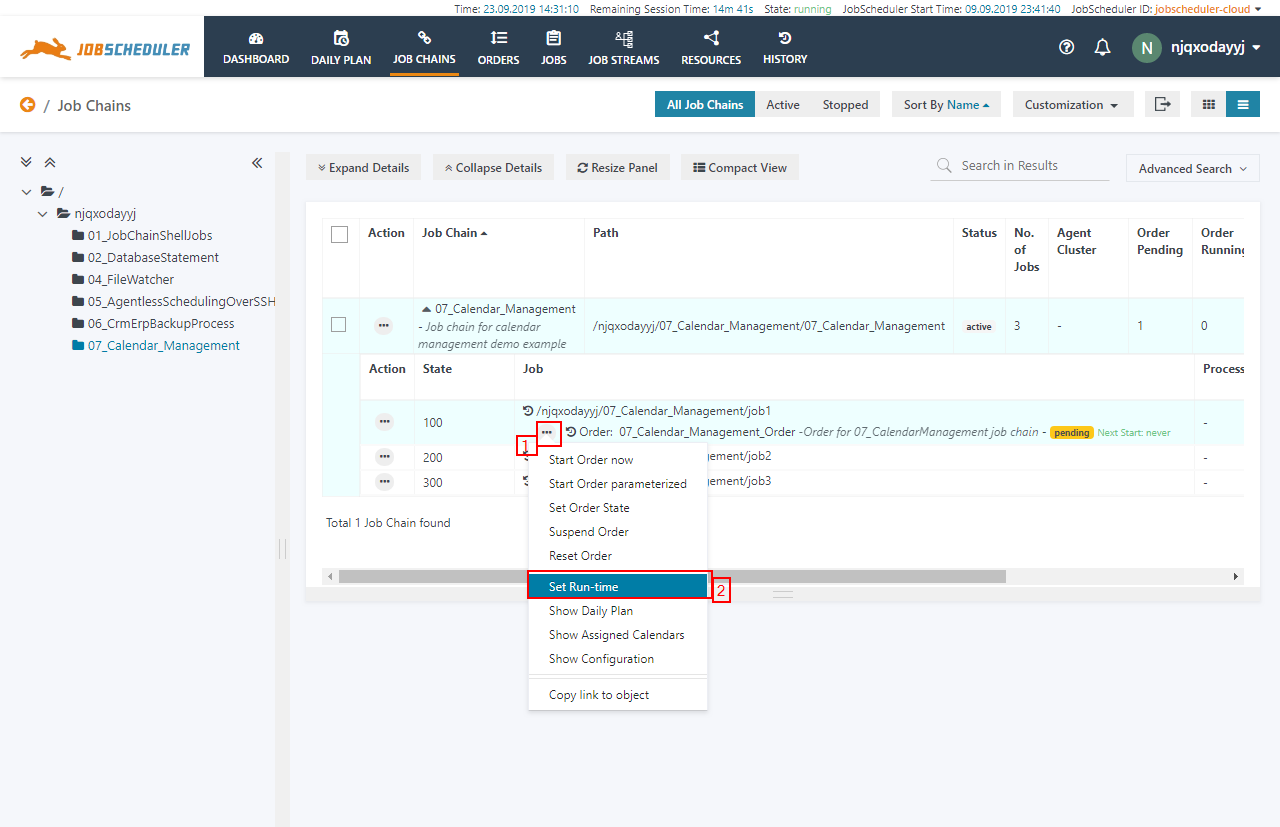
The job chain 07_CalendarManagement is a basic job chain with three jobs. It has an order 07_Calendar_Management_Order. To assign the calendar to the Order and to add the Restrictions on it follow the below steps.
- Switch to the Job Chains tab and select folder 07_Calendar_Management from the tree structure.

- From the action menu of the order 07_Calendar_Management select Set Run-time.
- A modal window for Set Run-time opens.
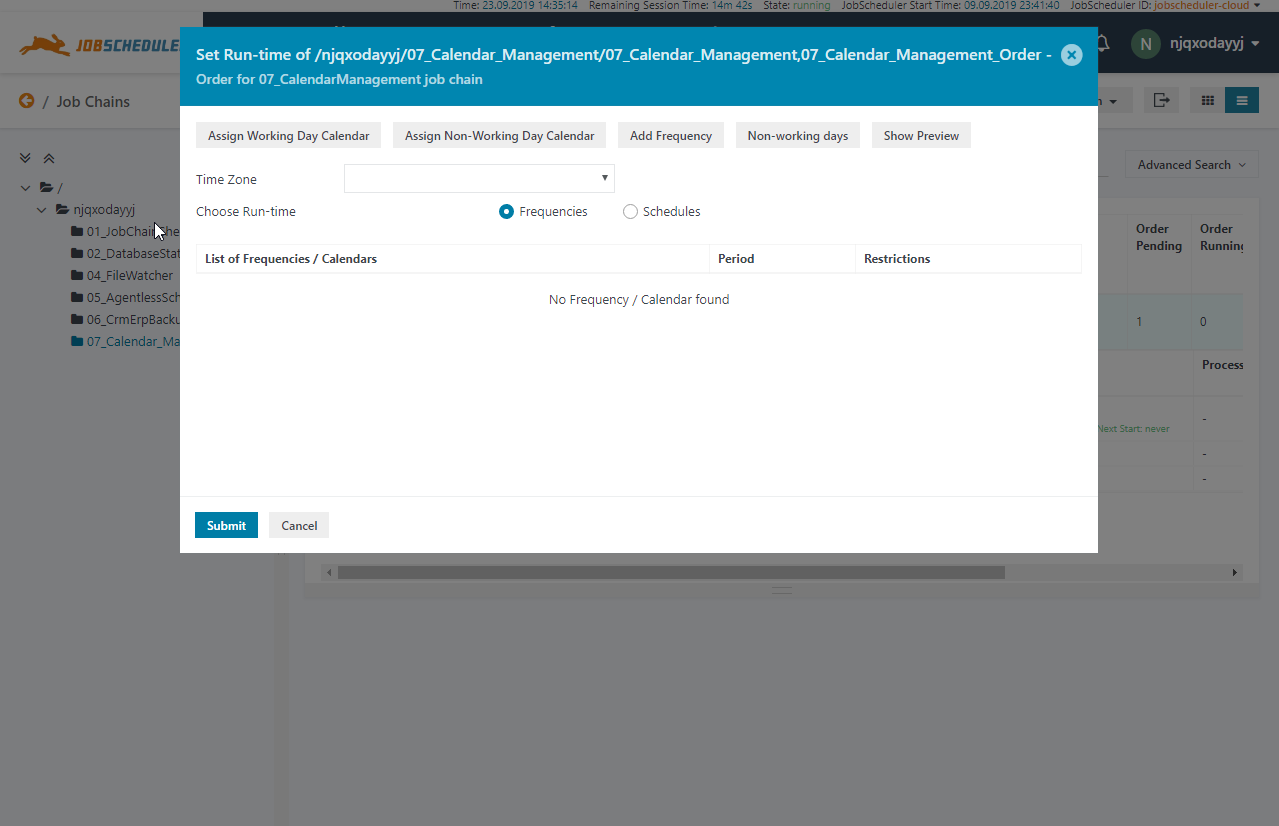
- Click on Assign Working Day Calendar.
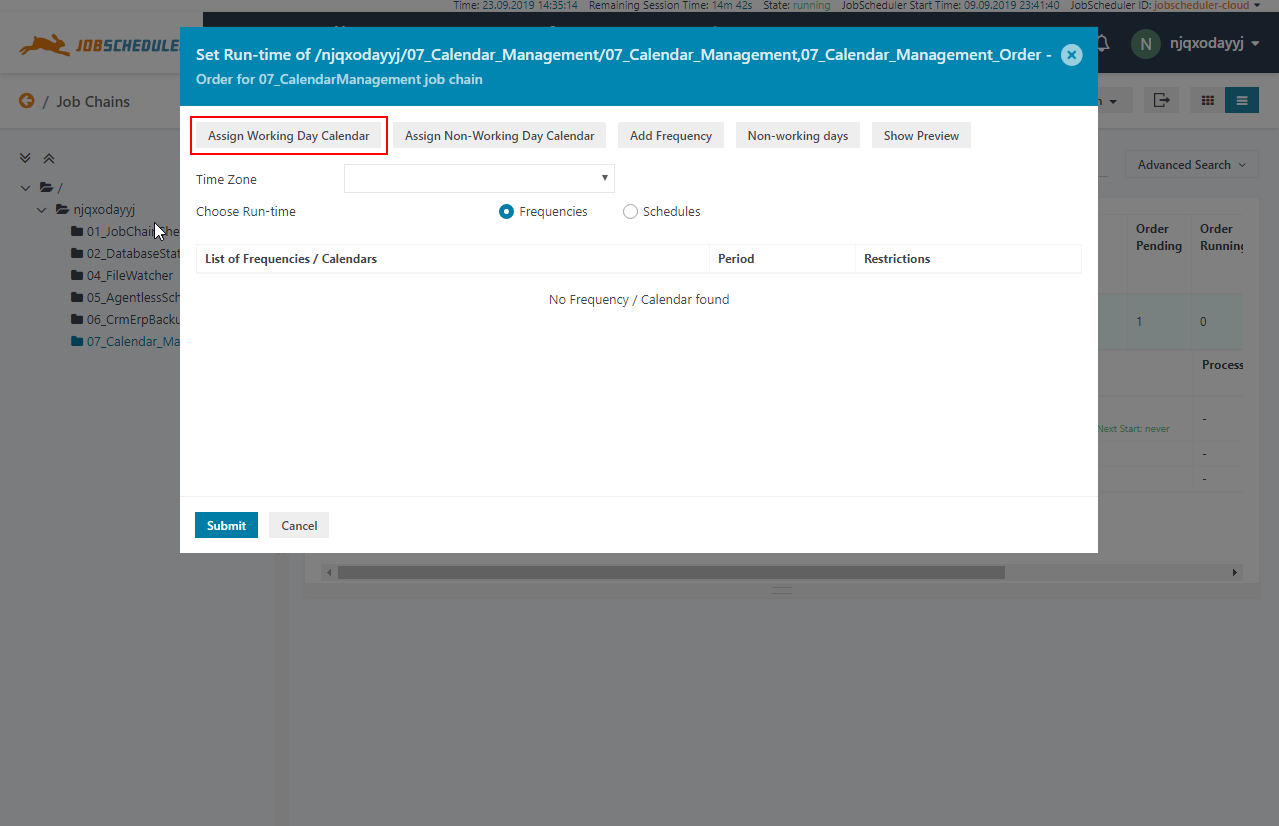
- Select the calendar from the tree and click Apply.

- On Clicking apply the select calendar is applied to the order and is shown in the List of Frequencies / Calendars.

- To add the Run-time for the job add the period for the job.

- Select the Repeat Interval, Start Time. The default values for the Repeat Interval is Single Start which means that the job or order will be executed only once. The other options are:
- Repeat End-Start - Once a job or order is executed it will repeat itself with an interval of Repeat Time according to end time of previous execution of job or order.
- Absolute Repeat Start-Start - The job execution will repeat itself with an interval of Repeat Time with respect to the start time of the job or order.
For example we want add a period as Single Start and morning 08:00:00 am.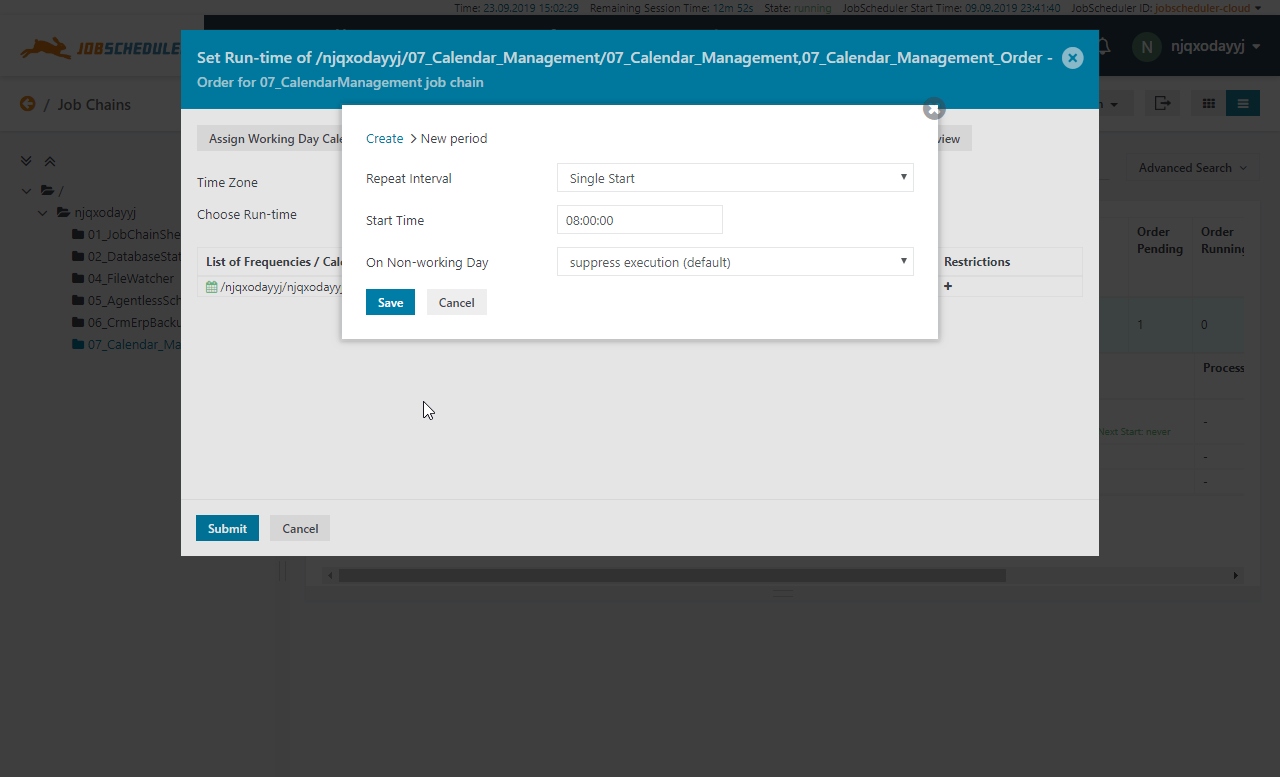
Click Save to add the Period.
- To add a frequency to this calendar use the Restrictions.

- A window open to Add Frequencies.
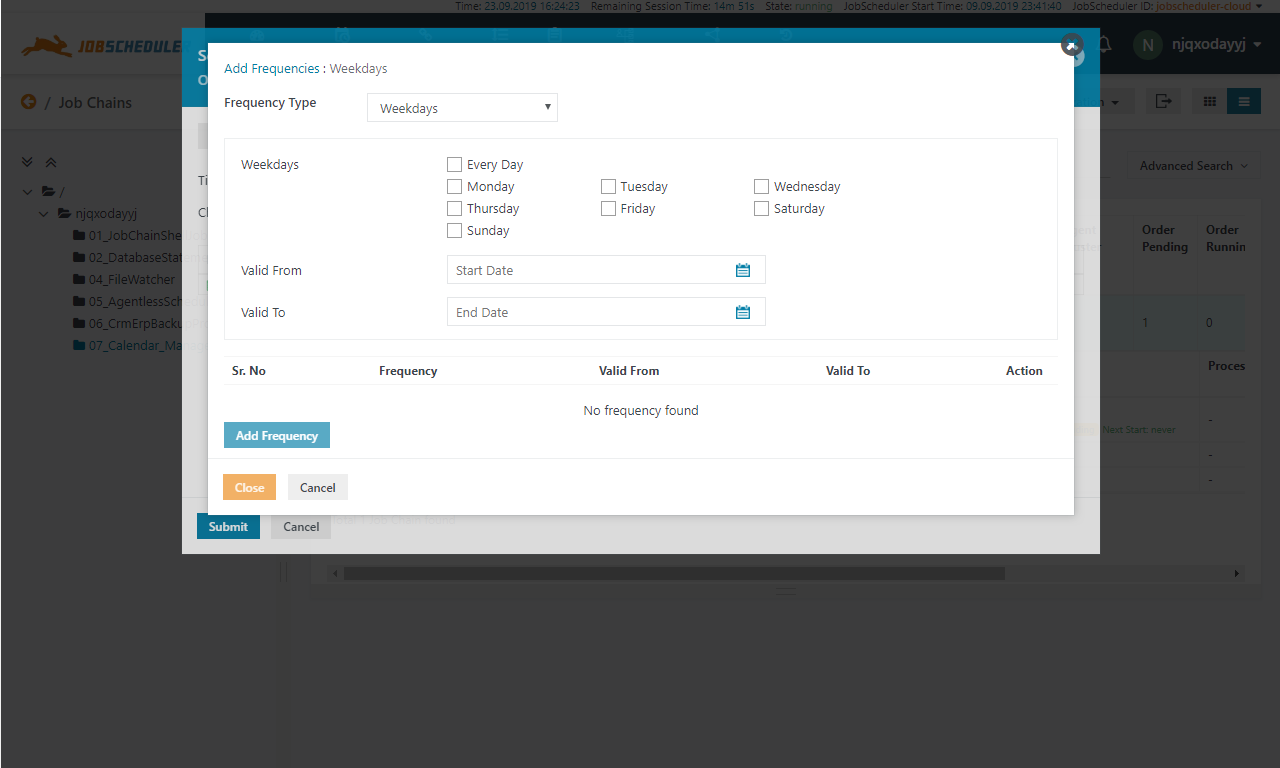
- The Add Frequencies provides an option of Frequency Types. This includes various options like Weekdays, Specific Weekdays, Specific Days, etc. For example, we want to add an frequency to run this order on third Friday of the Month, then we use Frequency Type as "Specific Weekdays" and Number of Day as "Third" and then we select Weekday as "Friday". The Valid From and Valid To if left empty then it takes the date up to which the calendar is valid.

- Then click Add Frequency, then close. After this click Submit. You can see the Next Start Time will be added to the order.
