...
- Start JobScheduler
- Open the JobScheduler Object Editor (JOE)
- In JOE, open the Open HotFolder function and use the Make New Folder to generate a sub-folder in the JobScheduler's Live folder. In this tutorial this sub-folder is given the name
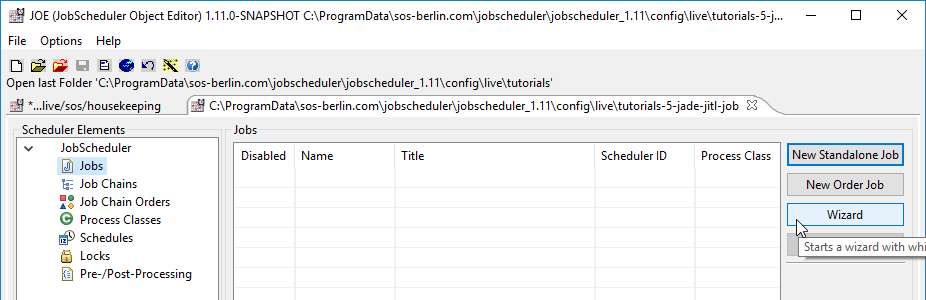
tutorials-5-yade-jitl-job. Now click OK to open this folder. - In the left hand pane of JOE select the Jobs icon - opening the JobScheduler icon if necessary. Now use the wizard function to import the YADE JITL Job by clicking on the Wizard button as shown in the screenshot below.
- In the small window that will now open, select Order controlled job and then Next, which will open the Import Jobs window as shown in the next screenshot.

- Enter a Jobname Jobname such as yade_jitl_job_1, as shown in the screenshot.
- In the Jobs pane, scroll down until the two YADE Jobs are visible and select the second YADE-Job (the one without DMZ in its file name).
This will cause the Title field to be filled with "API Job for JobScheduler ...." as shown in the next screenshot: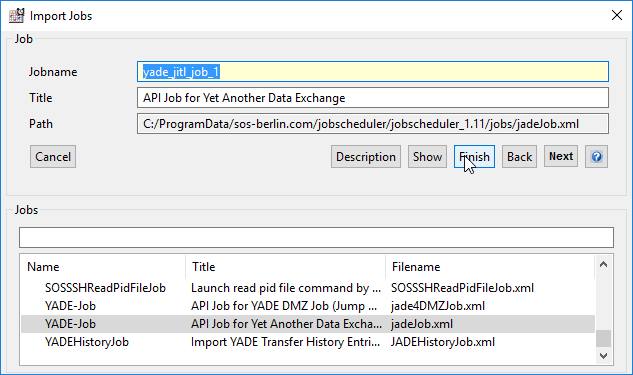
Now click on the Finish button to create the new job and close the wizard.
Info title Deprecated Parameters Note that use of the wizard to configure the job parameters as described in Tutorial 4 - Configuring and Running a JITL Job - i.e. proceeding by clicking on Next instead of Finish - is not recommended for this Job and an alternative method will be described.
This is because in releases up to and including 1.9 the wizard uses parameters which have now been deprecated and which would considerably restrict the configurations possible for the JITL Job.
For more information see
.Jira server SOS JIRA columns key,summary,type,created,updated,due,assignee,reporter,priority,status,resolution serverId 6dc67751-9d67-34cd-985b-194a8cdc9602 key JITL-201 - You will now be returned to JOE's Jobs tab where the yade_jitl_job_1 will be listed.
- In the small window that will now open, select Order controlled job and then Next, which will open the Import Jobs window as shown in the next screenshot.
- Open the yade_jitl_job_1 in JOE's left hand pane and select the Parameter element as shown in the next screenshot.

- Now enter the parameter name/value pairs required to configure this Job.
- There are a number of approaches that can be taken to specifying the parameter name/value pairs in for this Job:
- Use the job Parameter form shown above to enter the parameter pairs and store the information in theJob configuration. This is the simplest approach and will be described first in this tutorial.
- Specify a
settings.inifile and Profile in job Parameter form and then enter the necessary parameters in this file using a text editor. This procedure is described in the Use of a Profile and settings.ini file section of this tutorial. - Note that it is also possible to create a custom JITL job by duplicating the YADE JITL job in the JobScheduler data jobs folder and directly editing this file. This procedure is outside the scope of this tutorial.
The values of the necessary parameter name/value pairs can be taken from the list below, which users that are familiar with the YADE tutorials will recognize as being the parameters for the first YADE tutorial:
Code Block language text title YADE Parameter Settings operation = copy source_host = test.sos-berlin.com source_protocol = ftp source_port = 21 source_user = demo source_password = demo source_dir = / target_host = localhost target_protocol = local target_dir = ${USERPROFILE}\yade_demo\aNote that the
${USERPROFILE}value must be replaced with a suitable path to the desired target directory.- The use of the job Parameter form is very similar to the use of the JITL job parameter wizard already mentioned. The use of the wizard was described in detail in the Configuring and Running a JITL Job tutorial and the use of the Parameter form should therefore not require any further explanation.
- There are a number of approaches that can be taken to specifying the parameter name/value pairs in for this Job:
- The Job Parameter form will appear as shown below once all the parameter pairs have been entered:

- Note that the value of the target_dir parameter shown in the screenshot has been changed from the parametrized value used in YADE (i.e.
${USERPROFILE}\yade_demo\a) to an absolute value.
This is because the JobScheduler on the system used to configure this tutorial runs under its own user account and therefore the${USERPROFILE}variable would return the wrong path.- Information about finding exact YADE parameter definitions is given in the YADE parameter definitions section in this tutorial.
- Note that the value of the target_dir parameter shown in the screenshot has been changed from the parametrized value used in YADE (i.e.
- Create a new Job Chain for the yade_jitl_job_1 job:

- Add the Job to the Job Chain along with two end nodes as shown:

- Create and configure an Order for the Job Chain:

- Don't forget to save the configuration as shown above.
- Add the Job to the Job Chain along with two end nodes as shown:
...