...
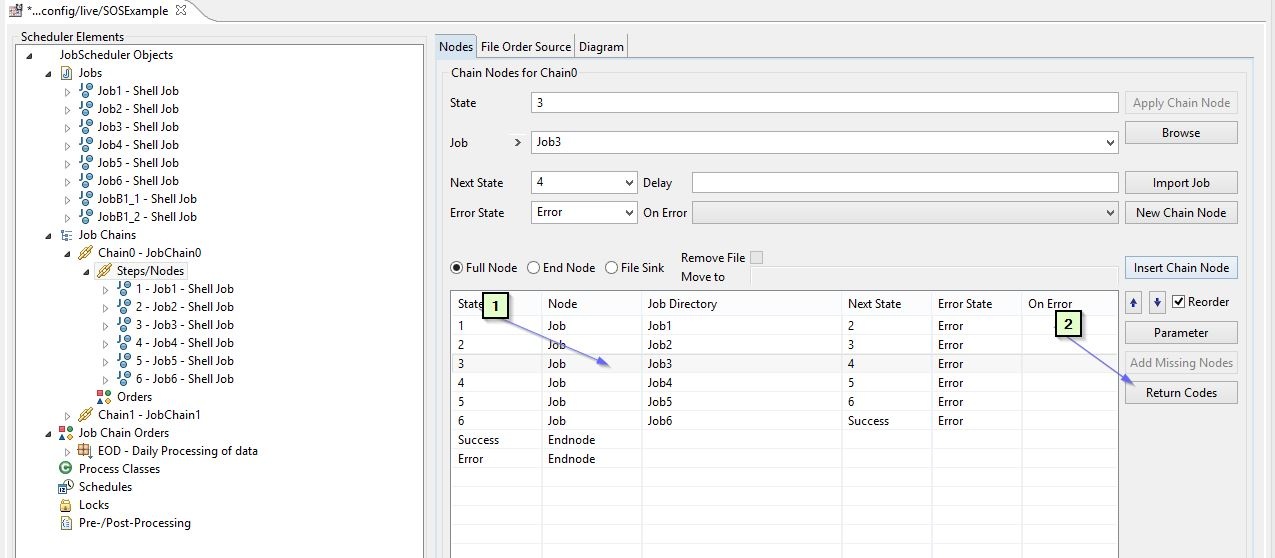
- The standard progression through the job chains is configured in the NextState and ErrorState fields of the form.
- Generation of the order to start JobChain1 is configured as shown in the screenshot:
- 1) Select Job3 since we want to start JobChain1 if this job ends successfully
- 2) Click on the Return Codes button to open the Return Code configuration form
Screenshot 1
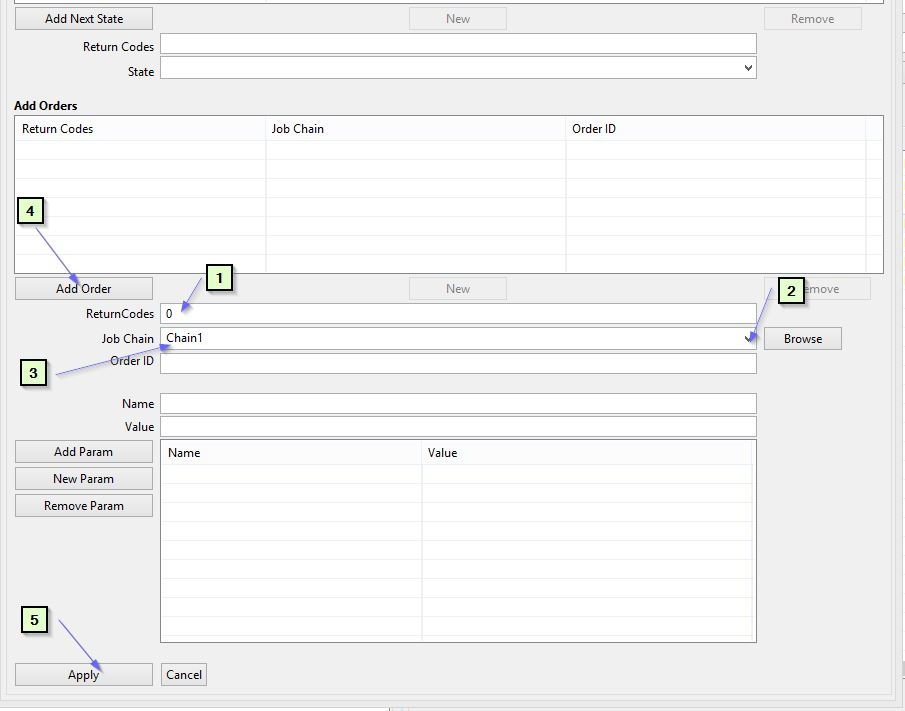
- 1) Give the return code, e.g
. return_code = 0signals success, in the ReturnCodes field- Syntax:
- Individual return codes are separated by spaces (e.g. 1 2).
- Return code ranges are inclusive and written 1..5 6..9
- Return codes can only be specified once
- Behavior:
- Note that non-zero return codes can be used but will be seen as an errors in the originating job chain.
- Should no
<on_return_code>element match the current return code then JobScheduler will apply thejob_chain_node@next_state(return code 0) orjob_chain_node@error_state(other return codes) attribute.
- Syntax:
- 2), 3) Select the target job chain e.g. JobChain1 from the drop down list
 only job chains present in the same folder will be available in the Job Chain dropdown list
- Other job chains can be:
- navigated to using the Browse button.
- specified using the syntax:
/myFolder/myJobChain.
- 4) Click on Add Order button to assign the Order to the
JobChain1 - 5) Click on Apply (at the foot of the form)to make the changes in the job chain configuration
- Save the job chain configuration.
Screenshot 2
Example Job Chain Code
...