...
Opening the configuration in the JobScheduler's Object Editor, JOE, will show the file structure illustrated in the left hand pane of the following screenshot:
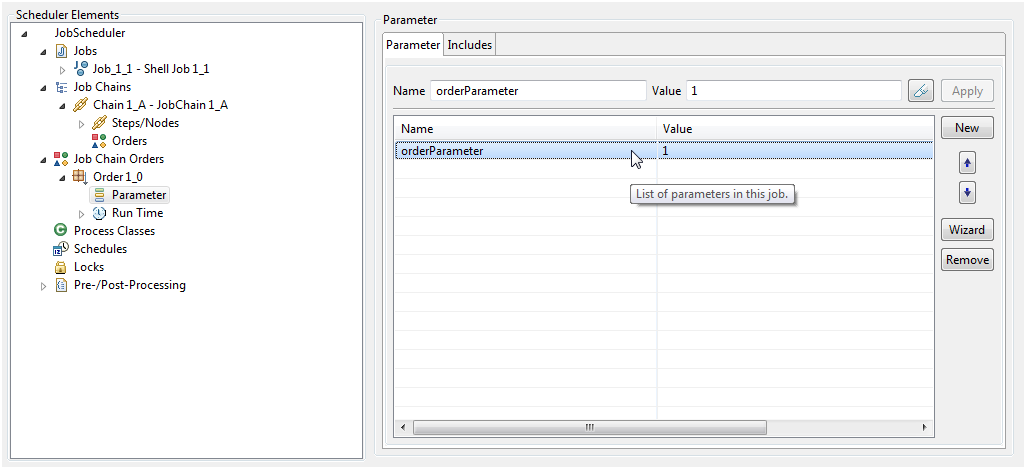
- The example has a job chain with one job with a shell script that contains a simple sleep function. The Order1_0 has one parameter, orderParameter, with the value 1.
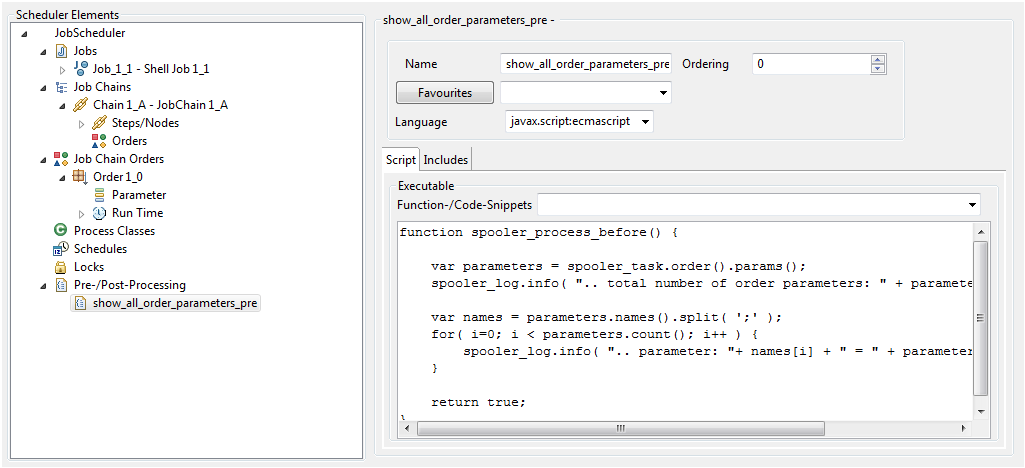
- Opening the Pre-/Post-Processing element in JOE's left hand pane as shown in the next screenshot to display the configuration for the show_all_order_parameters_pre Monitor:
- The next two sections describe how to create and apply the show_all_order_parameters_pre Monitor.
Creating
...
the Example Monitor using JOE
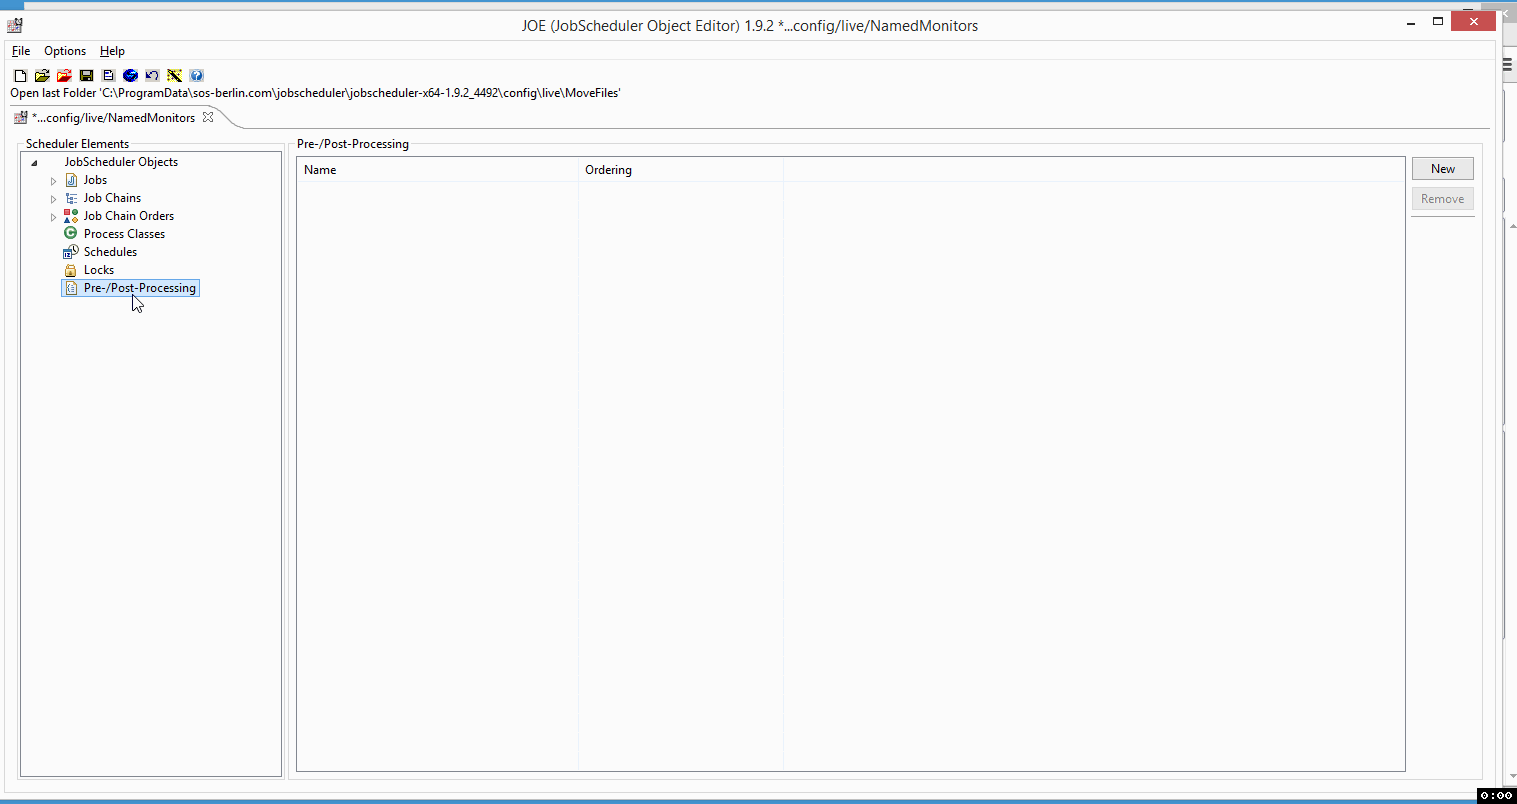
- In the left navigation pane click on Pre-/Post-Processing
- In the far right top side click on New to create a Pre-/Post-Processing Monitor
- A new Monitor will be created with a default name,
process0.
- A new Monitor will be created with a default name,
- Click on the Name of the newly created Monitor:
- This will open a form allowing more configuration options such as Name, Ordering etc. to be set.
- Click inside the Name text box and specify a relevant name for the Monitor, e.g. show_all_order_parameters_pre.
- Leave the Ordering at the default value of 0.
- Chose the script language java:javascript from the Language dropdown menu.
Just below of click on the script tab and chose the spoolerspooler_process_before() code code snippet.
Copy & Paste the following code snippet as a replacement for the function:
Code Block language js title show_all_order_parameters_pre collapse true function spooler_process_before() { var parameters = spooler_task.order().params(); spooler_log.info( ".. total number of order parameters: " + parameters.count() ); var names = parameters.names().split( ';' ); for( i=0; i < parameters.count(); i++ ) { spooler_log.info( ".. parameter: "+ names[i] + " = " + parameters.value( names[i] ) ); } return true; }Save the configuration by clicking on Save Configuration.
- This will open a form allowing more configuration options such as Name, Ordering etc. to be set.
Assigning a Pre-/Post-Processing Monitor
...
on the Save Configuration icon in the top left hand corner of JOE.
Specification of Monitors as Pre- or Post-Porcessors
- The use of the spooler_process_before() or spooler_process_after() function in the monitor script defines whether a Monitor is a pre-processor or post-processor.
Assigning the Example Monitor as a Named Monitor
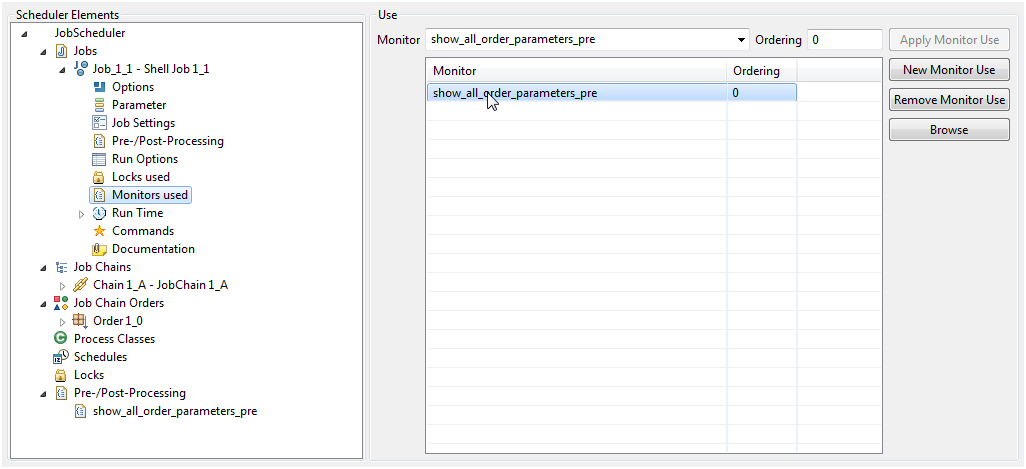
- Click on the job you want to use the Pre-Processing Monitor show_all_order_parameters parameters_pre Pre-Processing Monitor with.
- Expand the job configuration options by clicking on the left side of the job.
- Click on the Monitors Used option Monitors used that will open the left side pan to assign pane for assigning a Pre-/Post-Processing Monitor.
- Click on the button "New Monitor Use" as shown in the screenshot below.
- Select the monitor show_all_order_parameters parameters_pre monitor from the Monitor Monitor drop down list.
- Assign an ordering sequence 1 to the Ordering value 0 to the Ordering text box.
- Click "Click on the Apply Monitor Use" button.
Save the configuration by clicking on Save Configuration.on the Save Configuration icon.
Configuration Notes
- The same Pre-/Post Processing Monitor can be used by a number of jobs.
- The Browse button in the Monitors Used pane can be used to select Monitors from other subfolders in the JobScheduler
livefolder.
This means that a series of generic Monitors could be configured in a central directory and then be specified for individual jobs as required.
Specification of Monitors as Pre- or Post-Porcessors
- Monitors a
Ordering in Detail
The
Instruction Video
References
...